User Guide
1
Start Here

Click "Start Your Journey"

On the Farmflex landing page, you'll find a "Start Your Journey" button. Click it to begin your registration process.
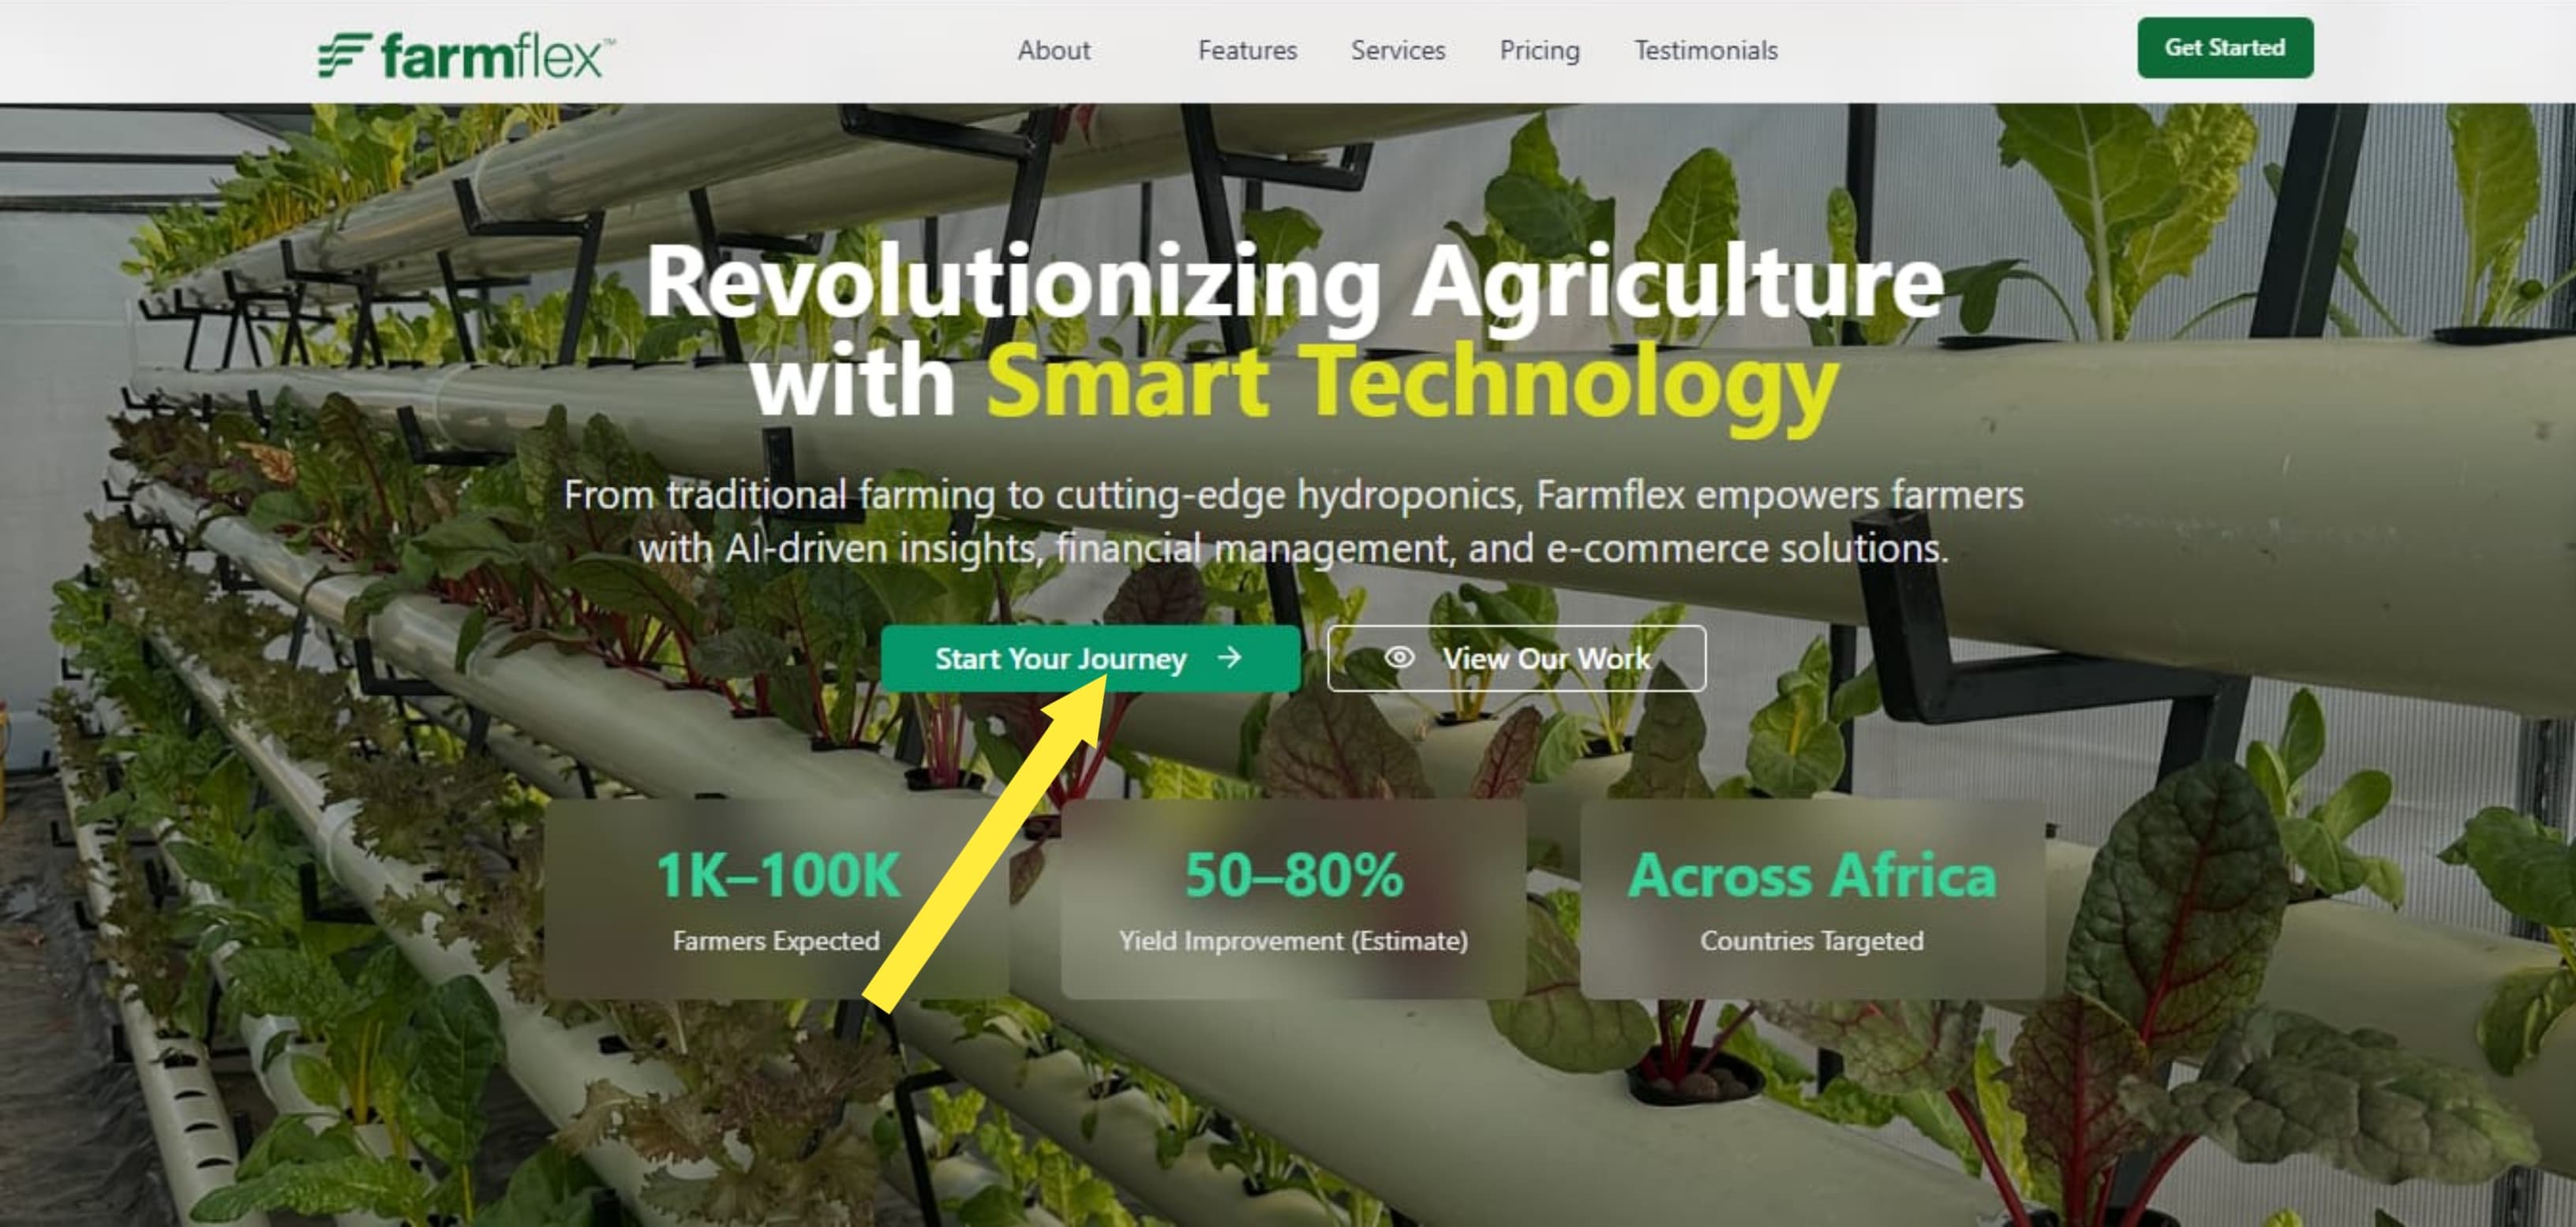
  • Look for the green button on the homepage
  • The arrow will guide you to it
  • One click starts your journey
Try It Now
Get Started Button
2
Step 2

Complete Registration Form

Fill in your farmshop details including name, system type (Hydroponics/Traditional), owner information, and physical address.
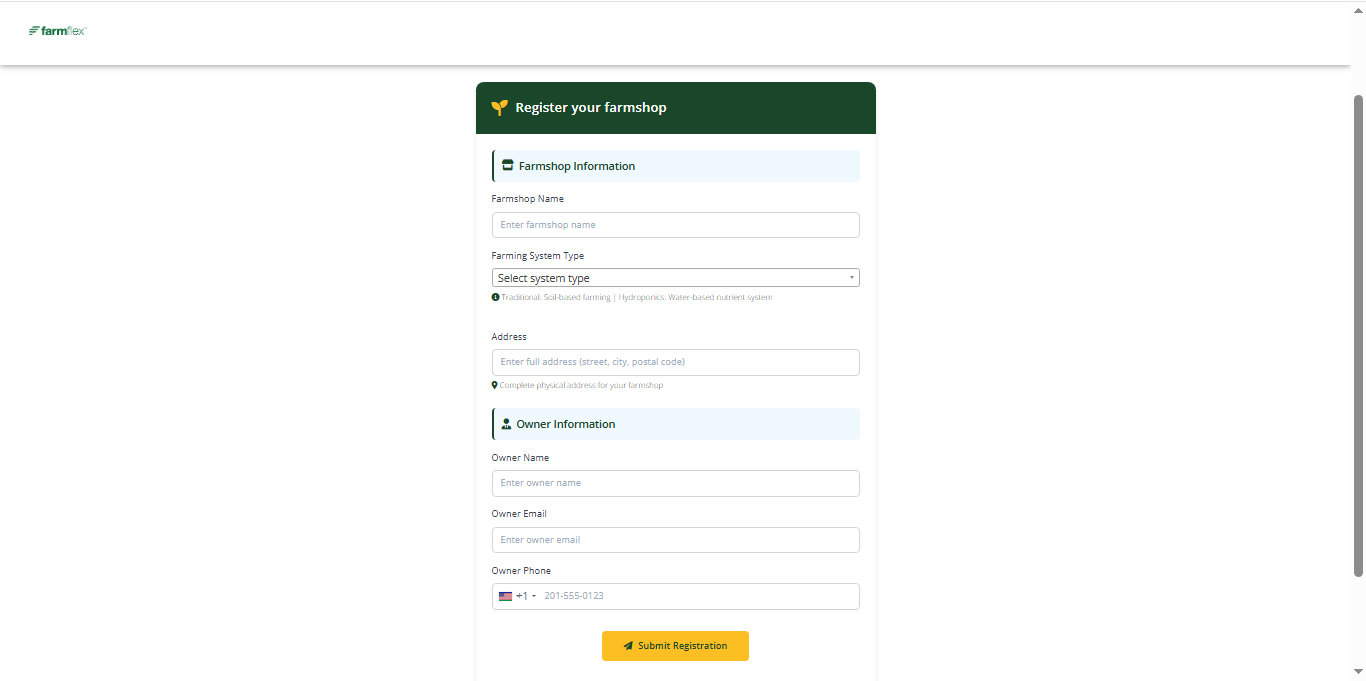
  • Farmshop name
  • Select farming system type
  • Owner personal information
  • Complete physical address
Registration Form
3
Step 3

Success Message & Phone Verification

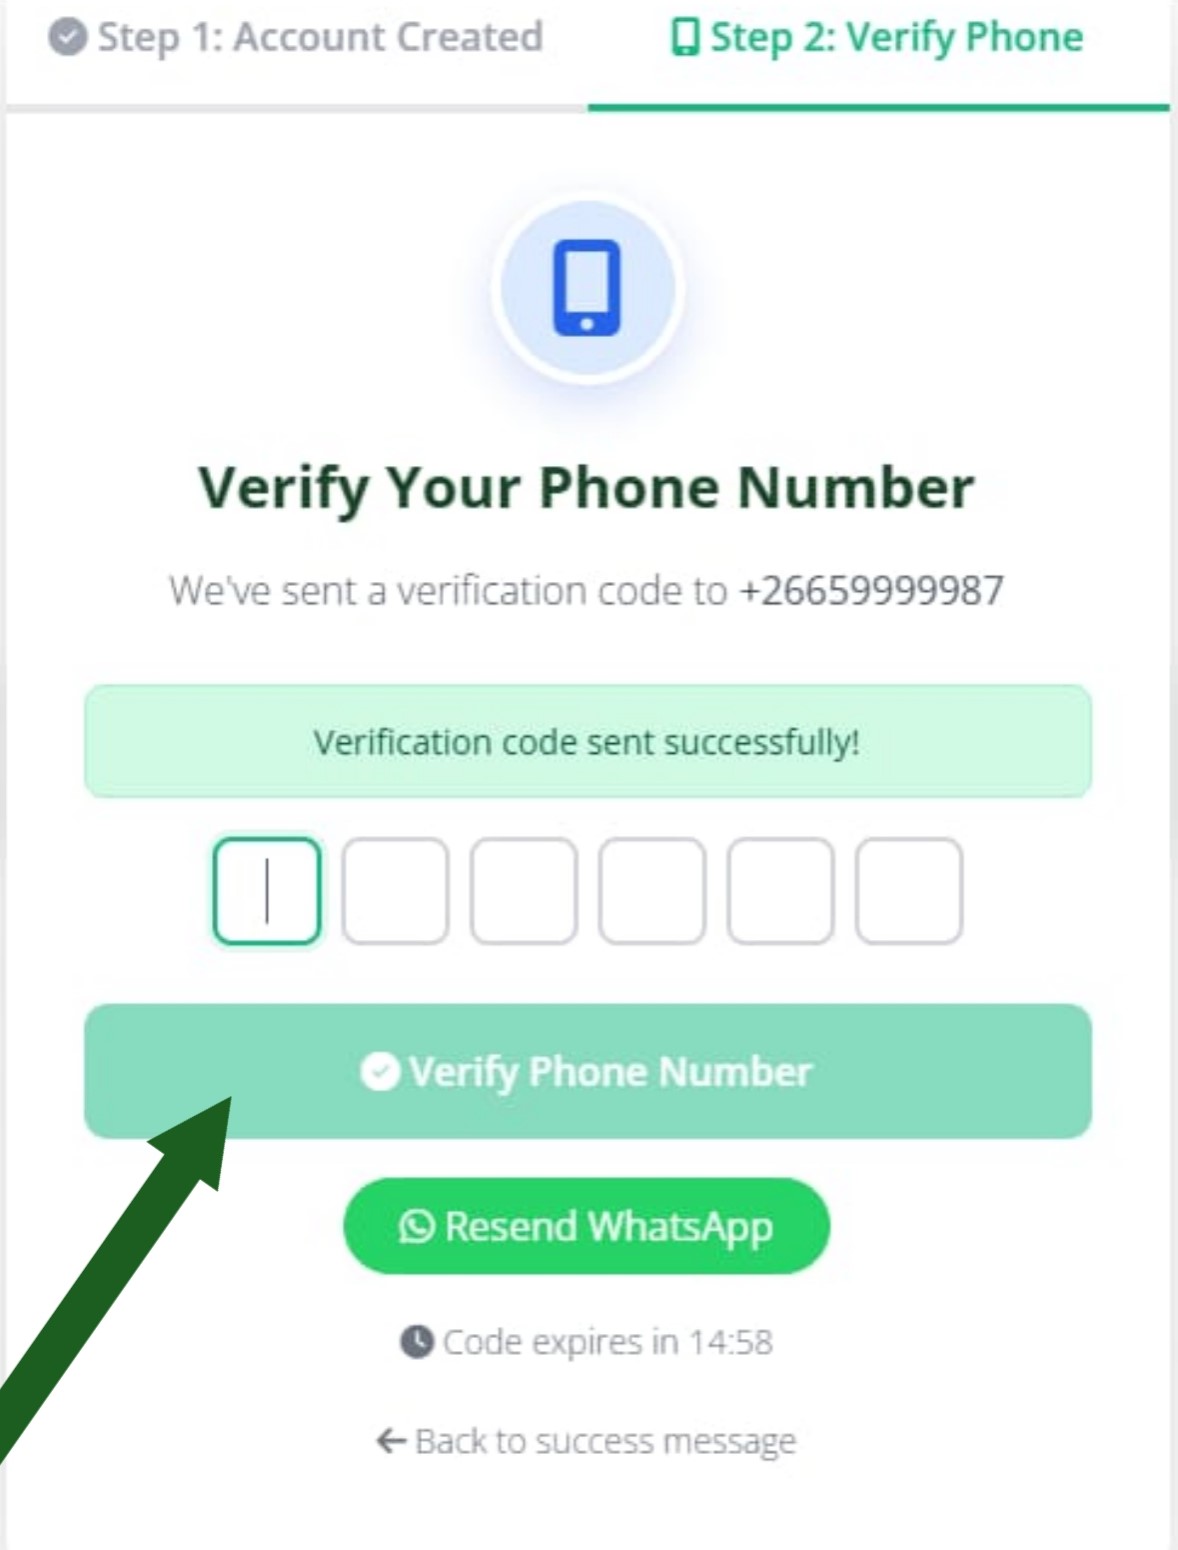
After registration, you'll see a success message. A 6-digit verification code will be sent to your WhatsApp.
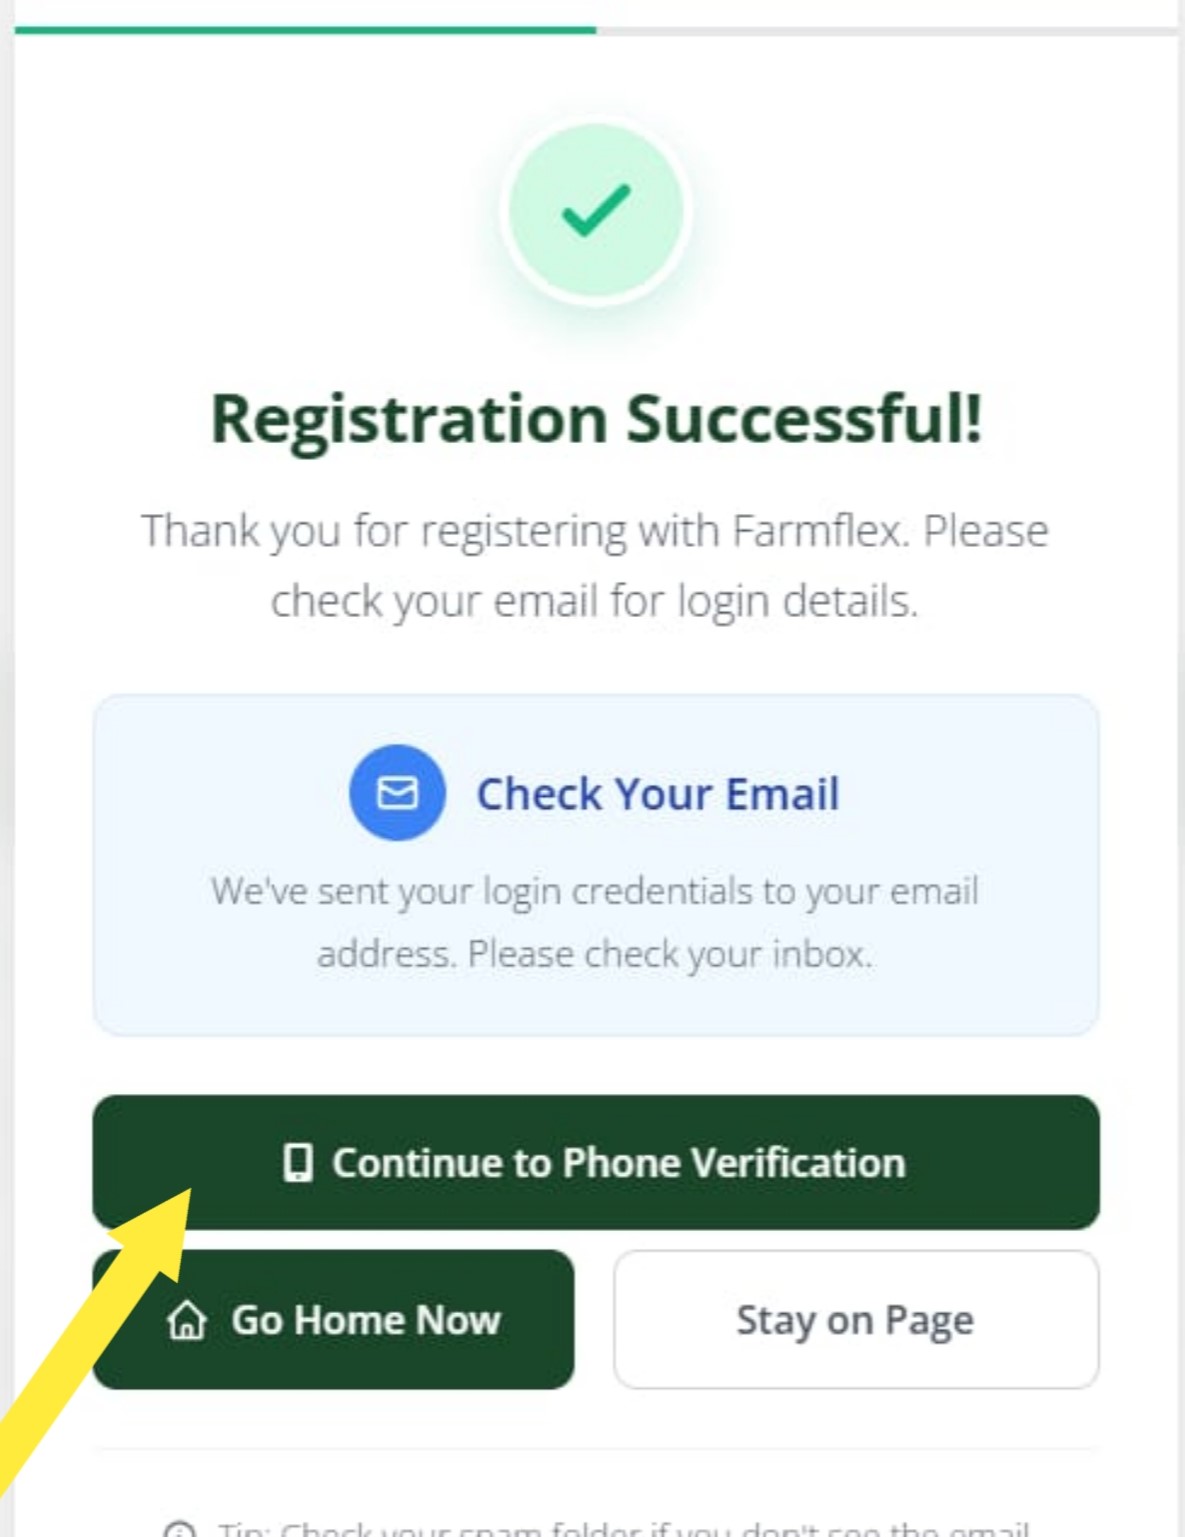
  • Login credentials sent to your email
  • 6-digit code via WhatsApp
  • Code expires in 15 minutes
  • Verify to secure your account
Success Message Phone Verification
4
Step 4

Return & Login

Go back to the landing page and click "Get Started". Now you'll be redirected to the login page.
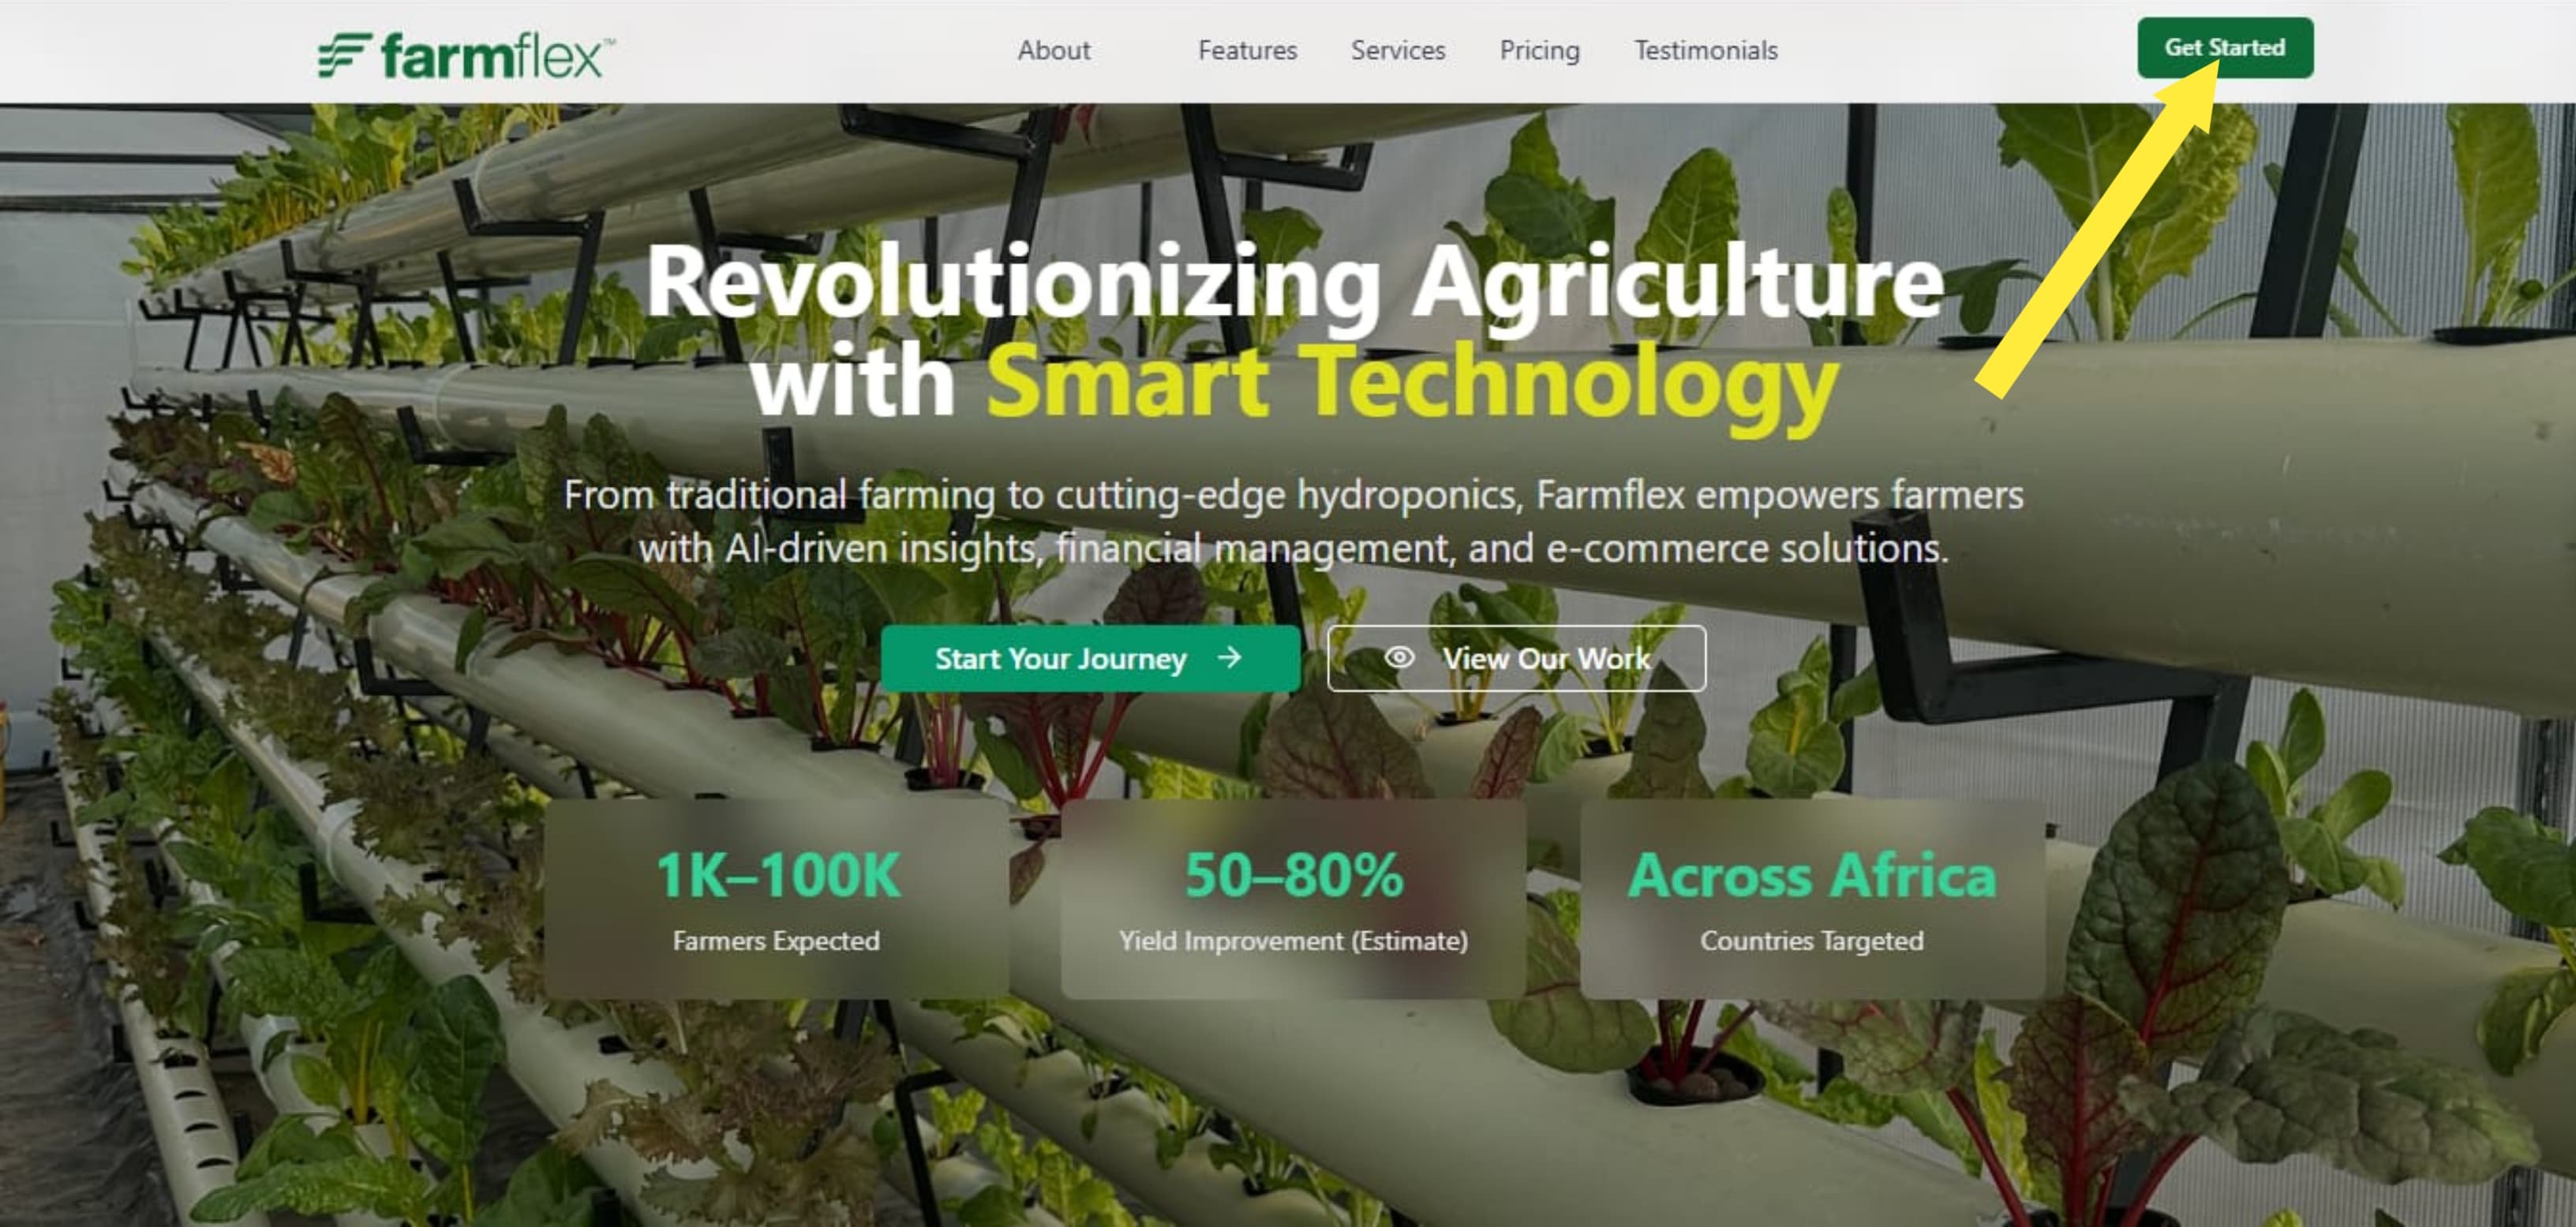
  • Use email from your registration
  • Enter the temporary password sent via email
  • Change password on first login
  • Check spam folder if email not received
Go to Login
Login Page
5
Step 5

Welcome to Your Dashboard

After successful login, you'll land on your personalized dashboard where you can manage everything.
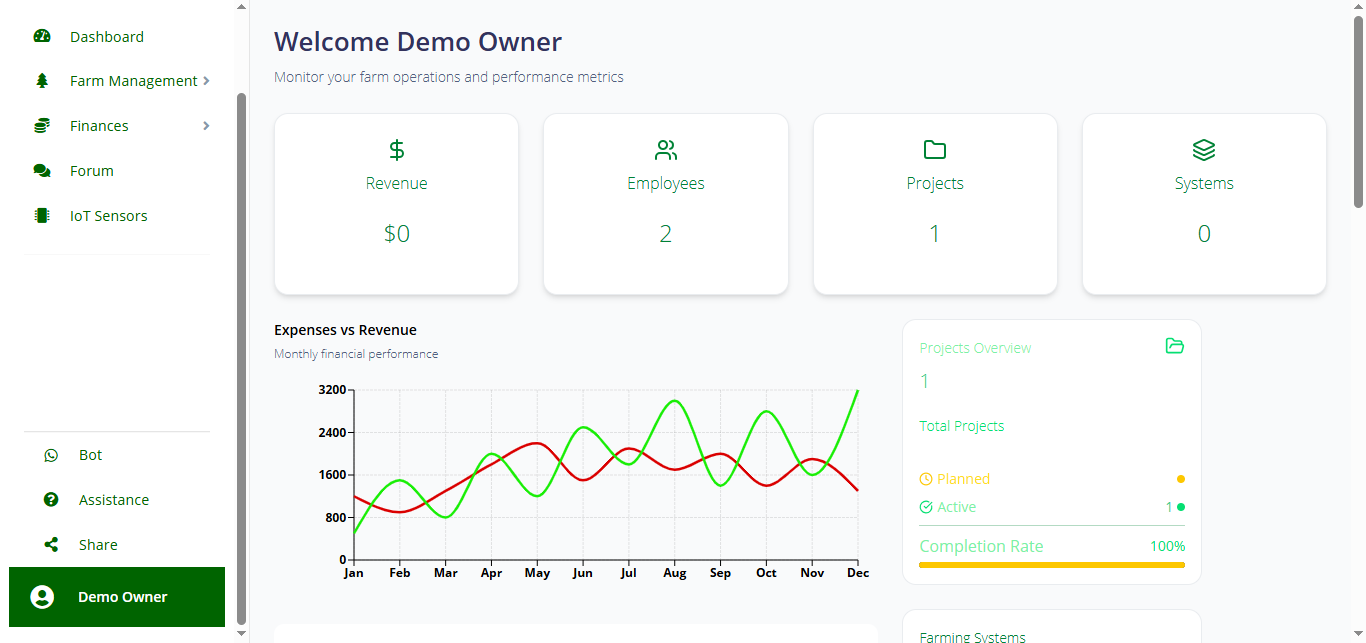
  • Farm statistics at a glance
  • Your farms list
  • Timeline analytics
  • Task management overview
Dashboard Home
6
Step 6

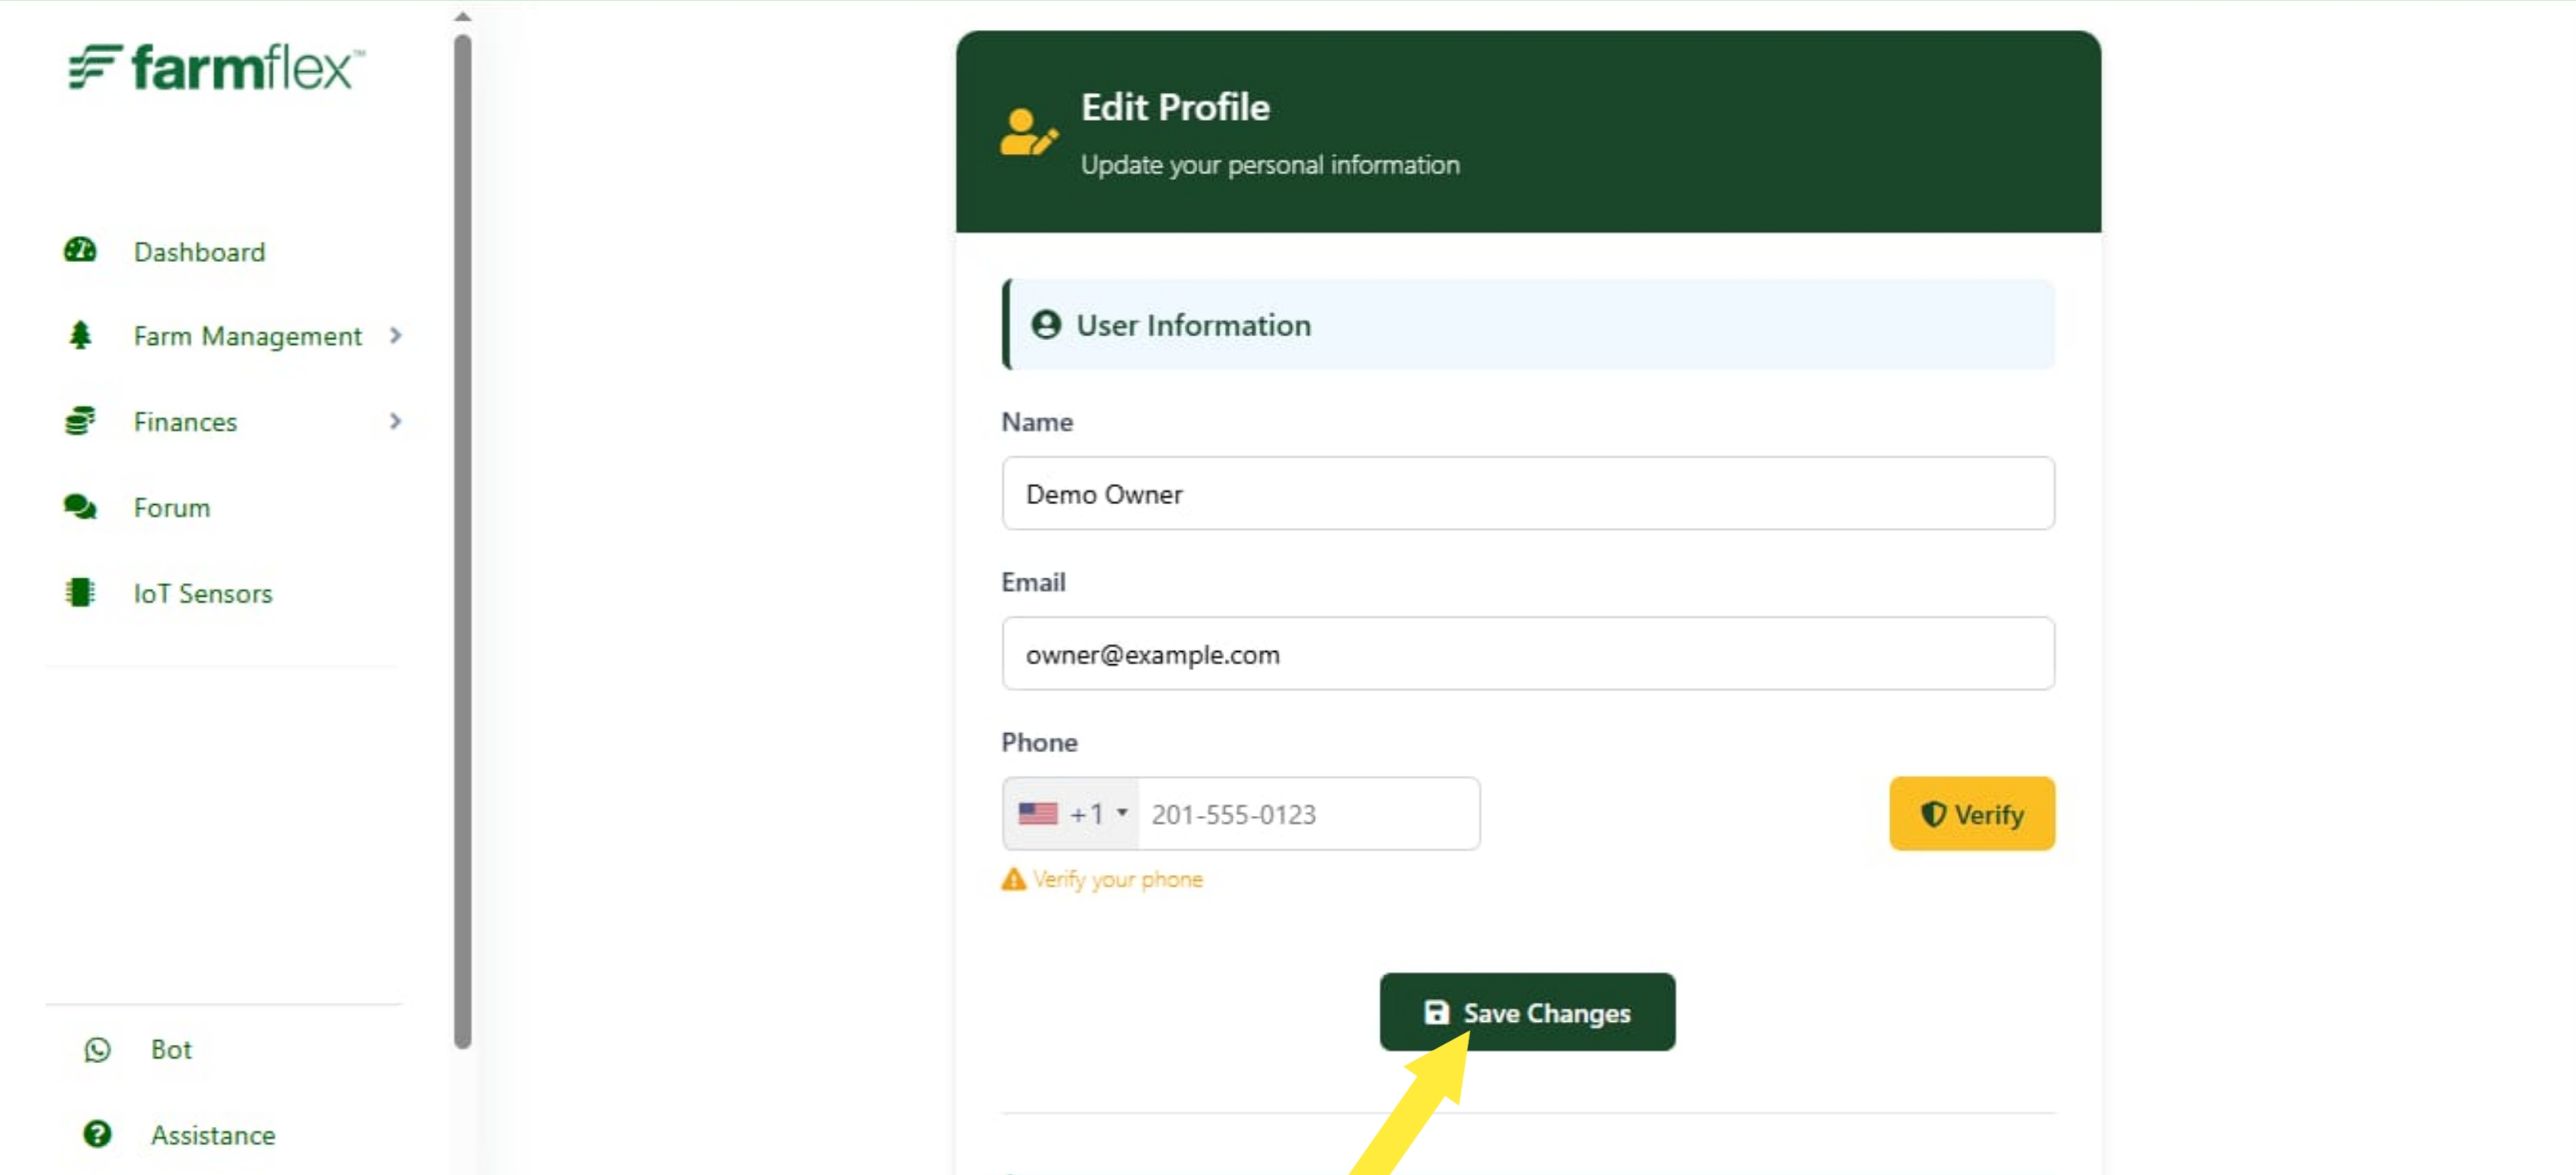
Update Your Profile

Customize your account and enhance security by updating your profile information.
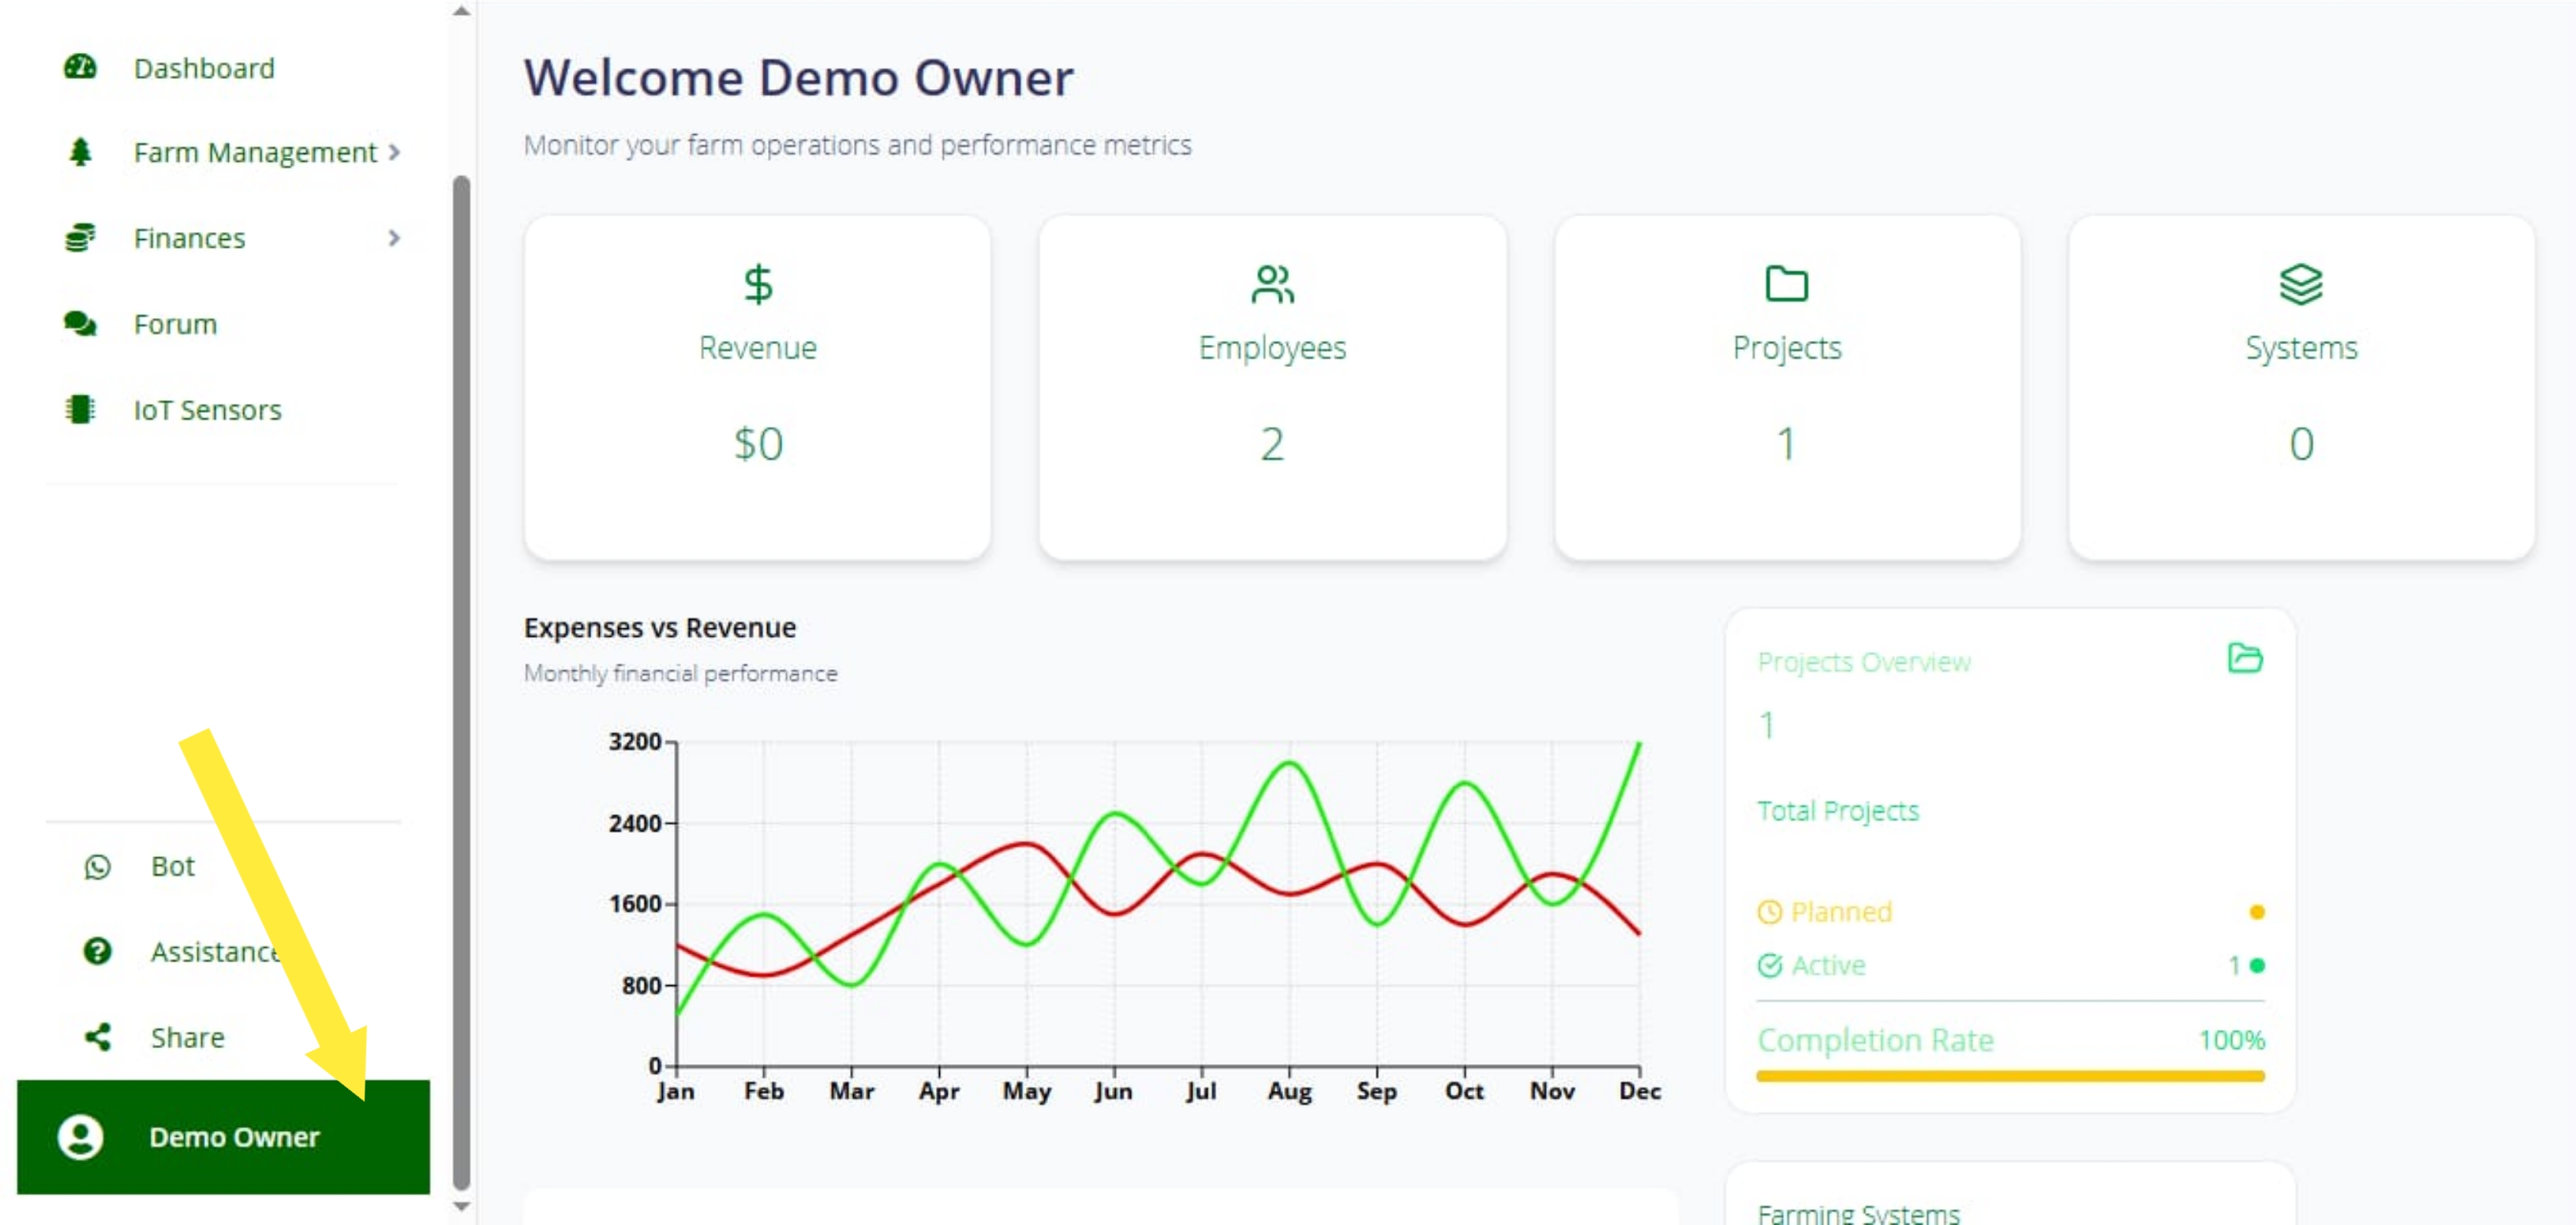
  • Click on your profile icon at the bottom of the sidebar
  • Select "My Profile" from the dropdown menu
  • Update your name and email address
  • Change your phone number and verify it via WhatsApp
  • Change your password for better security
  • Save your changes to update your profile
Go to Profile
Profile Menu Profile Update Form
1
Step 1

Access Farm Management

From the sidebar, click on "Farm Management" dropdown menu.
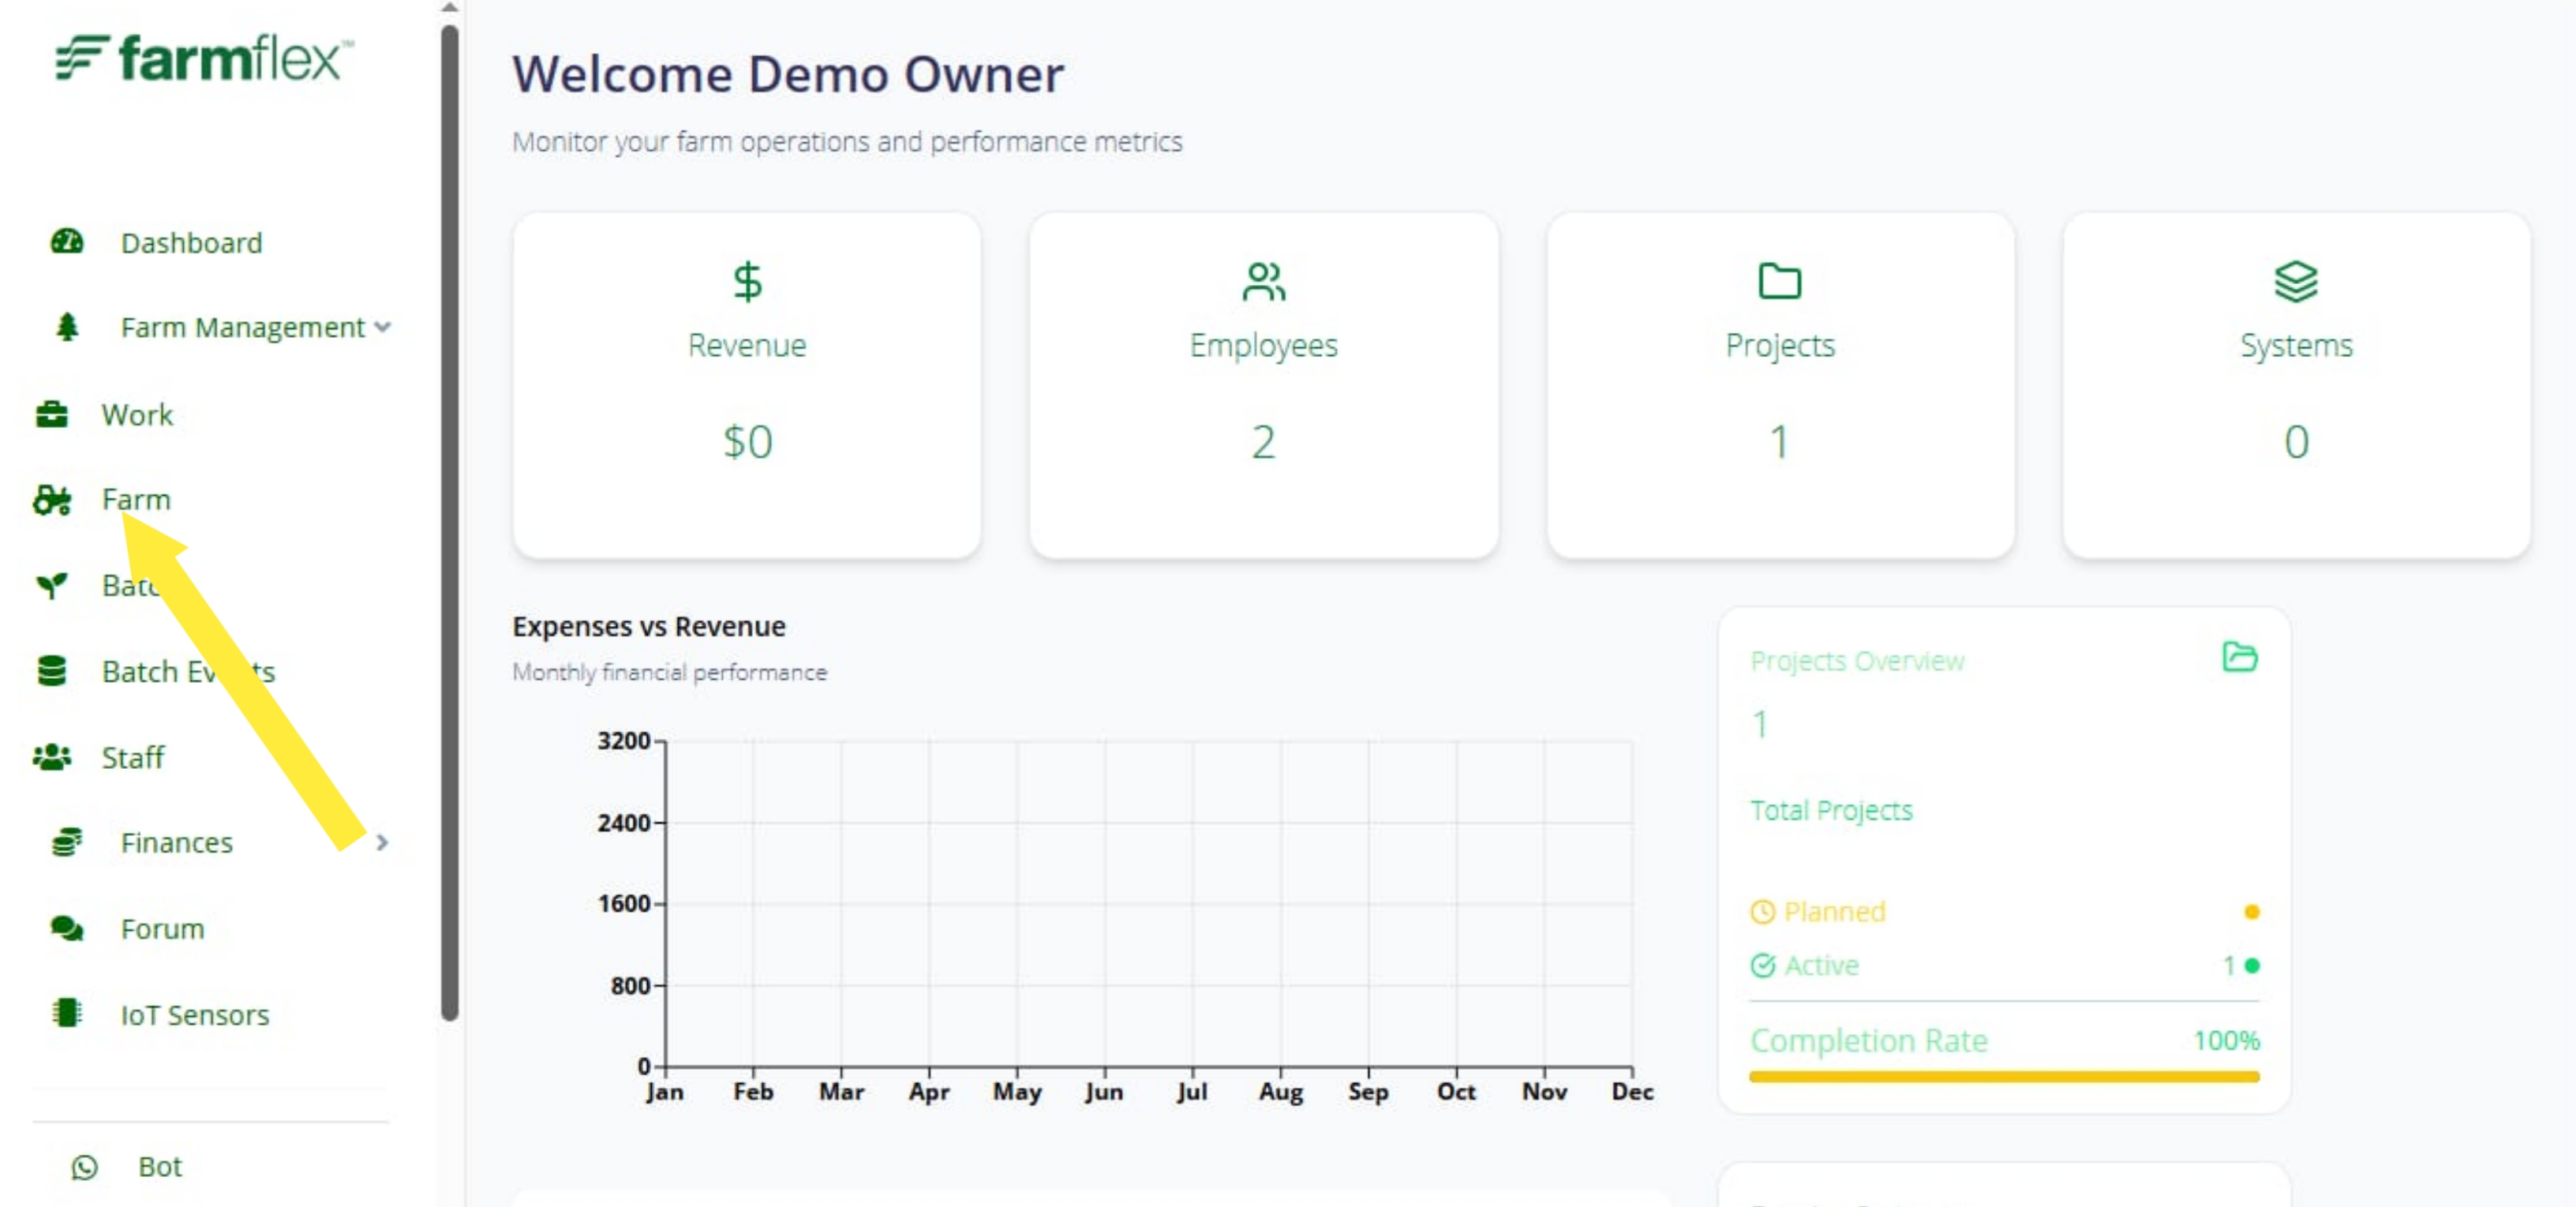
  • Expand the Farm Management dropdown
  • Click on "Farms" option
  • You'll be redirected to your farms dashboard
Go to Farms
Farm Management Sidebar
2
Step 2

Farm Dashboard Overview

View all your farms, statistics, and quick actions from the dashboard.
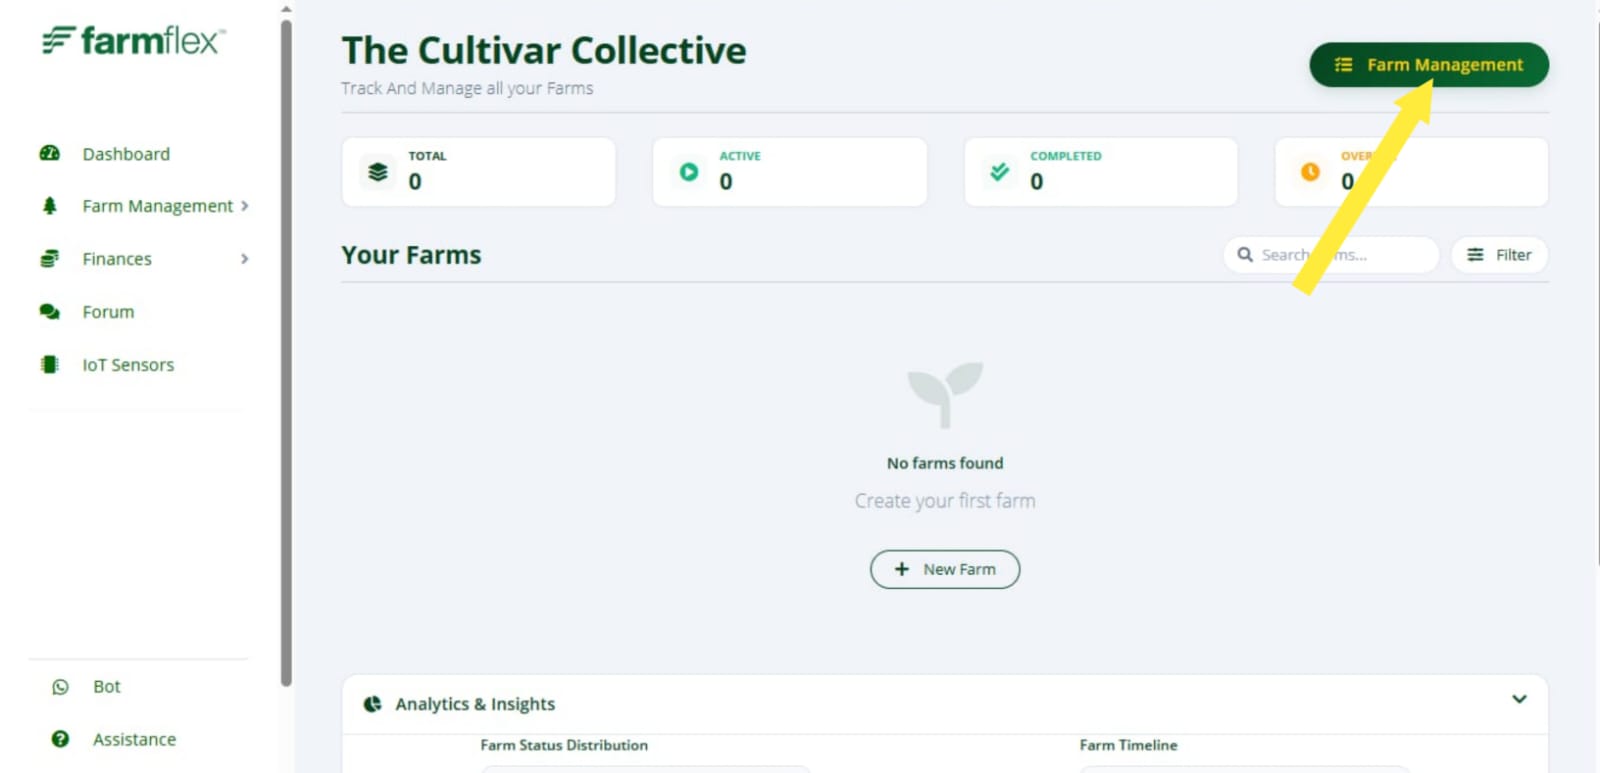
  • See total farms, active farms, and completed farms
  • Browse your existing farms list
  • Click "Add New Farm" to create a farm
View Dashboard
Farm Dashboard
3
Step 3

Add New Farm

Click the "Add New Farm" button to start creating your farm.
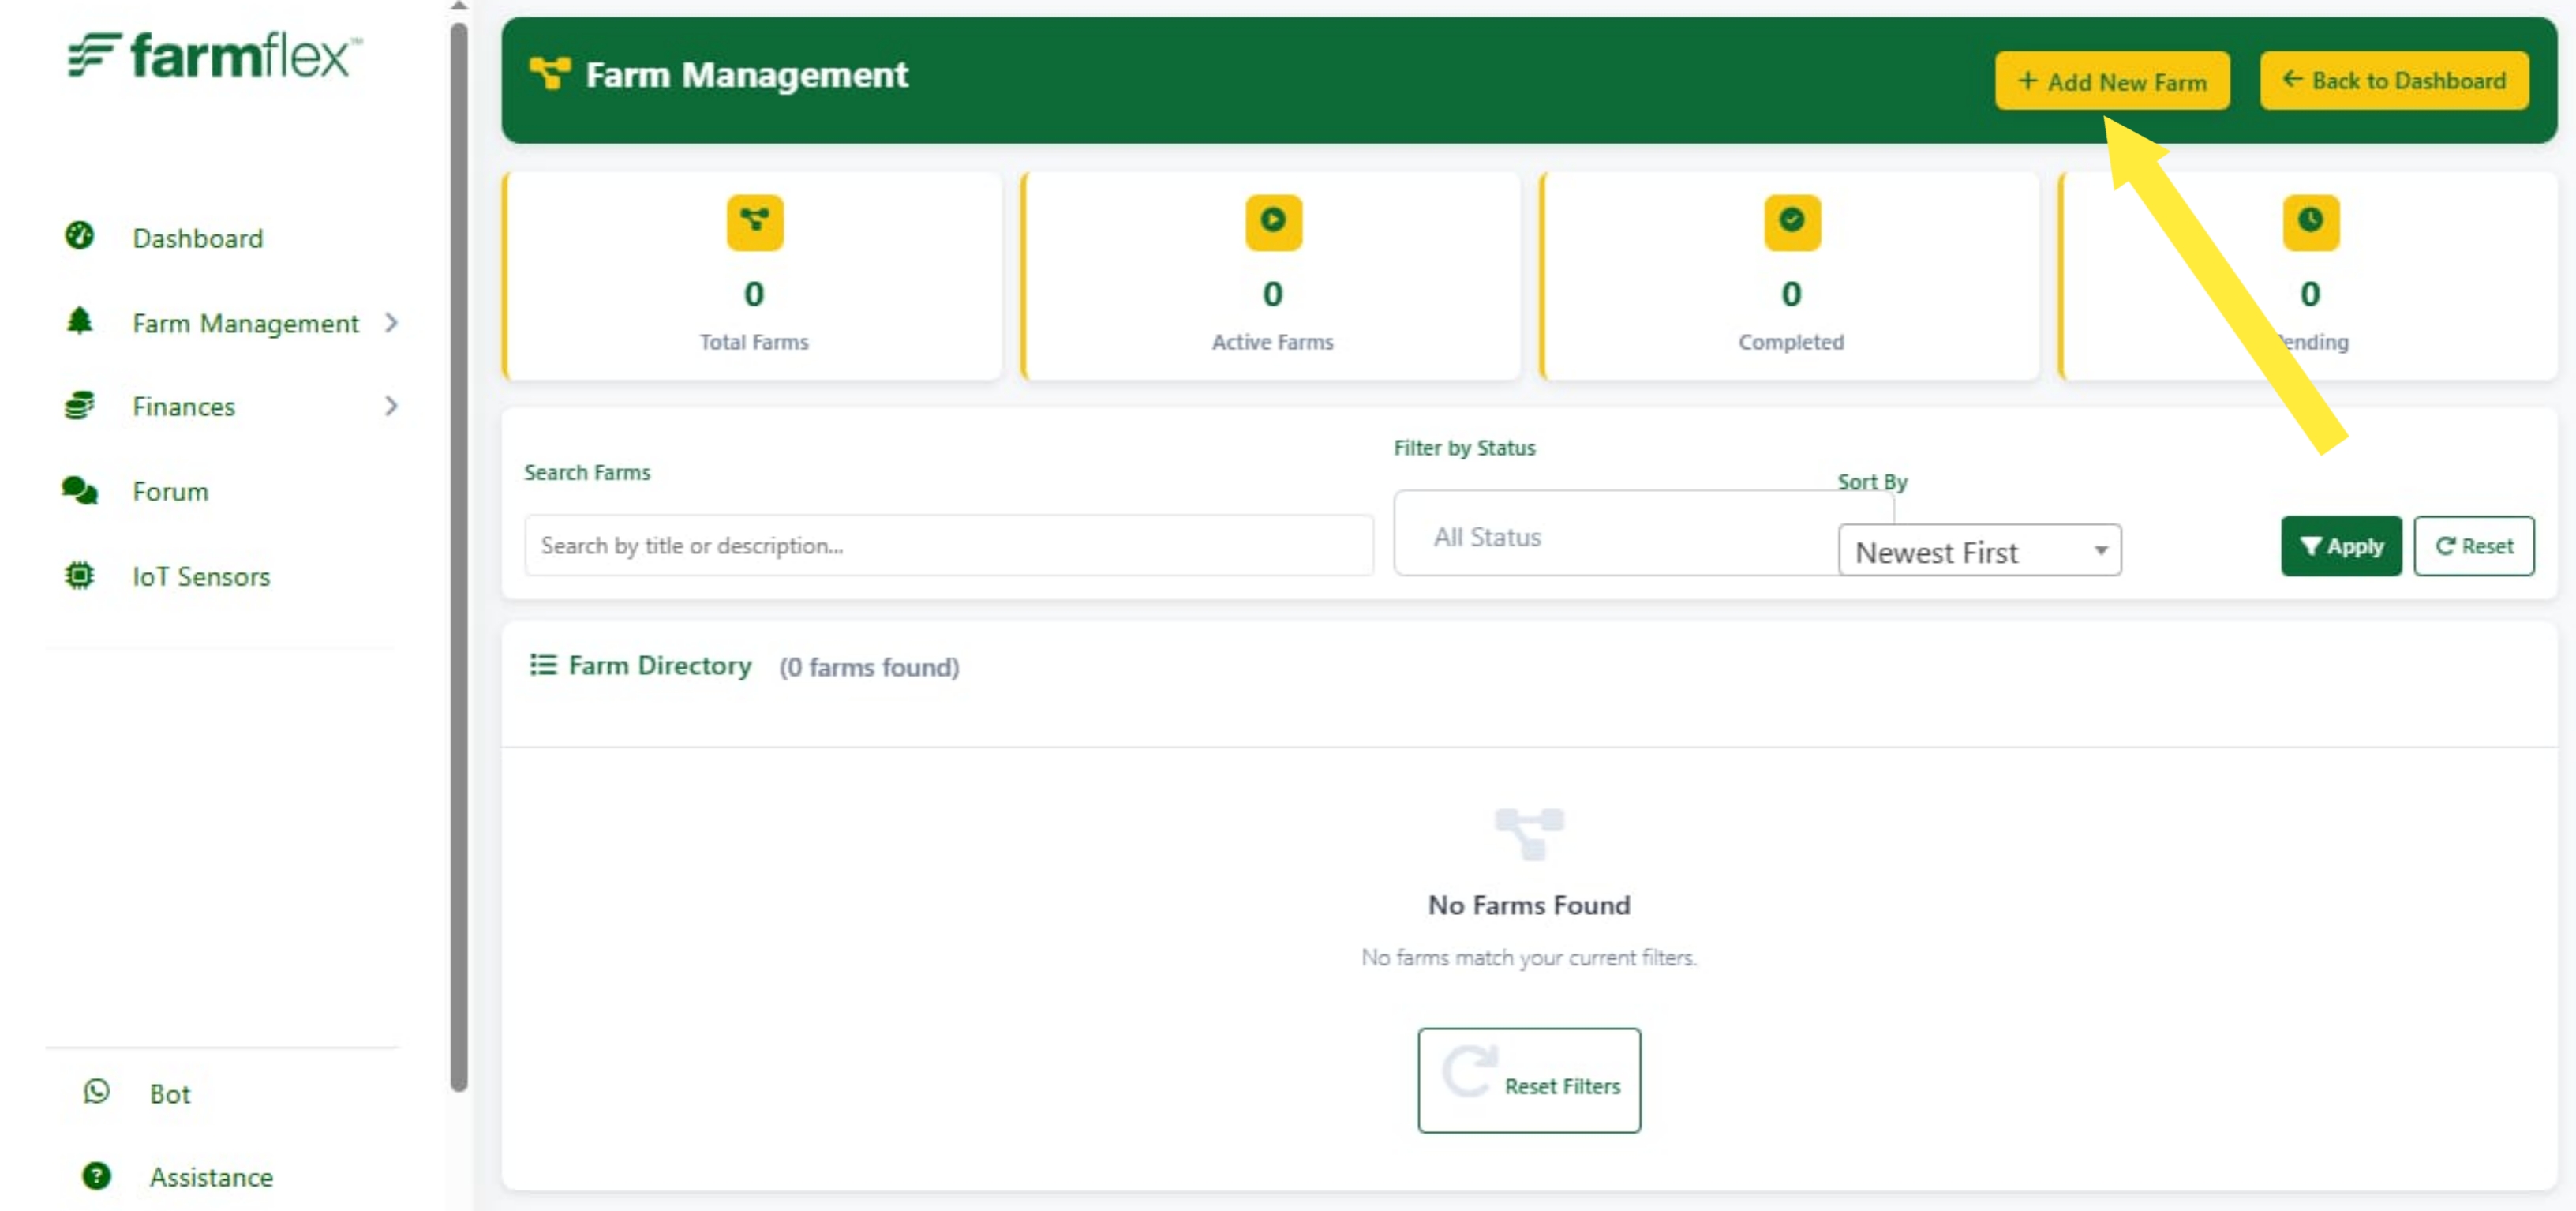
  • Click the green "Add New Farm" button
  • You'll be taken to the farm creation form
Add Farm Button
4
Step 4

Fill Farm Details

Enter basic farm information including name, description, and location.
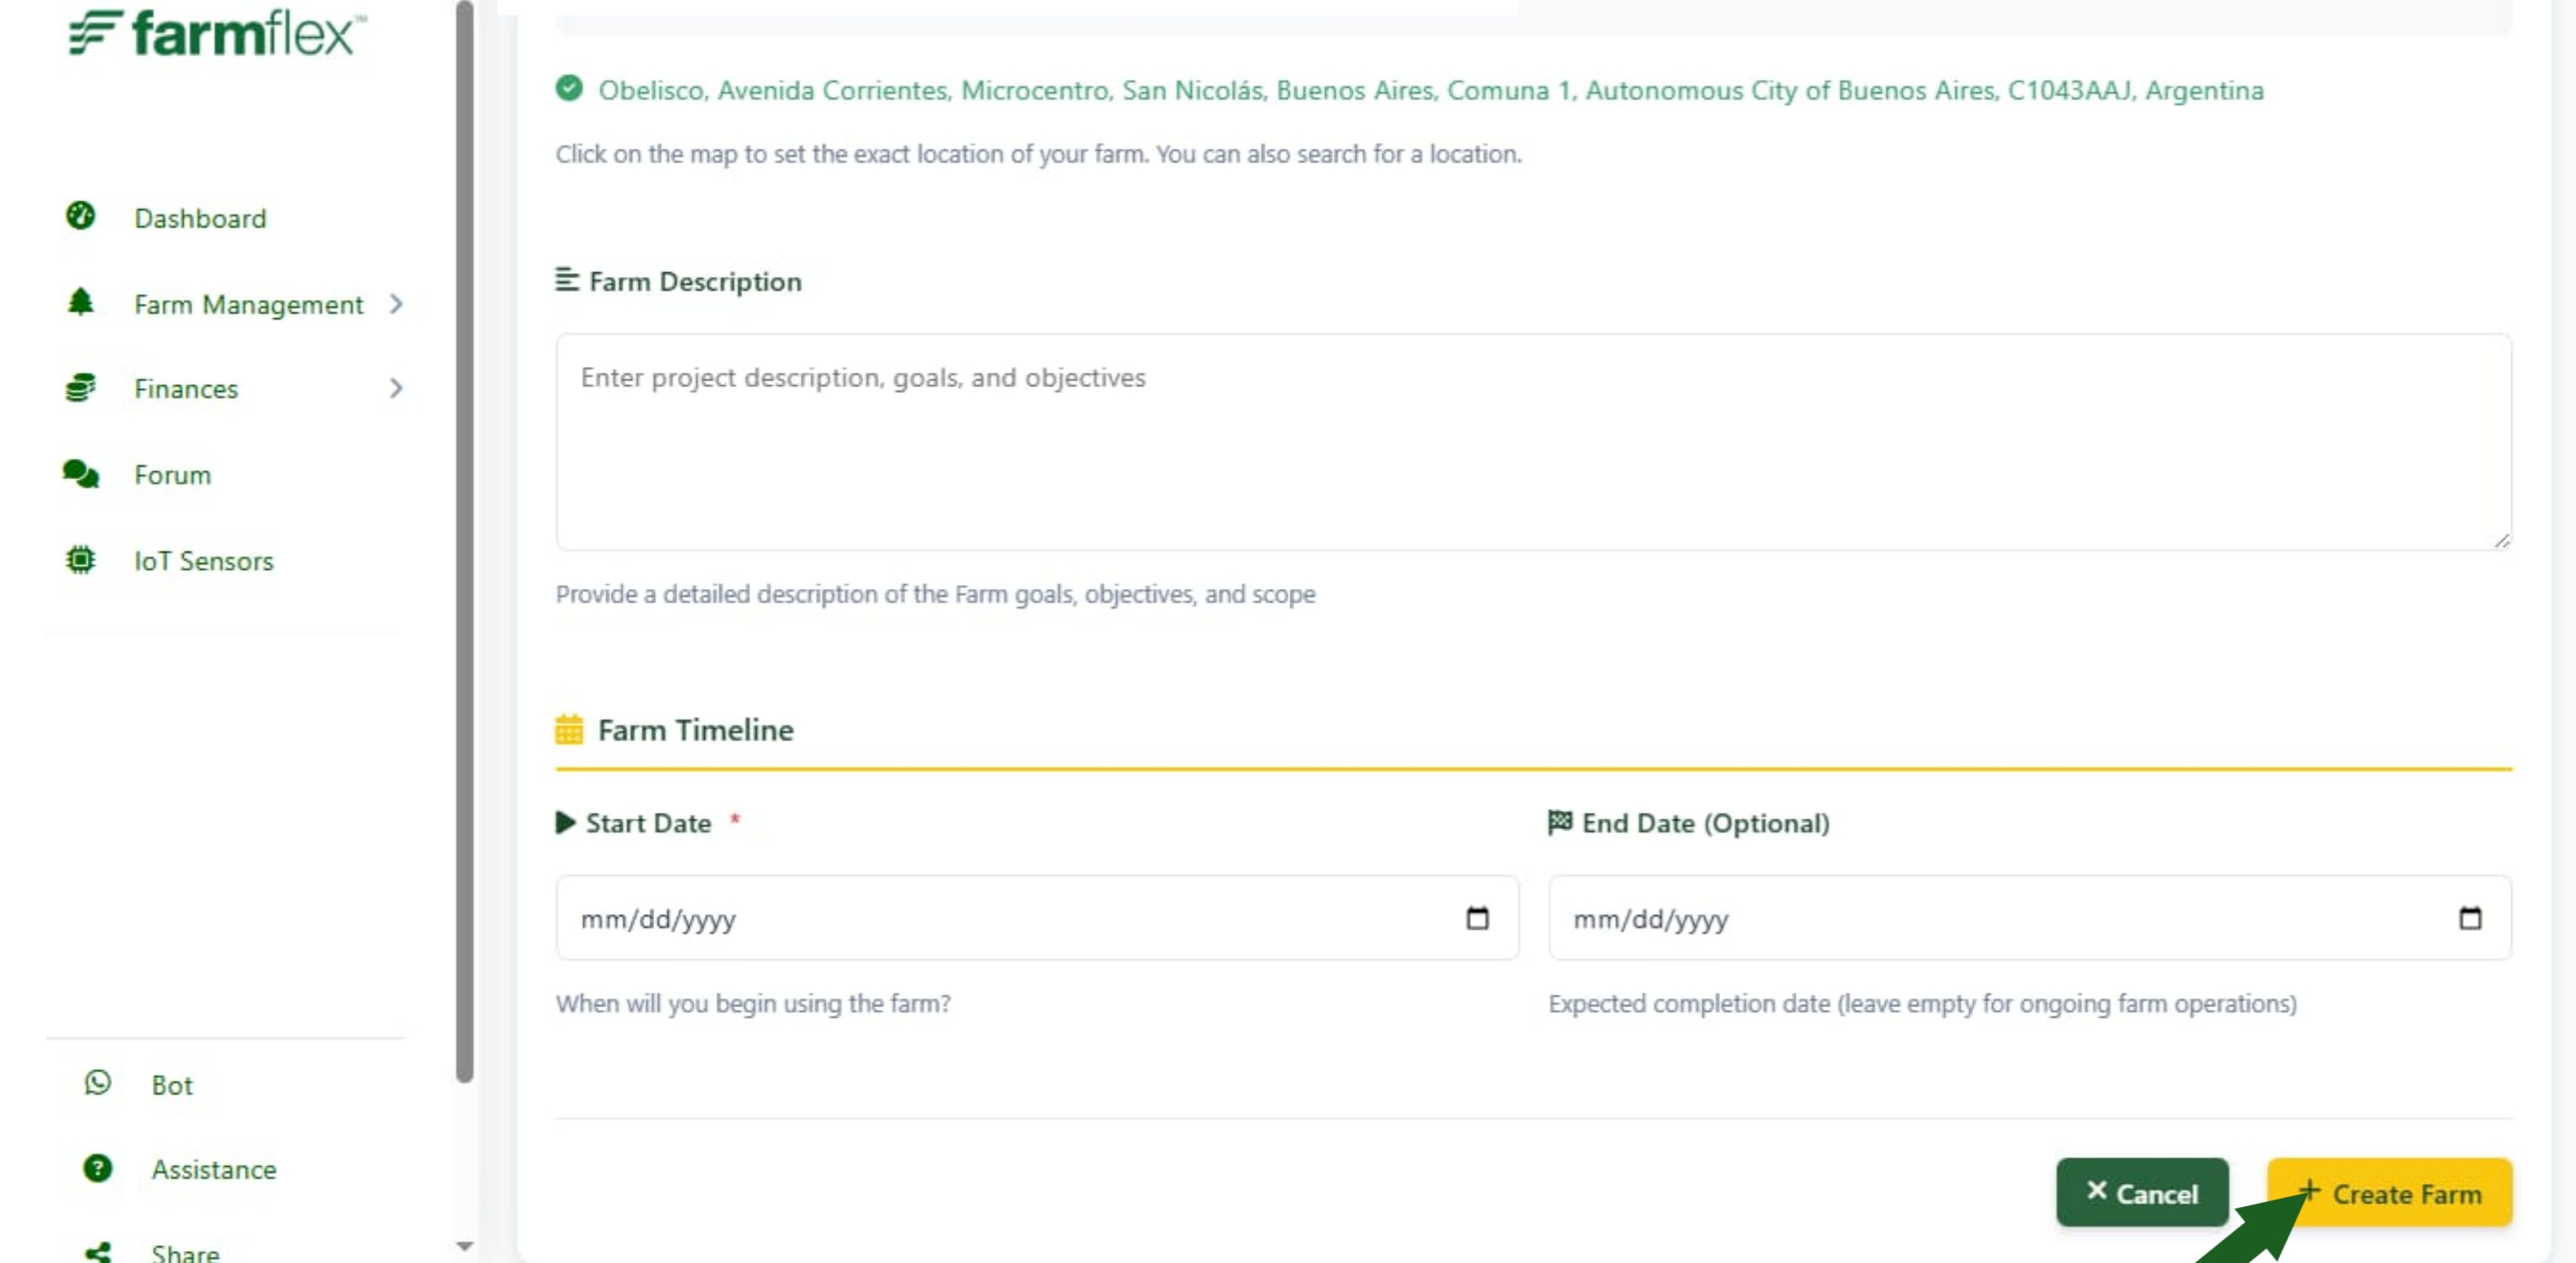
  • Farm name
  • Farm description
  • Location (address)
  • Start date and End date
  • Farm status (Planned, Active, Completed)
Farm Form
5
Step 5

Return to Farm Dashboard

After saving your farm, click back to dashboard, you'll be redirected back to the farm dashboard.
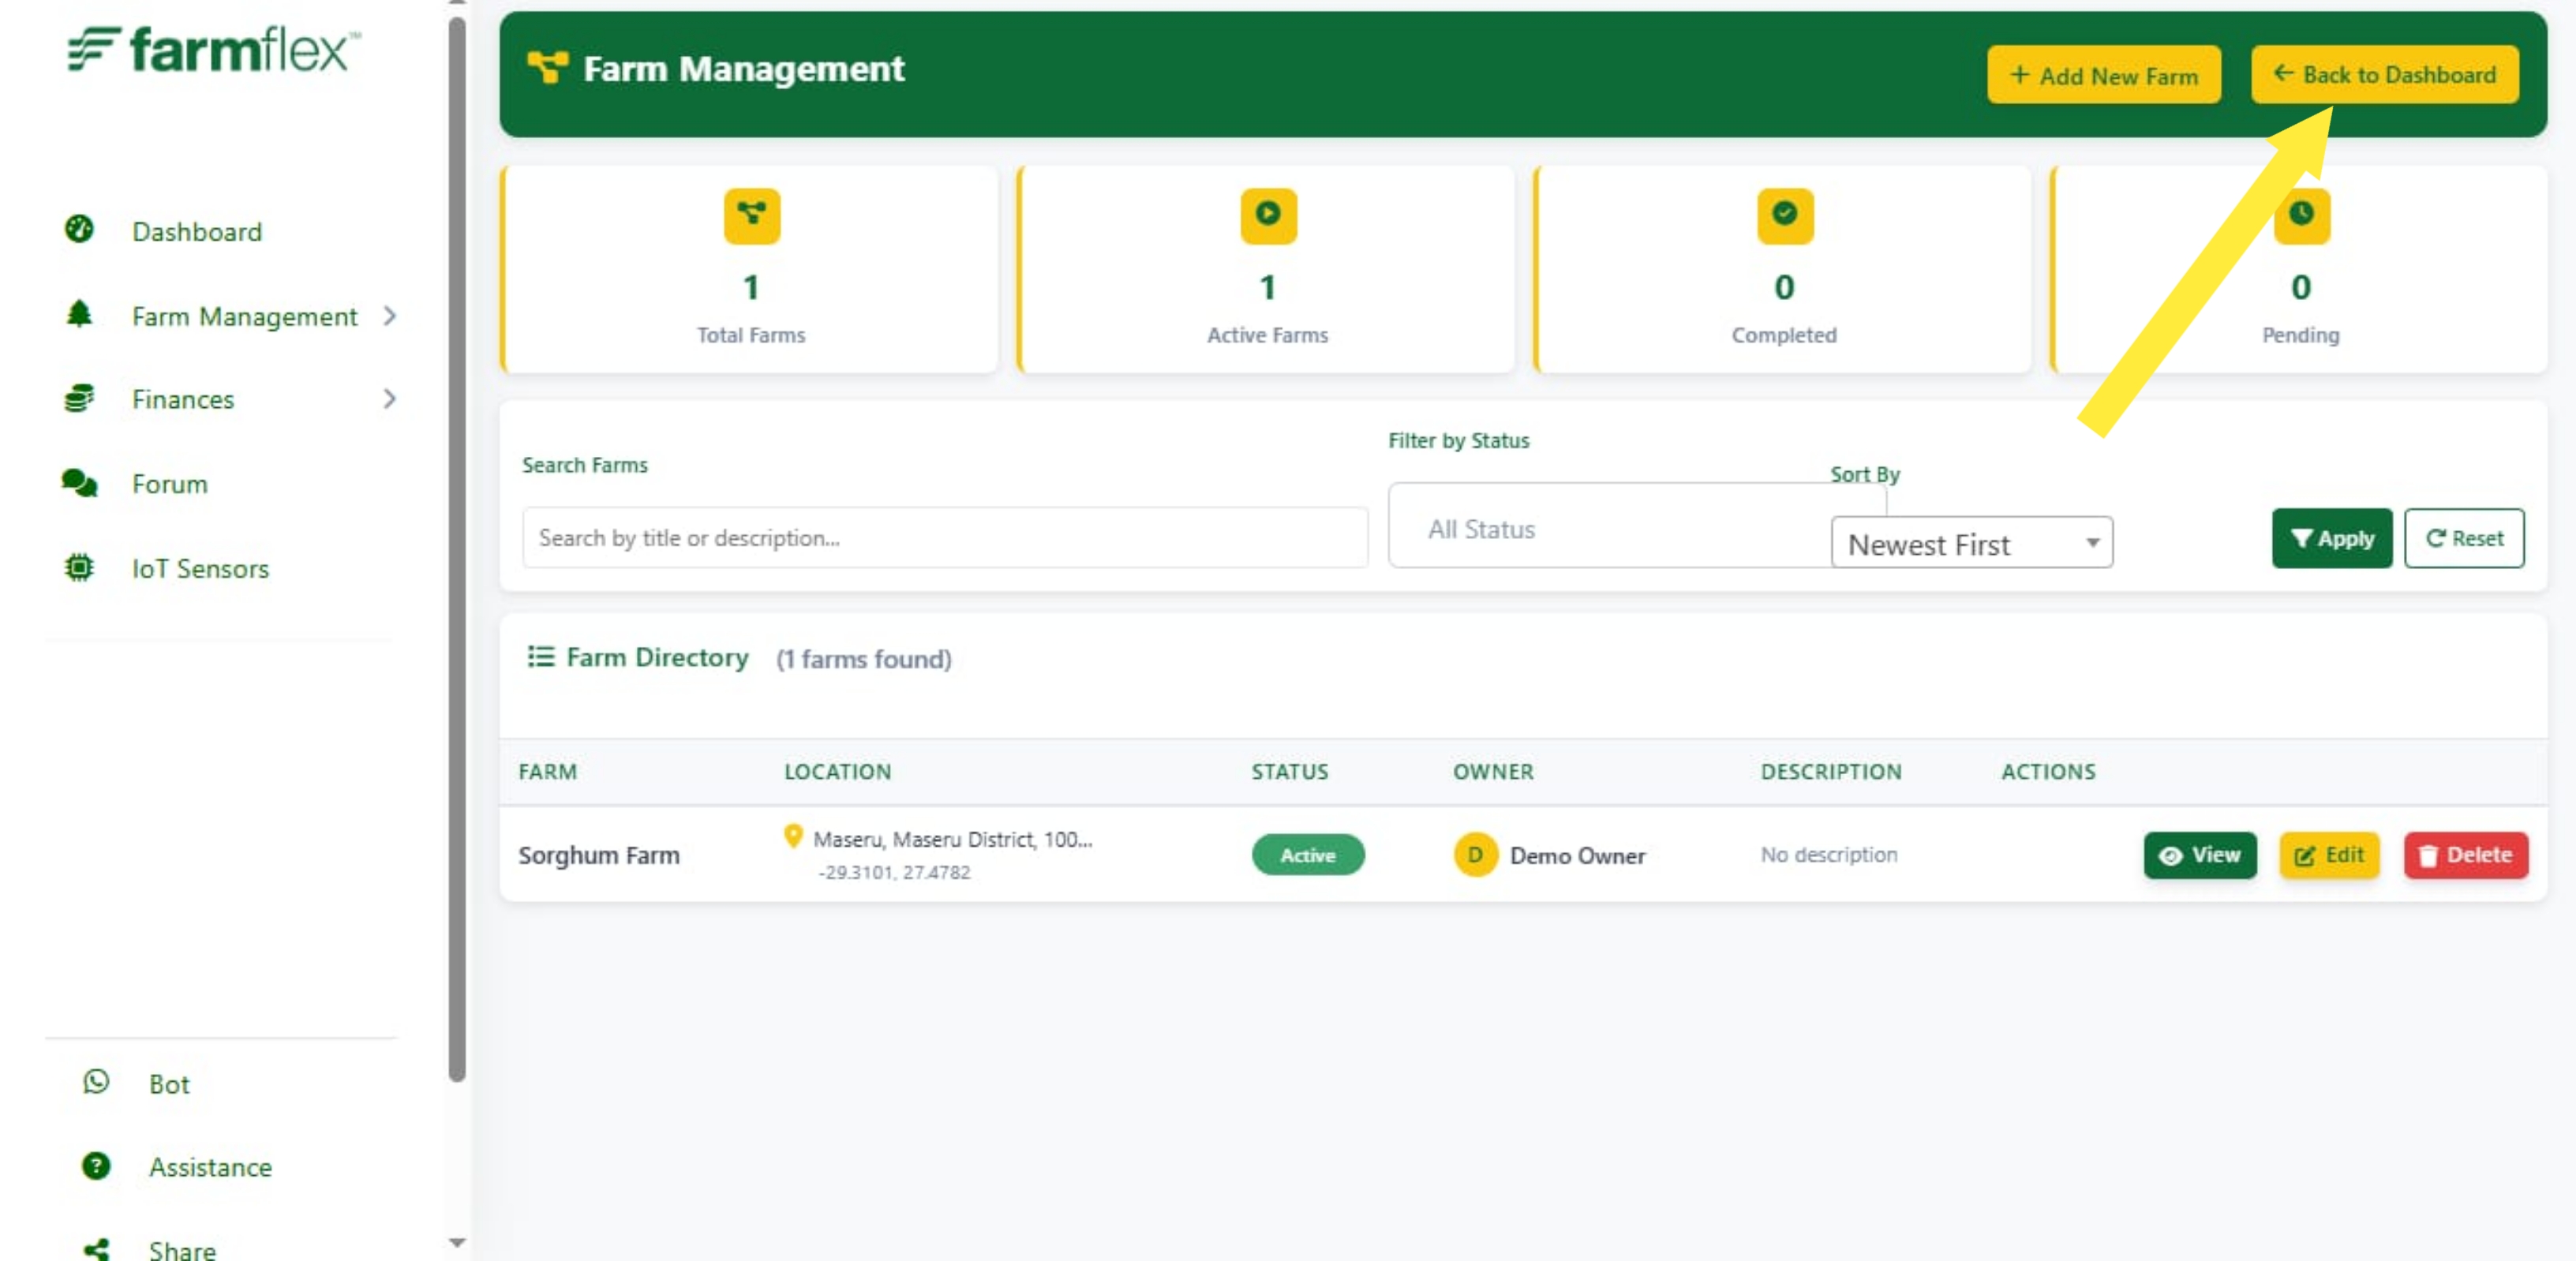
  • Farm created successfully
  • See your new farm in the farms list
  • Click on a farm to view details
Farm Dashboard After
6
Step 6

Select Your Farm

Click on your farm card to view its details and manage fields.
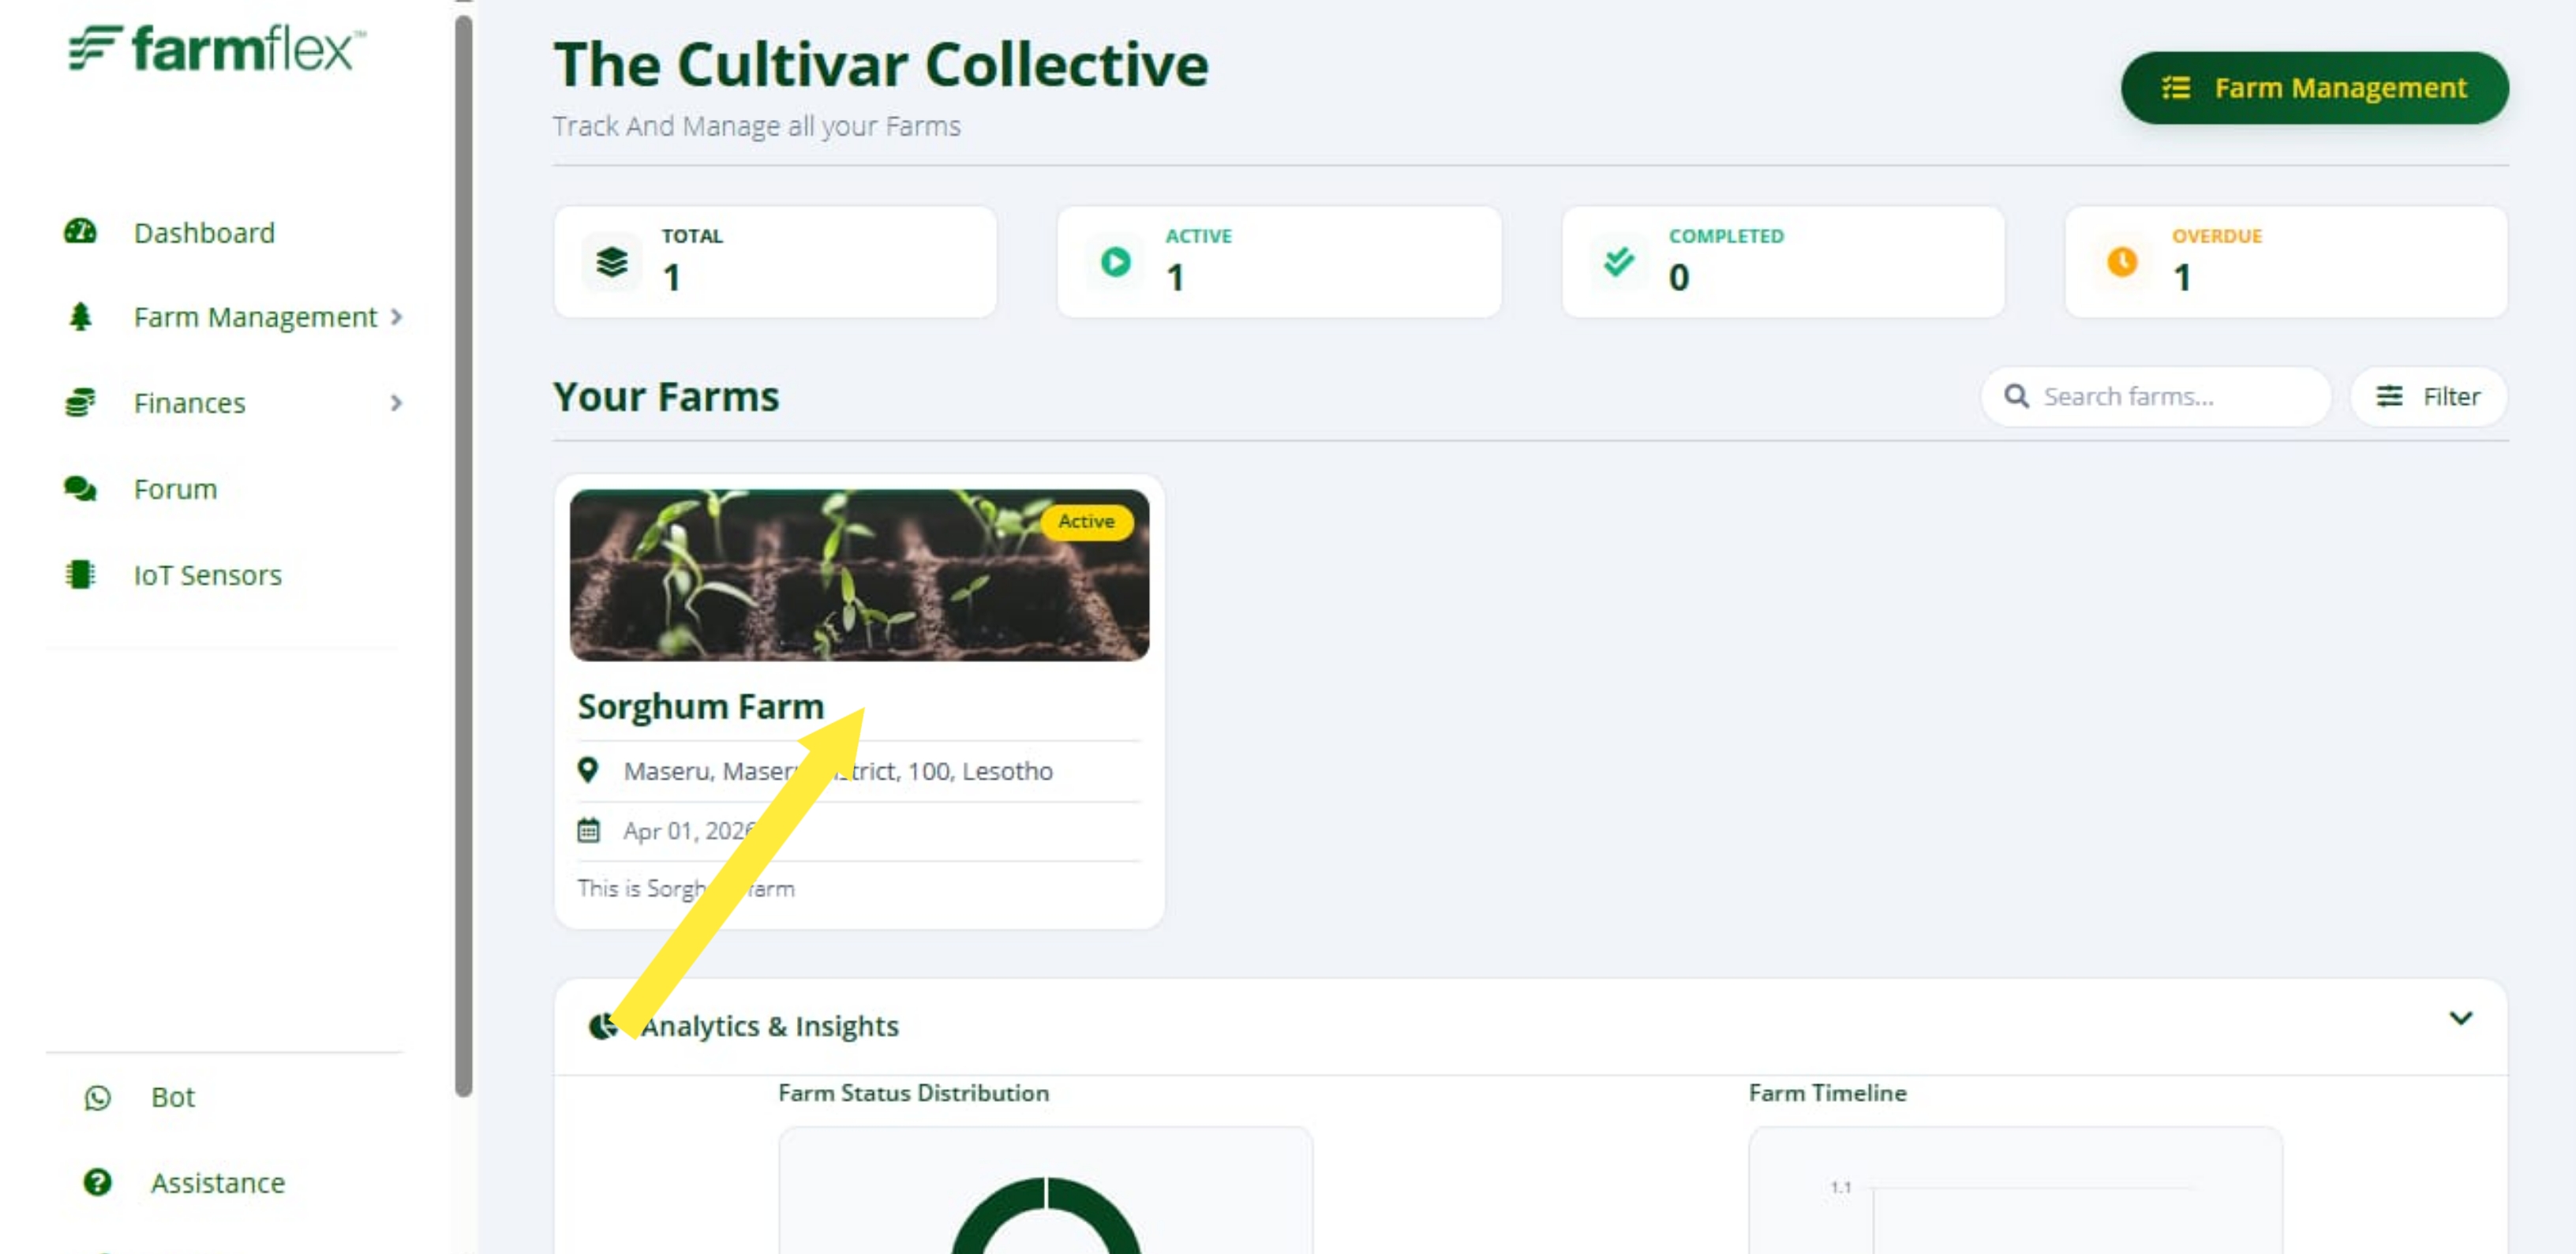
  • Click on the farm name or card
  • View farm details and statistics
  • Click "Add Field" to create fields
Click Farm
7
Step 7

Add New Field

Click "Add Field" to create a field within your farm.
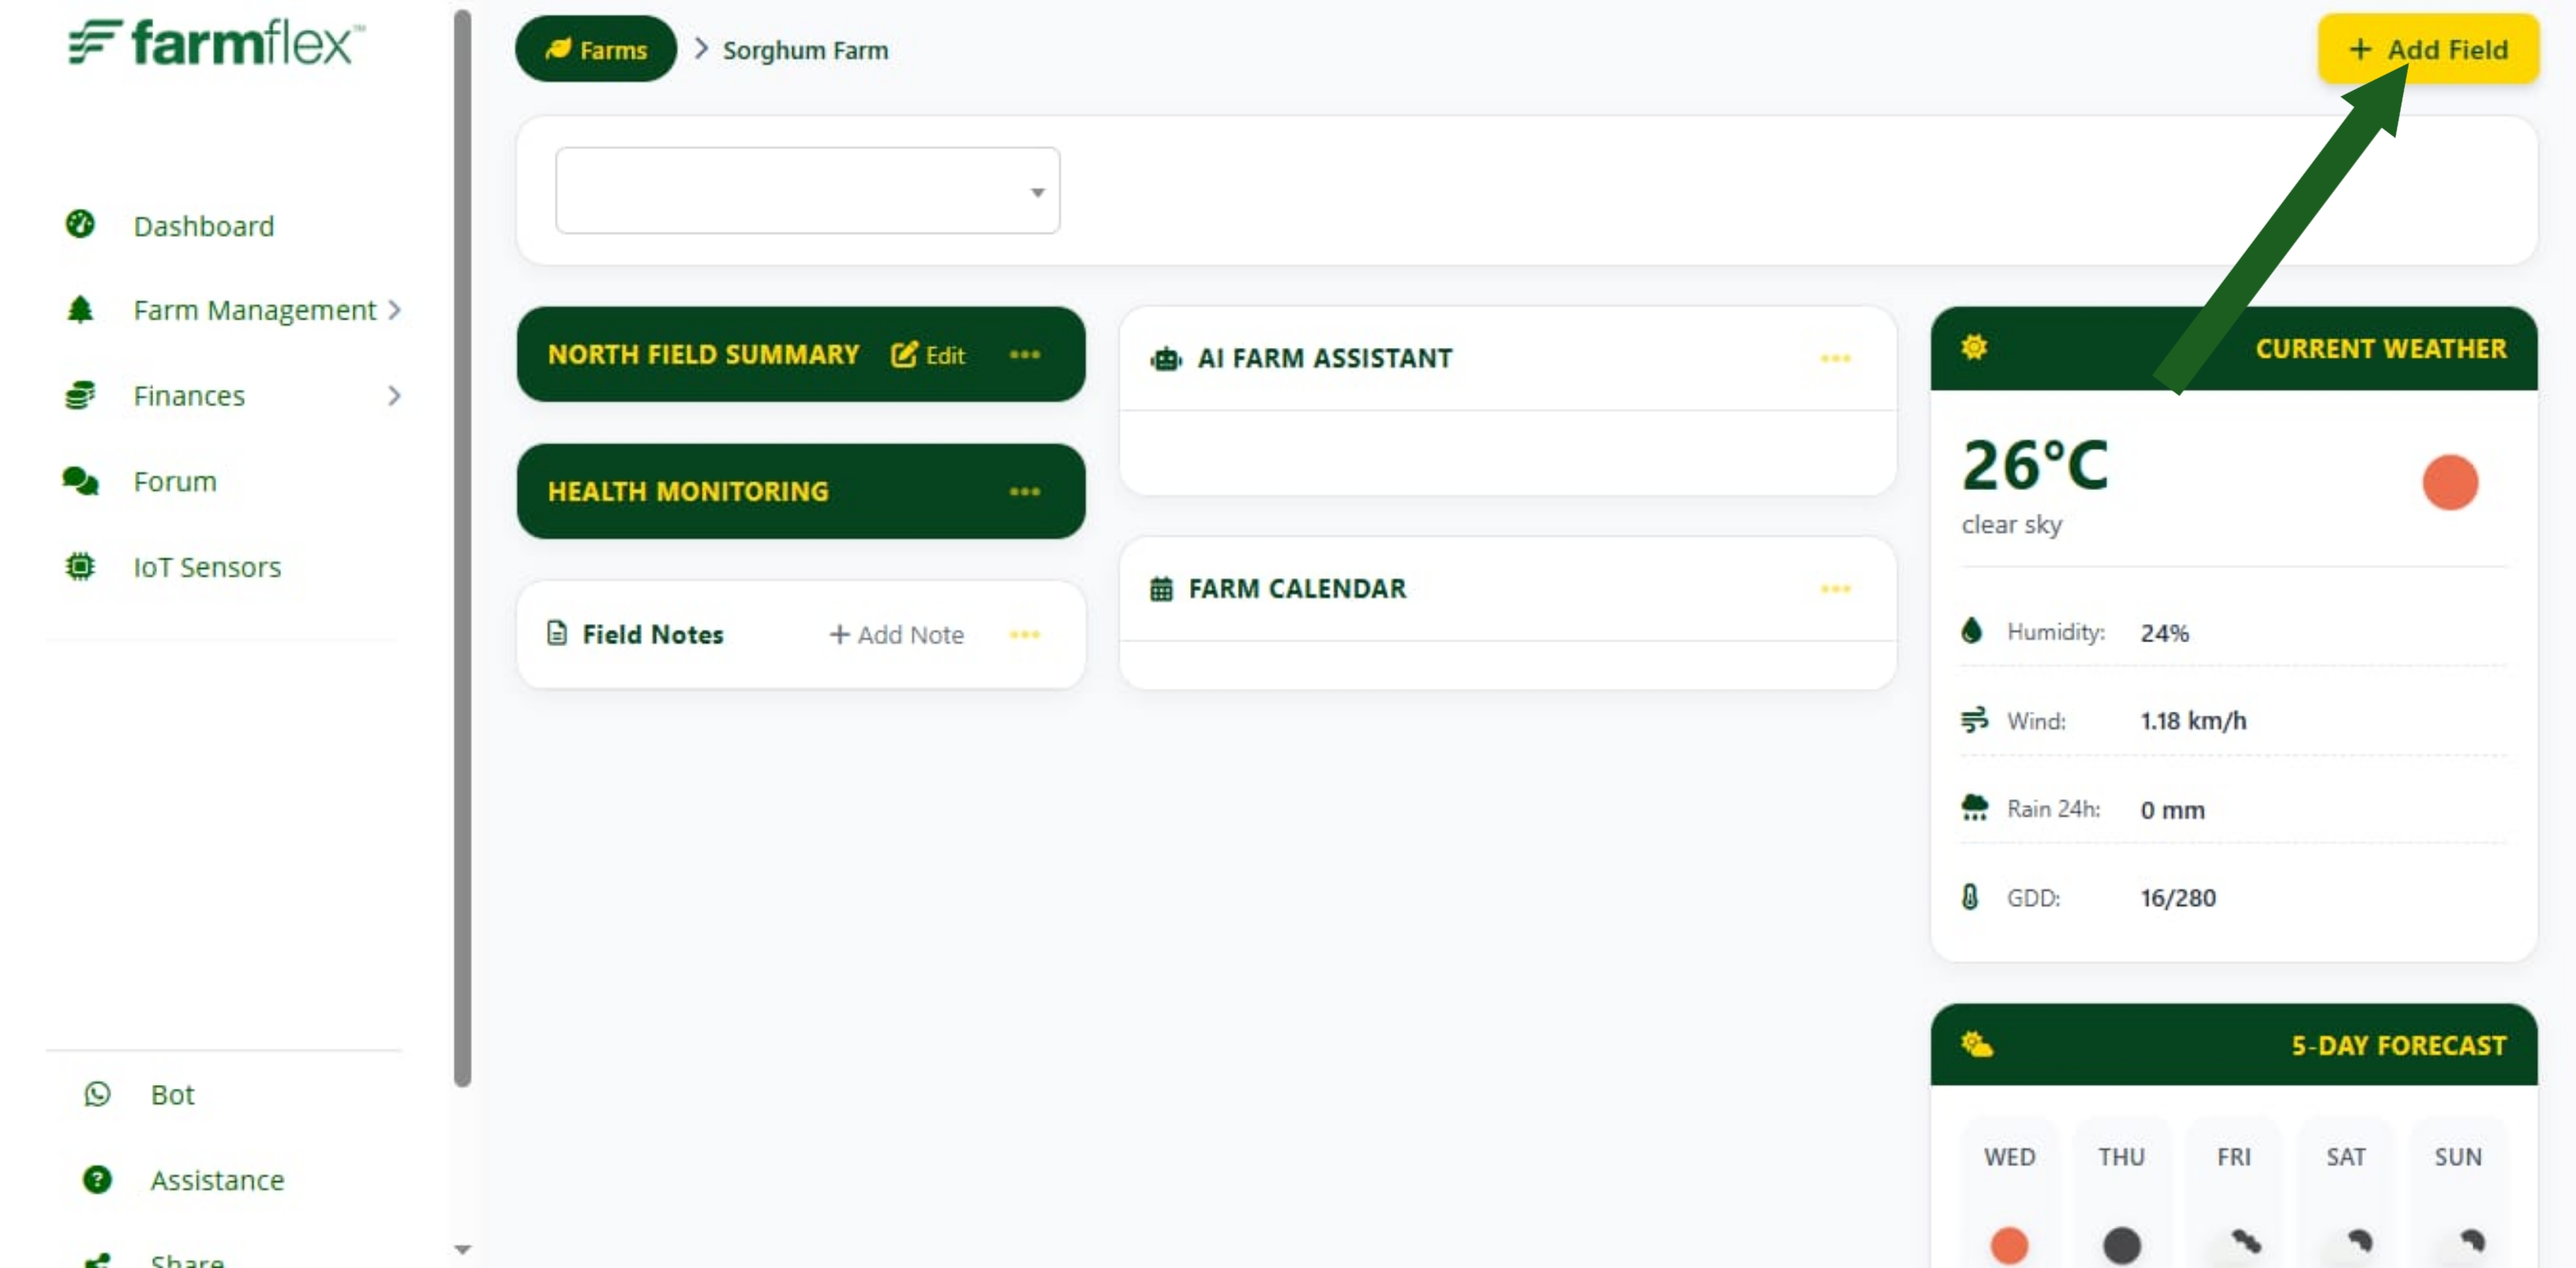
  • Click "Add Field" button
  • Fill field details form
Add Field Button
8
Step 8

Fill Field Details

Enter field information including name, area, crops, and planting date.
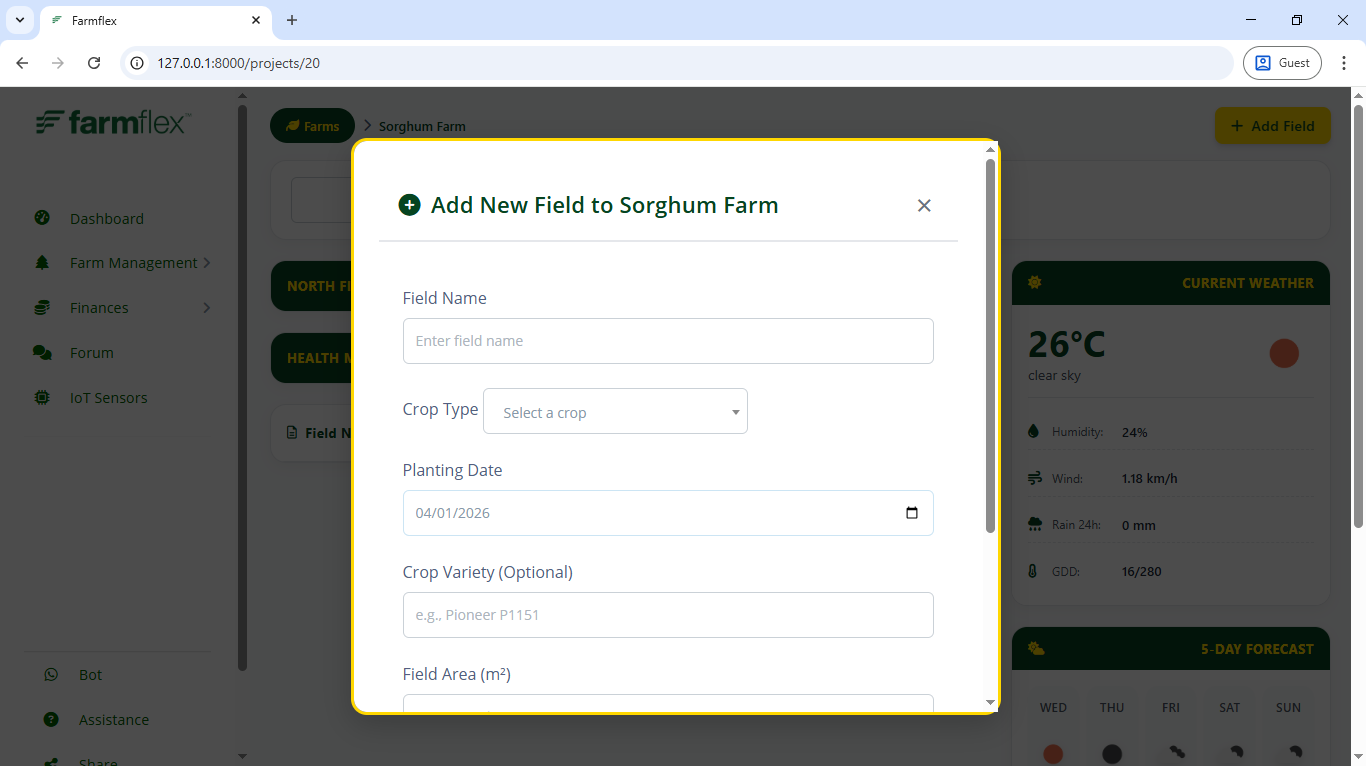
  • Field name
  • Field area (hectares/square meters)
  • Select crop type
  • Planting date
Create Field
Field Form
9
Step 9

Field Added Successfully

Your field is now visible inside the farm view.
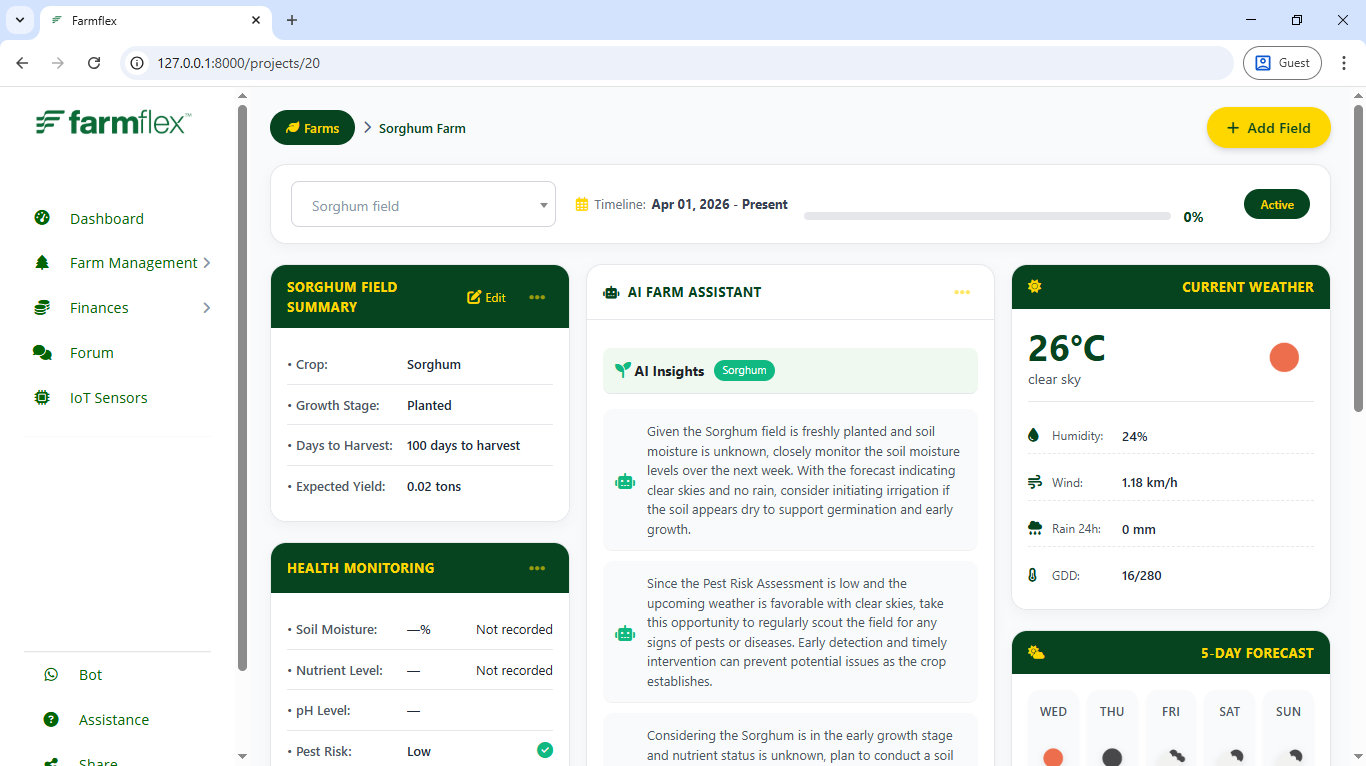
  • See your field details and weather for that farm
  • View field growth data
  • Create tasks for this field
Field Added
10
Step 10

Create Task for Field

Generate tasks for your field to track farming activities.
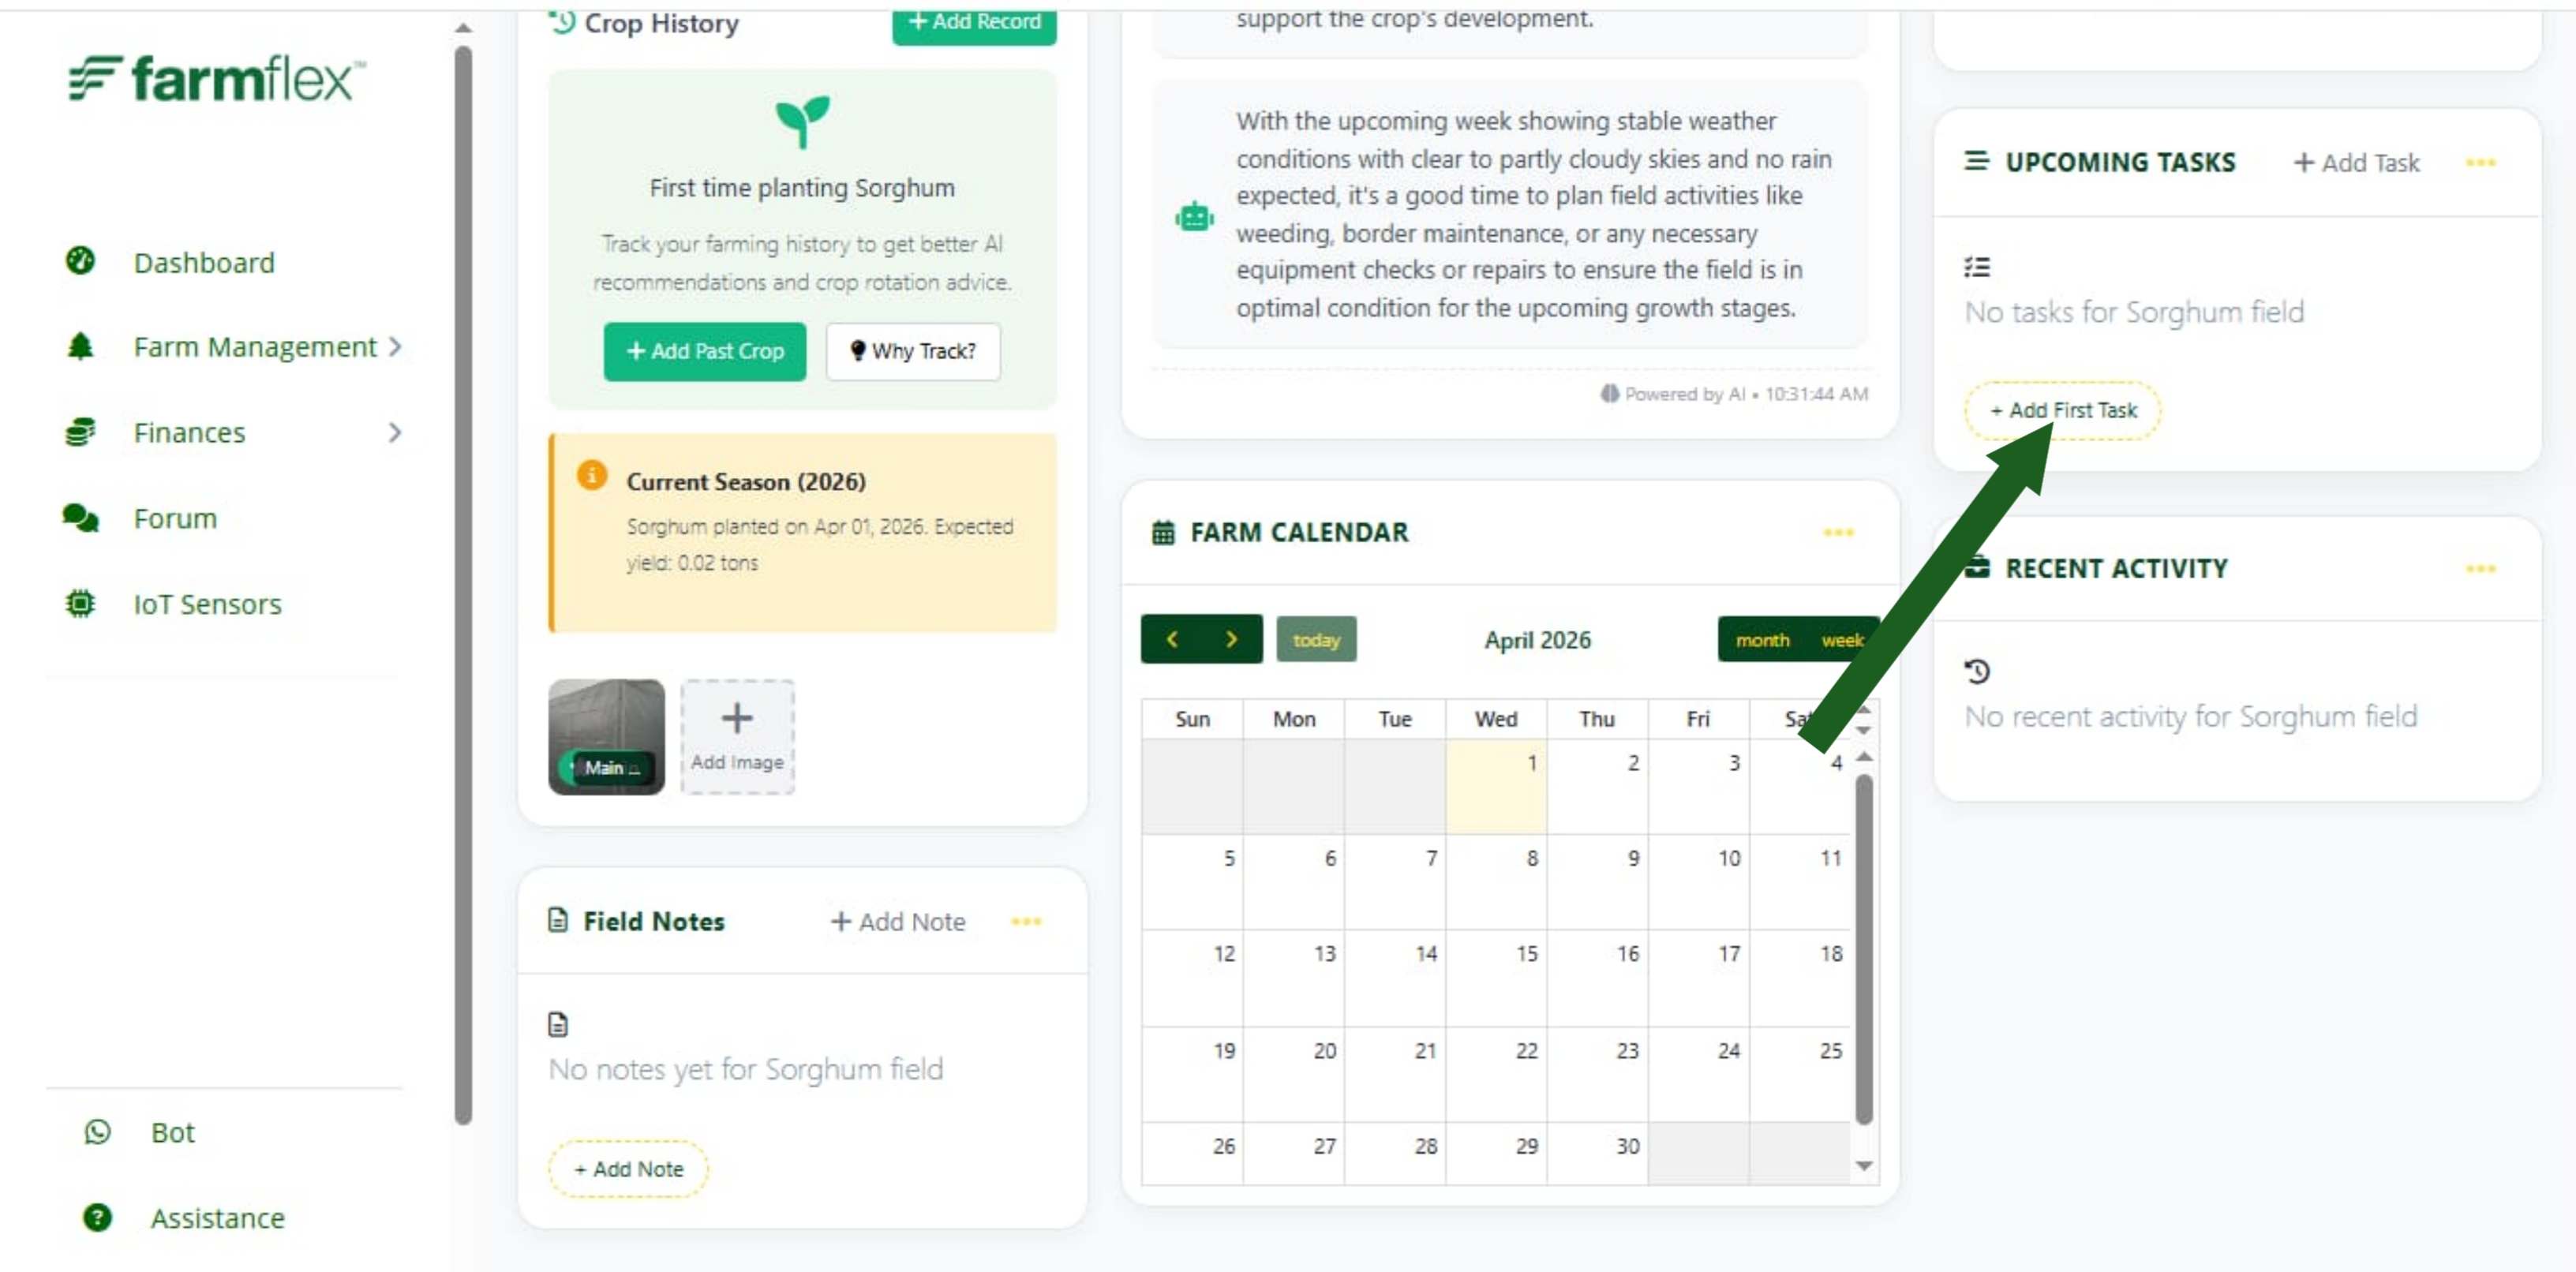
  • Click "Add Task"
  • Set due dates and priority
  • Assign to staff members
Create Task
Create Task
11
Step 11

Manage Your Tasks

View and manage all tasks for your fields from the task dashboard.
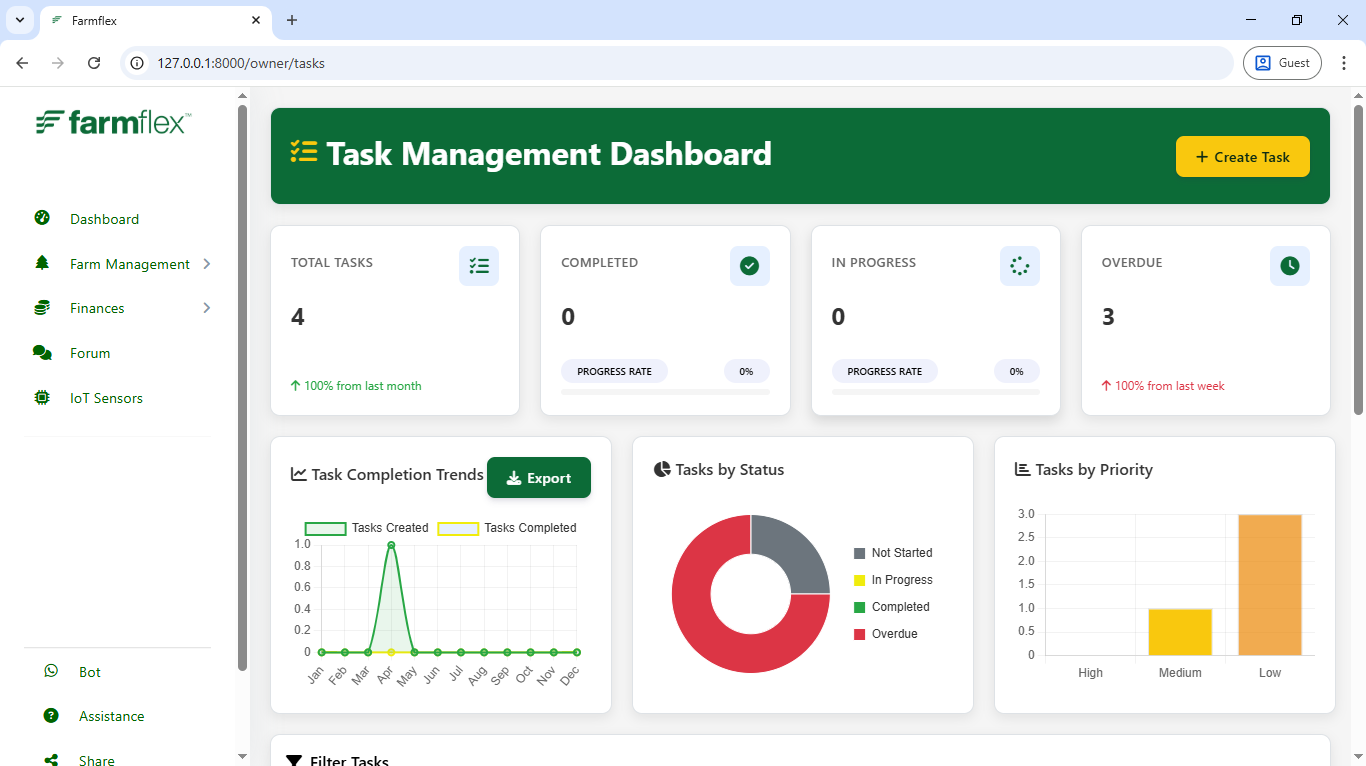
  • View pending, in-progress, and completed tasks
  • Update task status
  • Read task reports
  • Track task completion progress
View Tasks
Task Dashboard
1
Step 1

Access Finances & Menu

From the sidebar, click on "Finances" dropdown to access menu management.
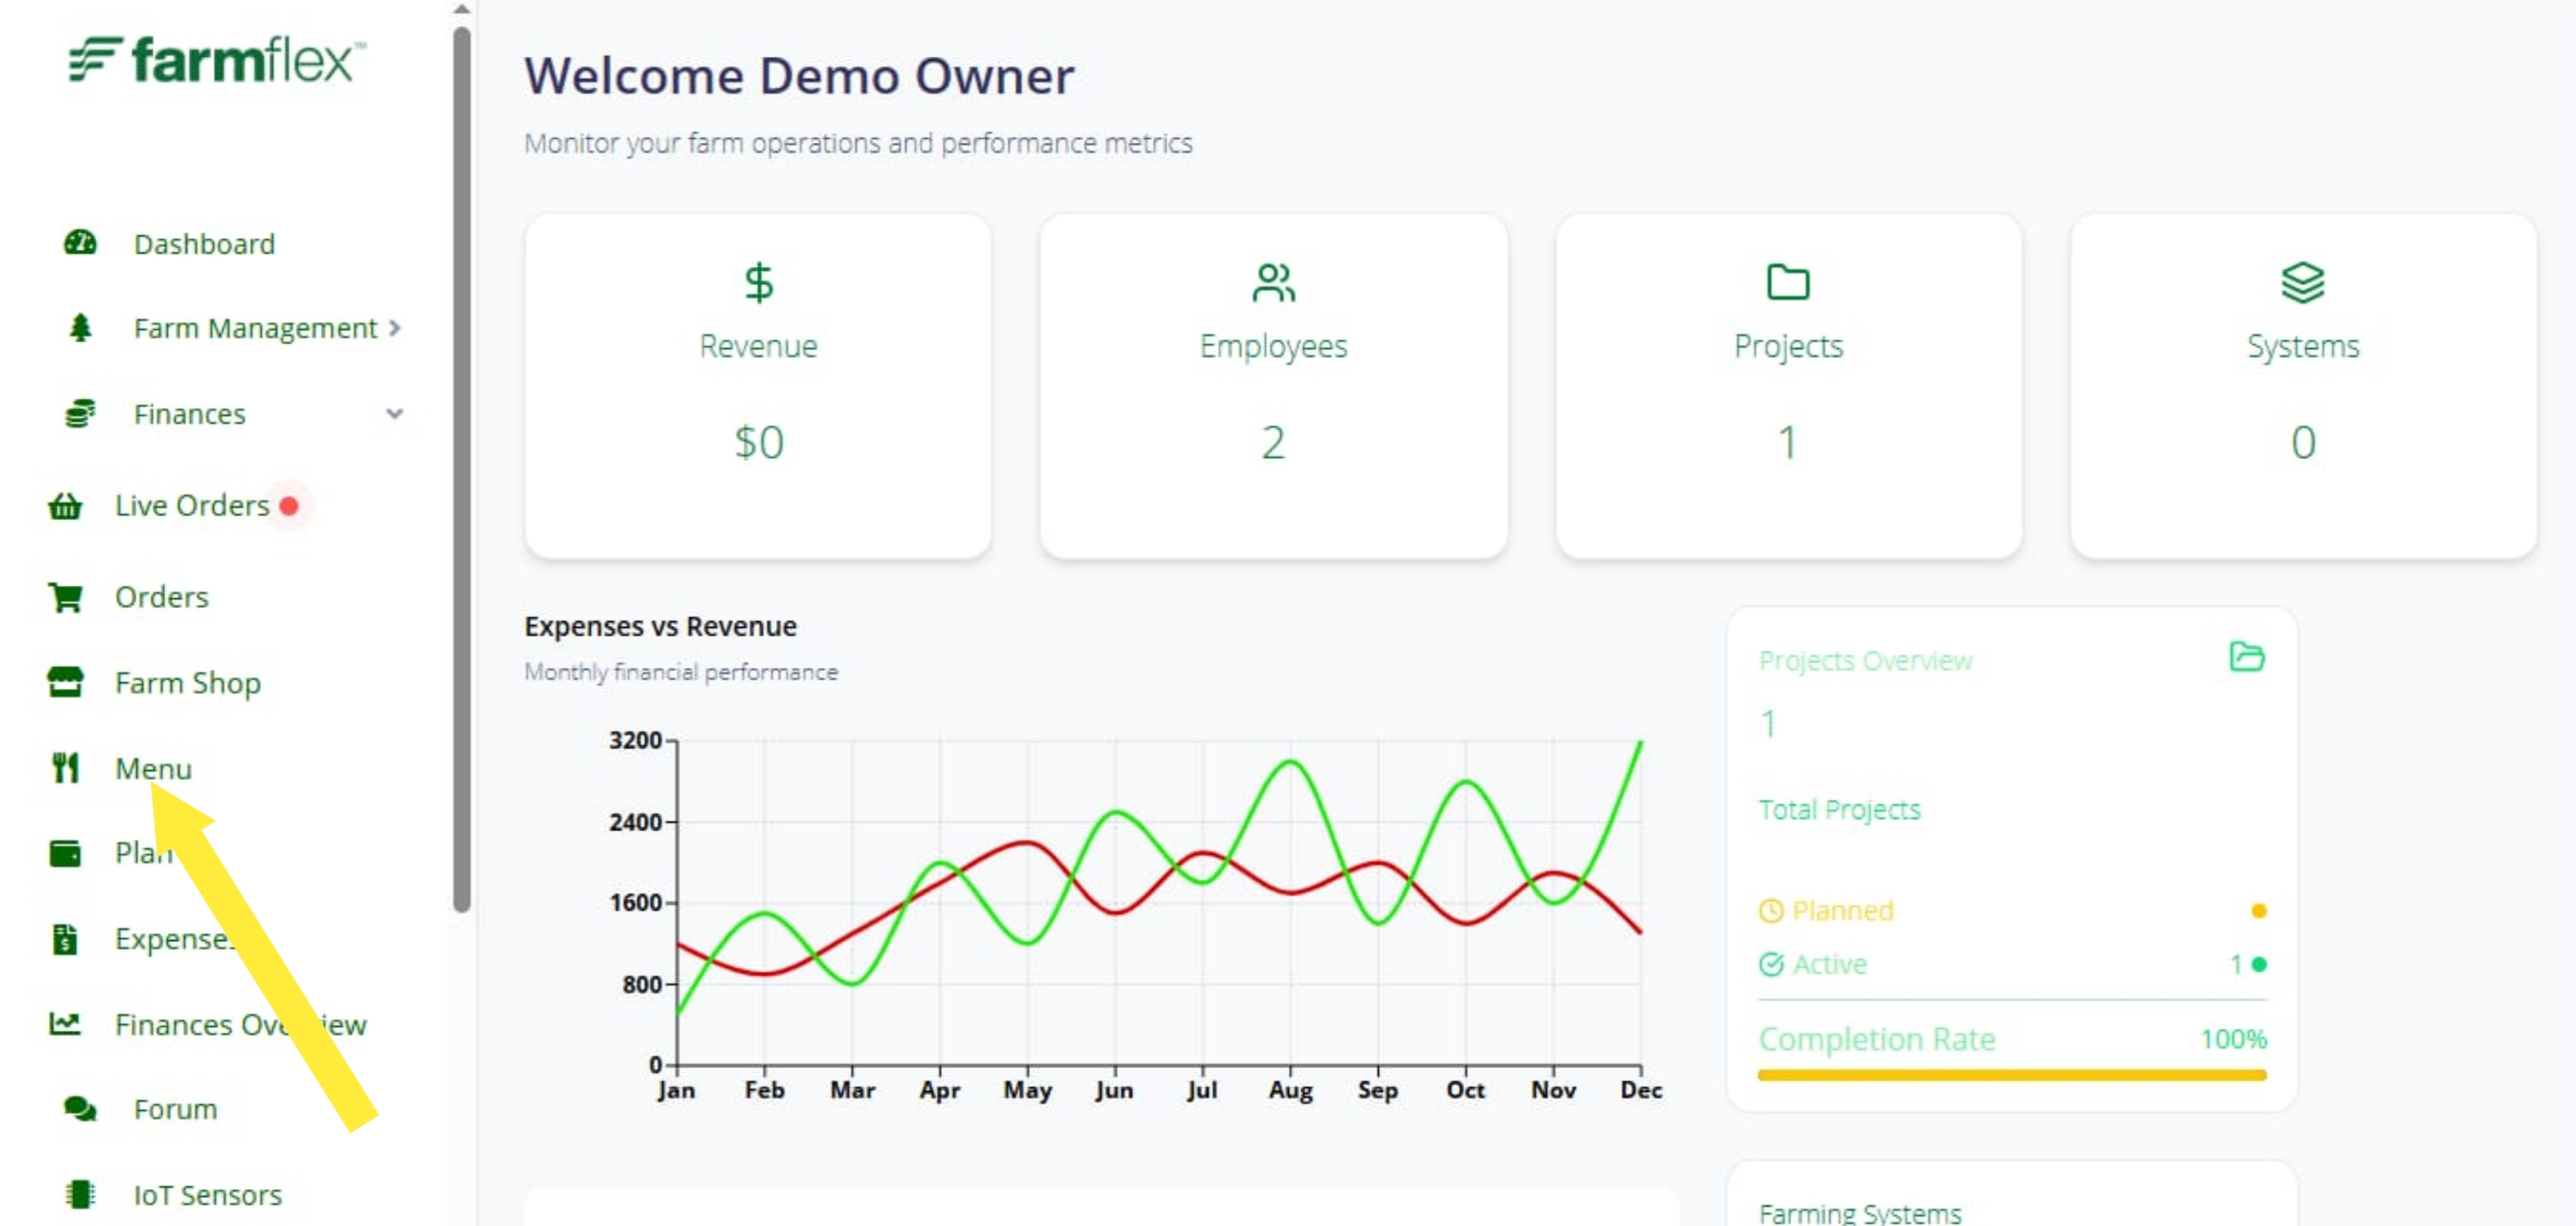
  • Expand the Finances dropdown menu
  • Click on "Menu" option
  • You'll be taken to the menu management page
Go to Menu
Finances Dropdown
2
Step 2

Add Category

On the menu page, click the "Add Category" button to create a new category.
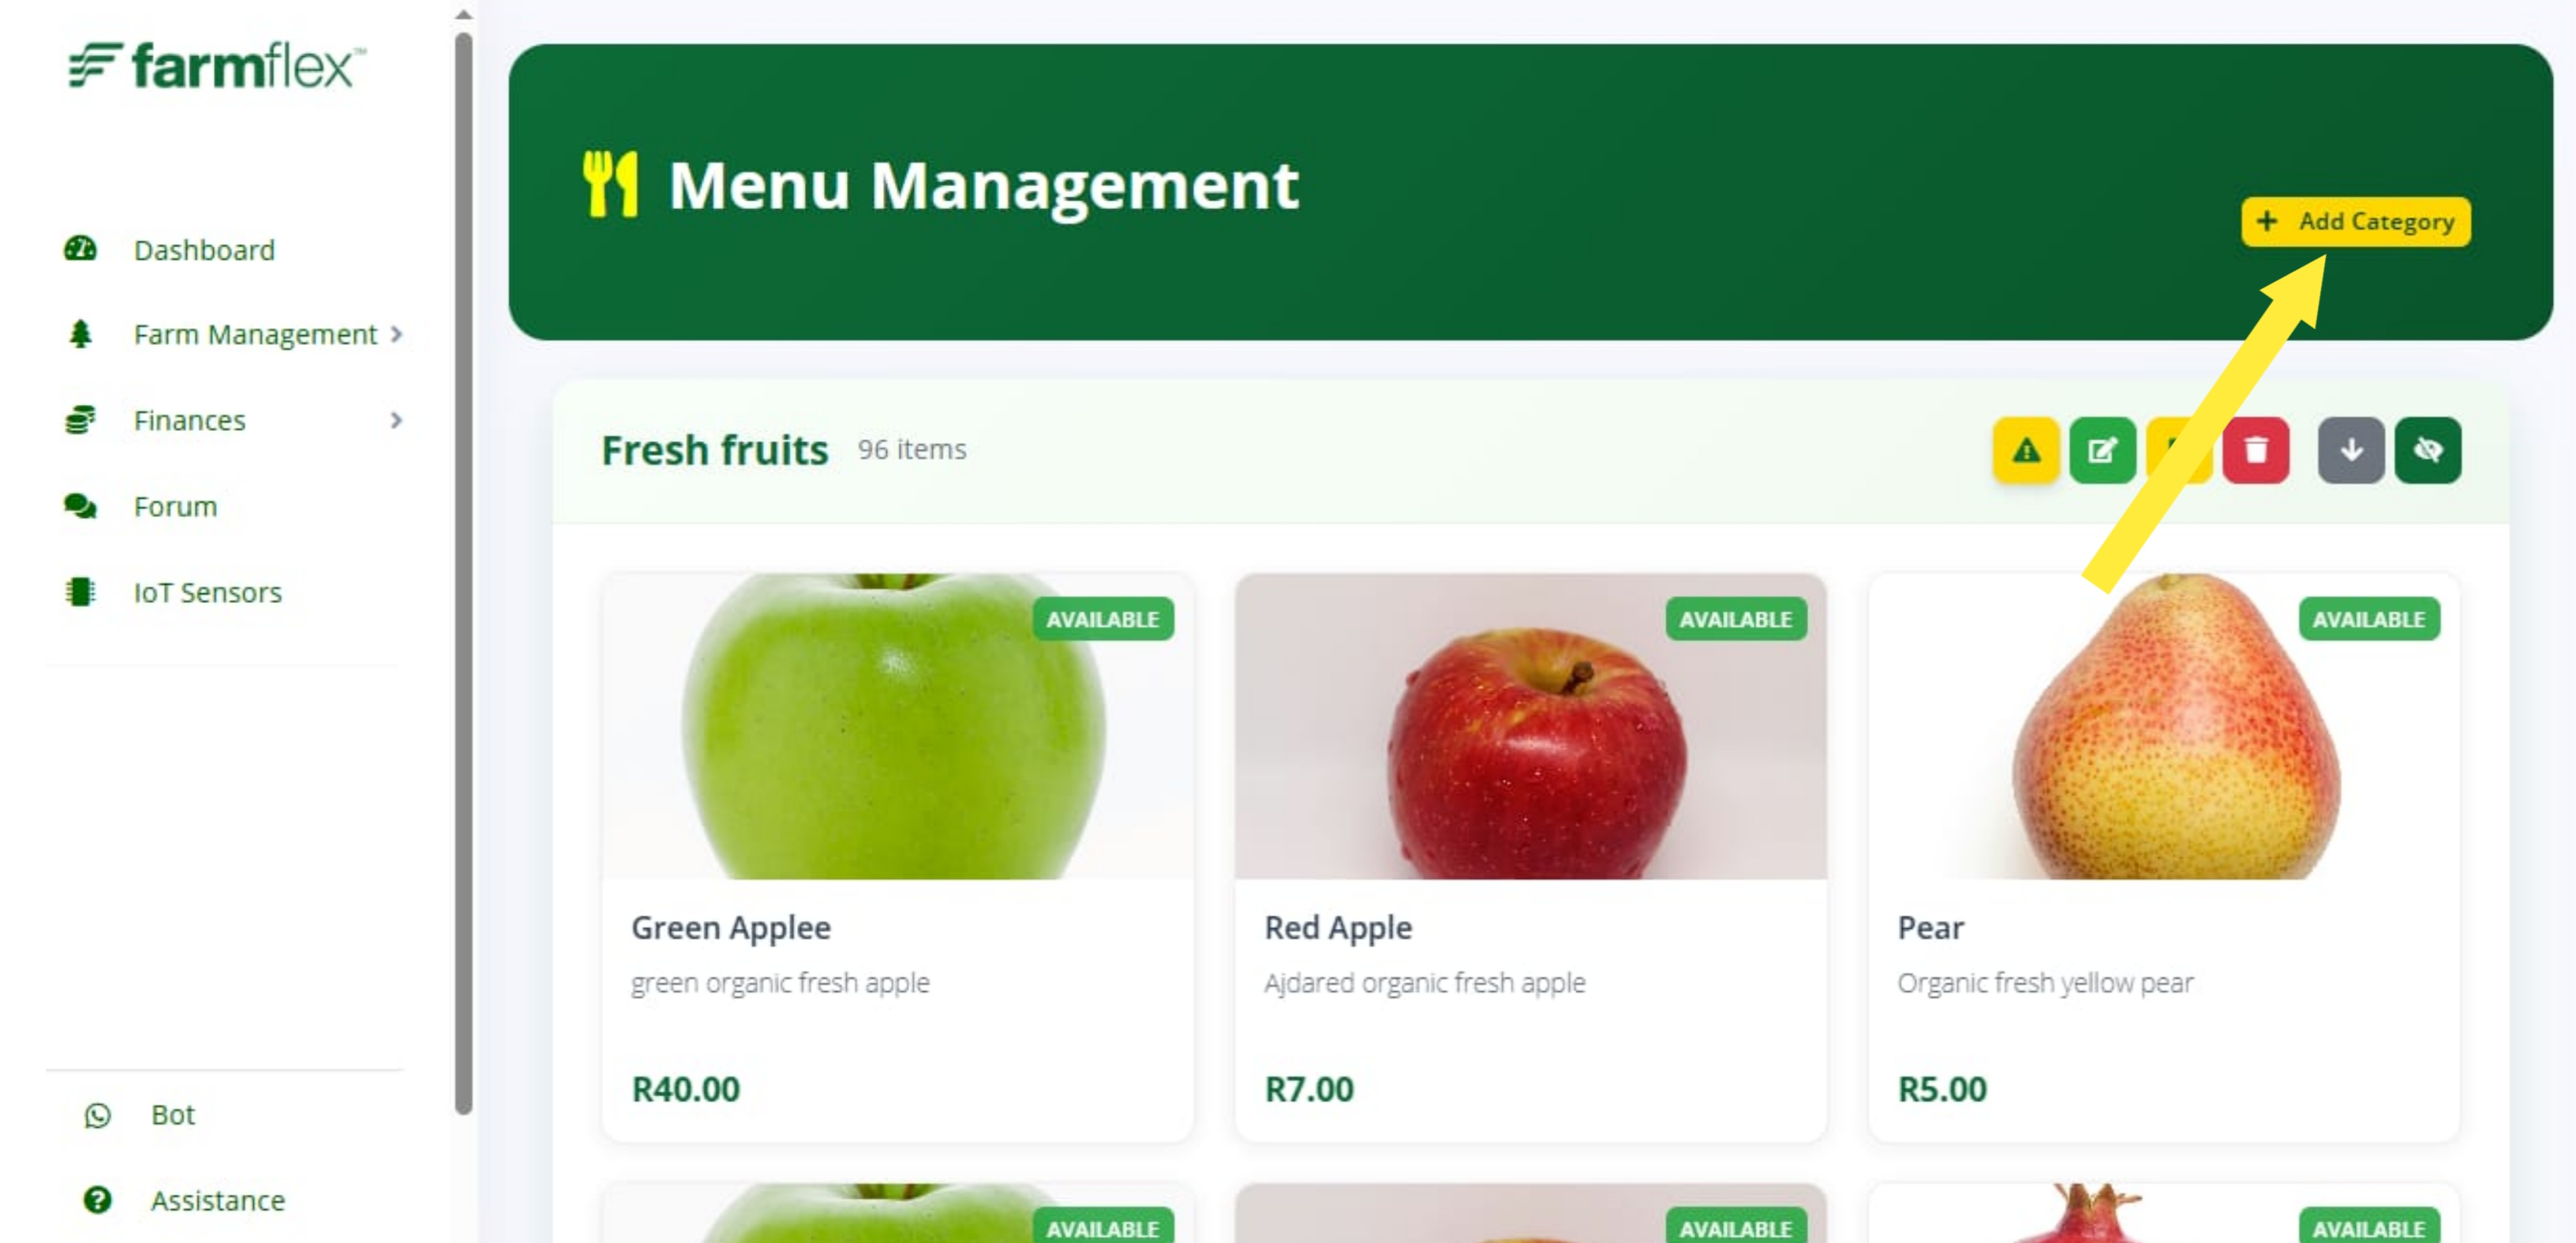
  • Look for the "Add Category" button
  • Categories help organize your items
  • A modal will appear to enter category details
Add Category Button
3
Step 3

Create Category

Fill in the category details to organize your products.
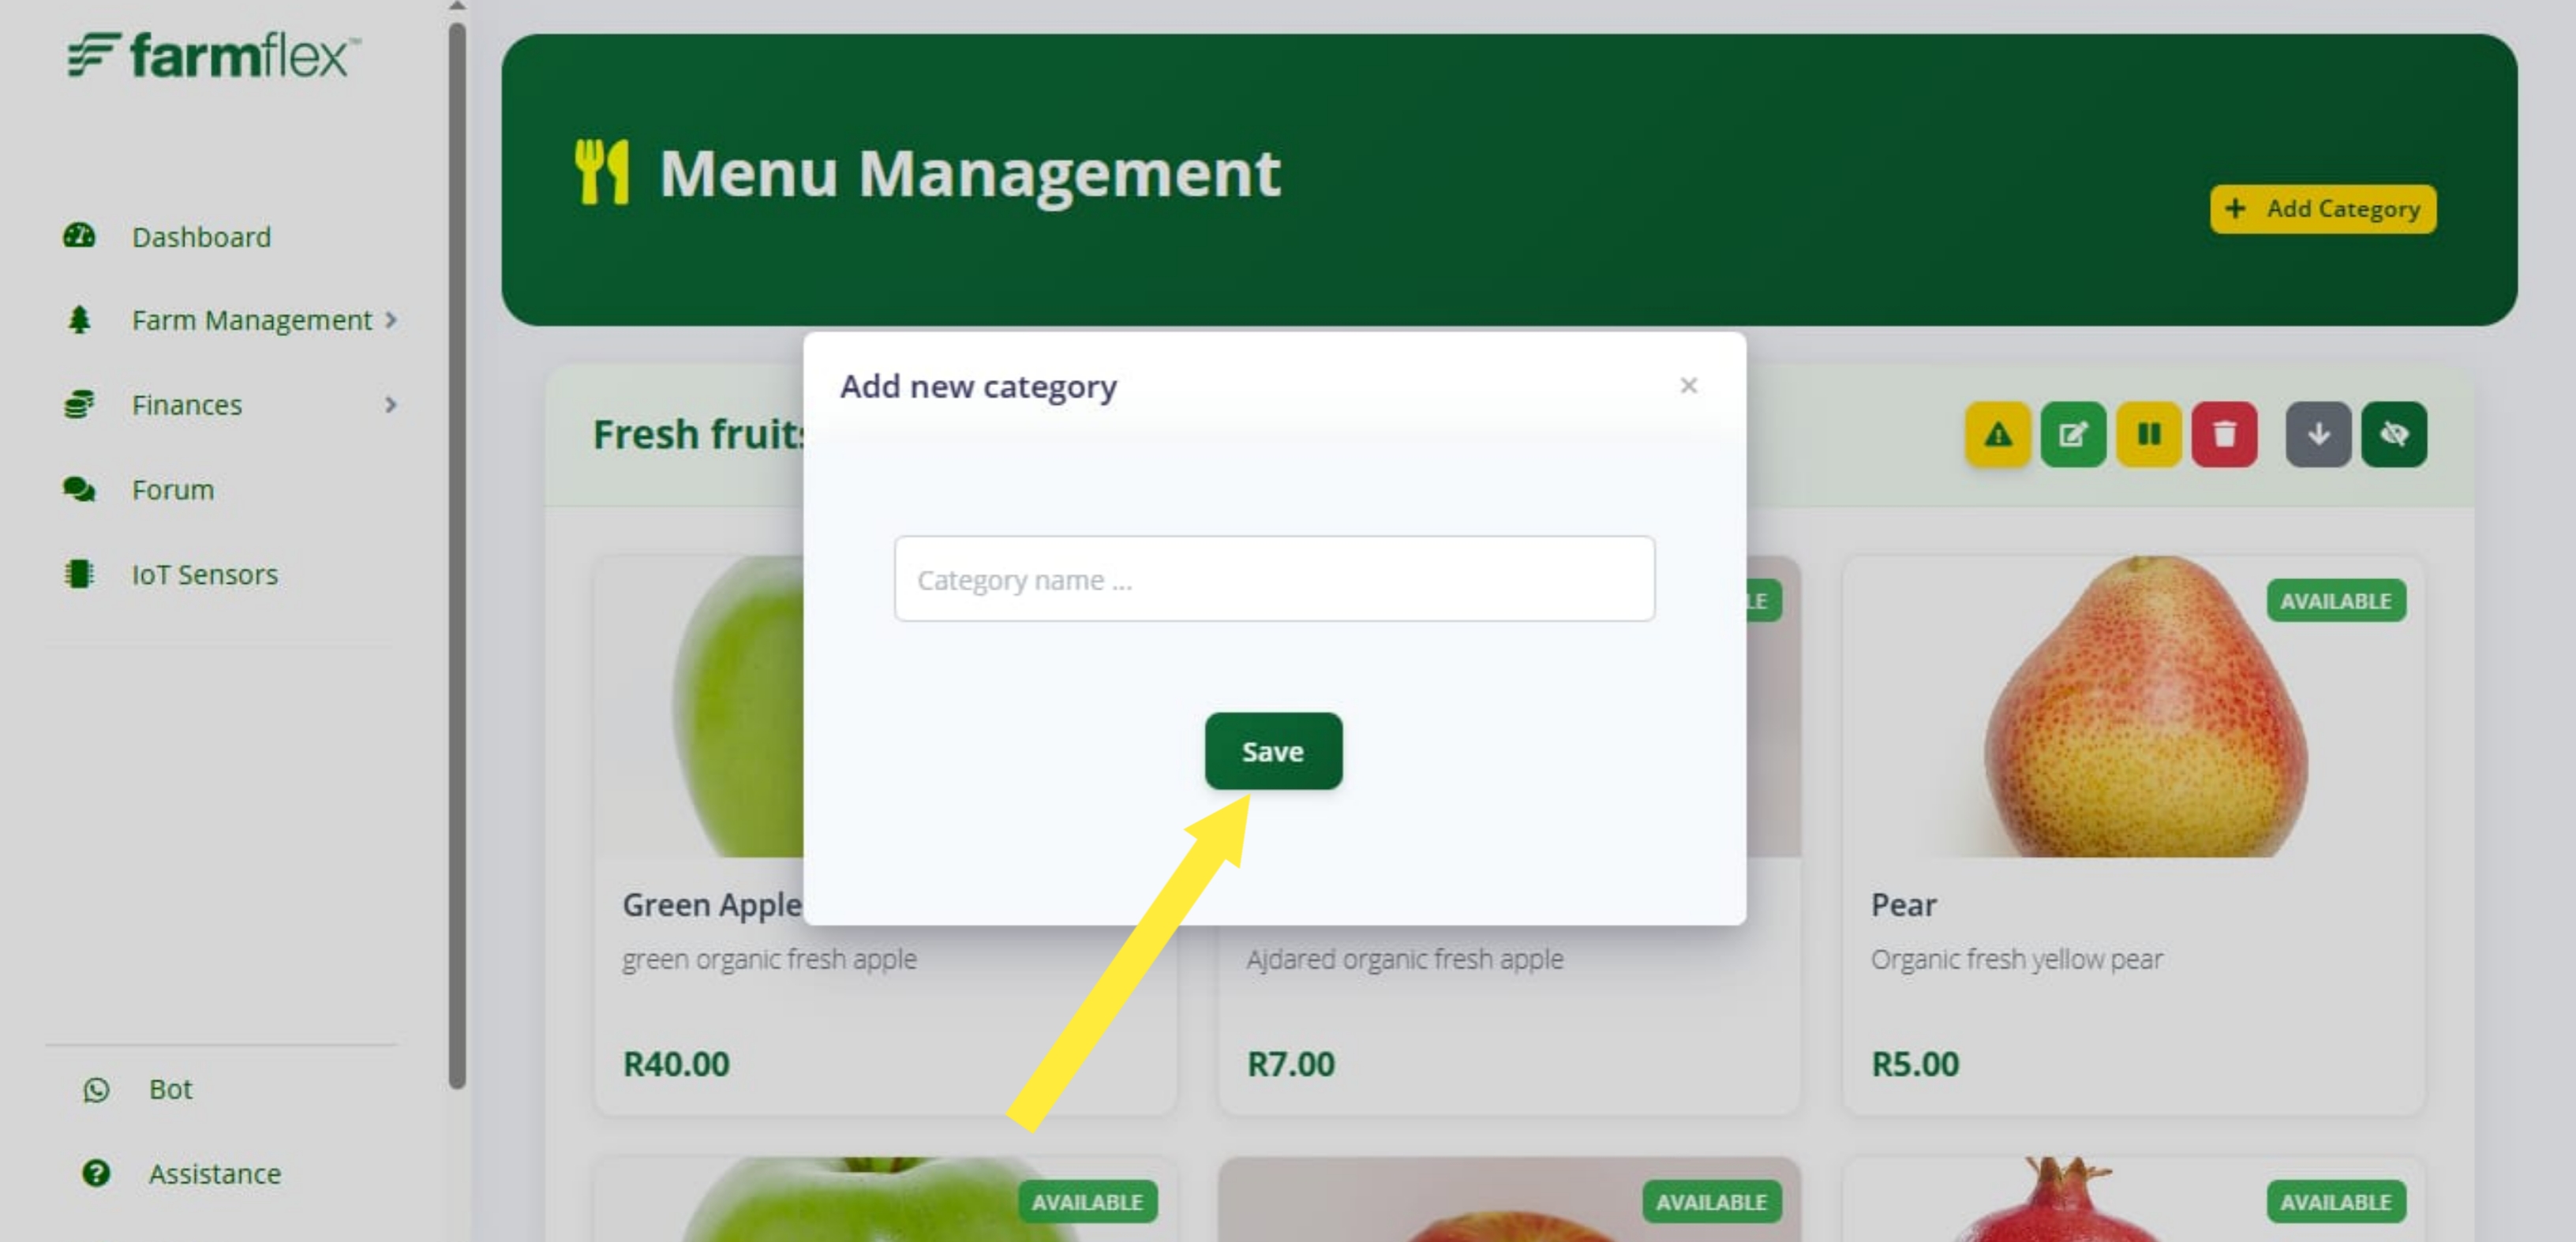
  • Enter category name
  • Click "Save" to create the category
  • Category will appear in the categories list
Category Form
4
Step 4

Add New Item

Click the "Add Item" button to create a new product for sale.
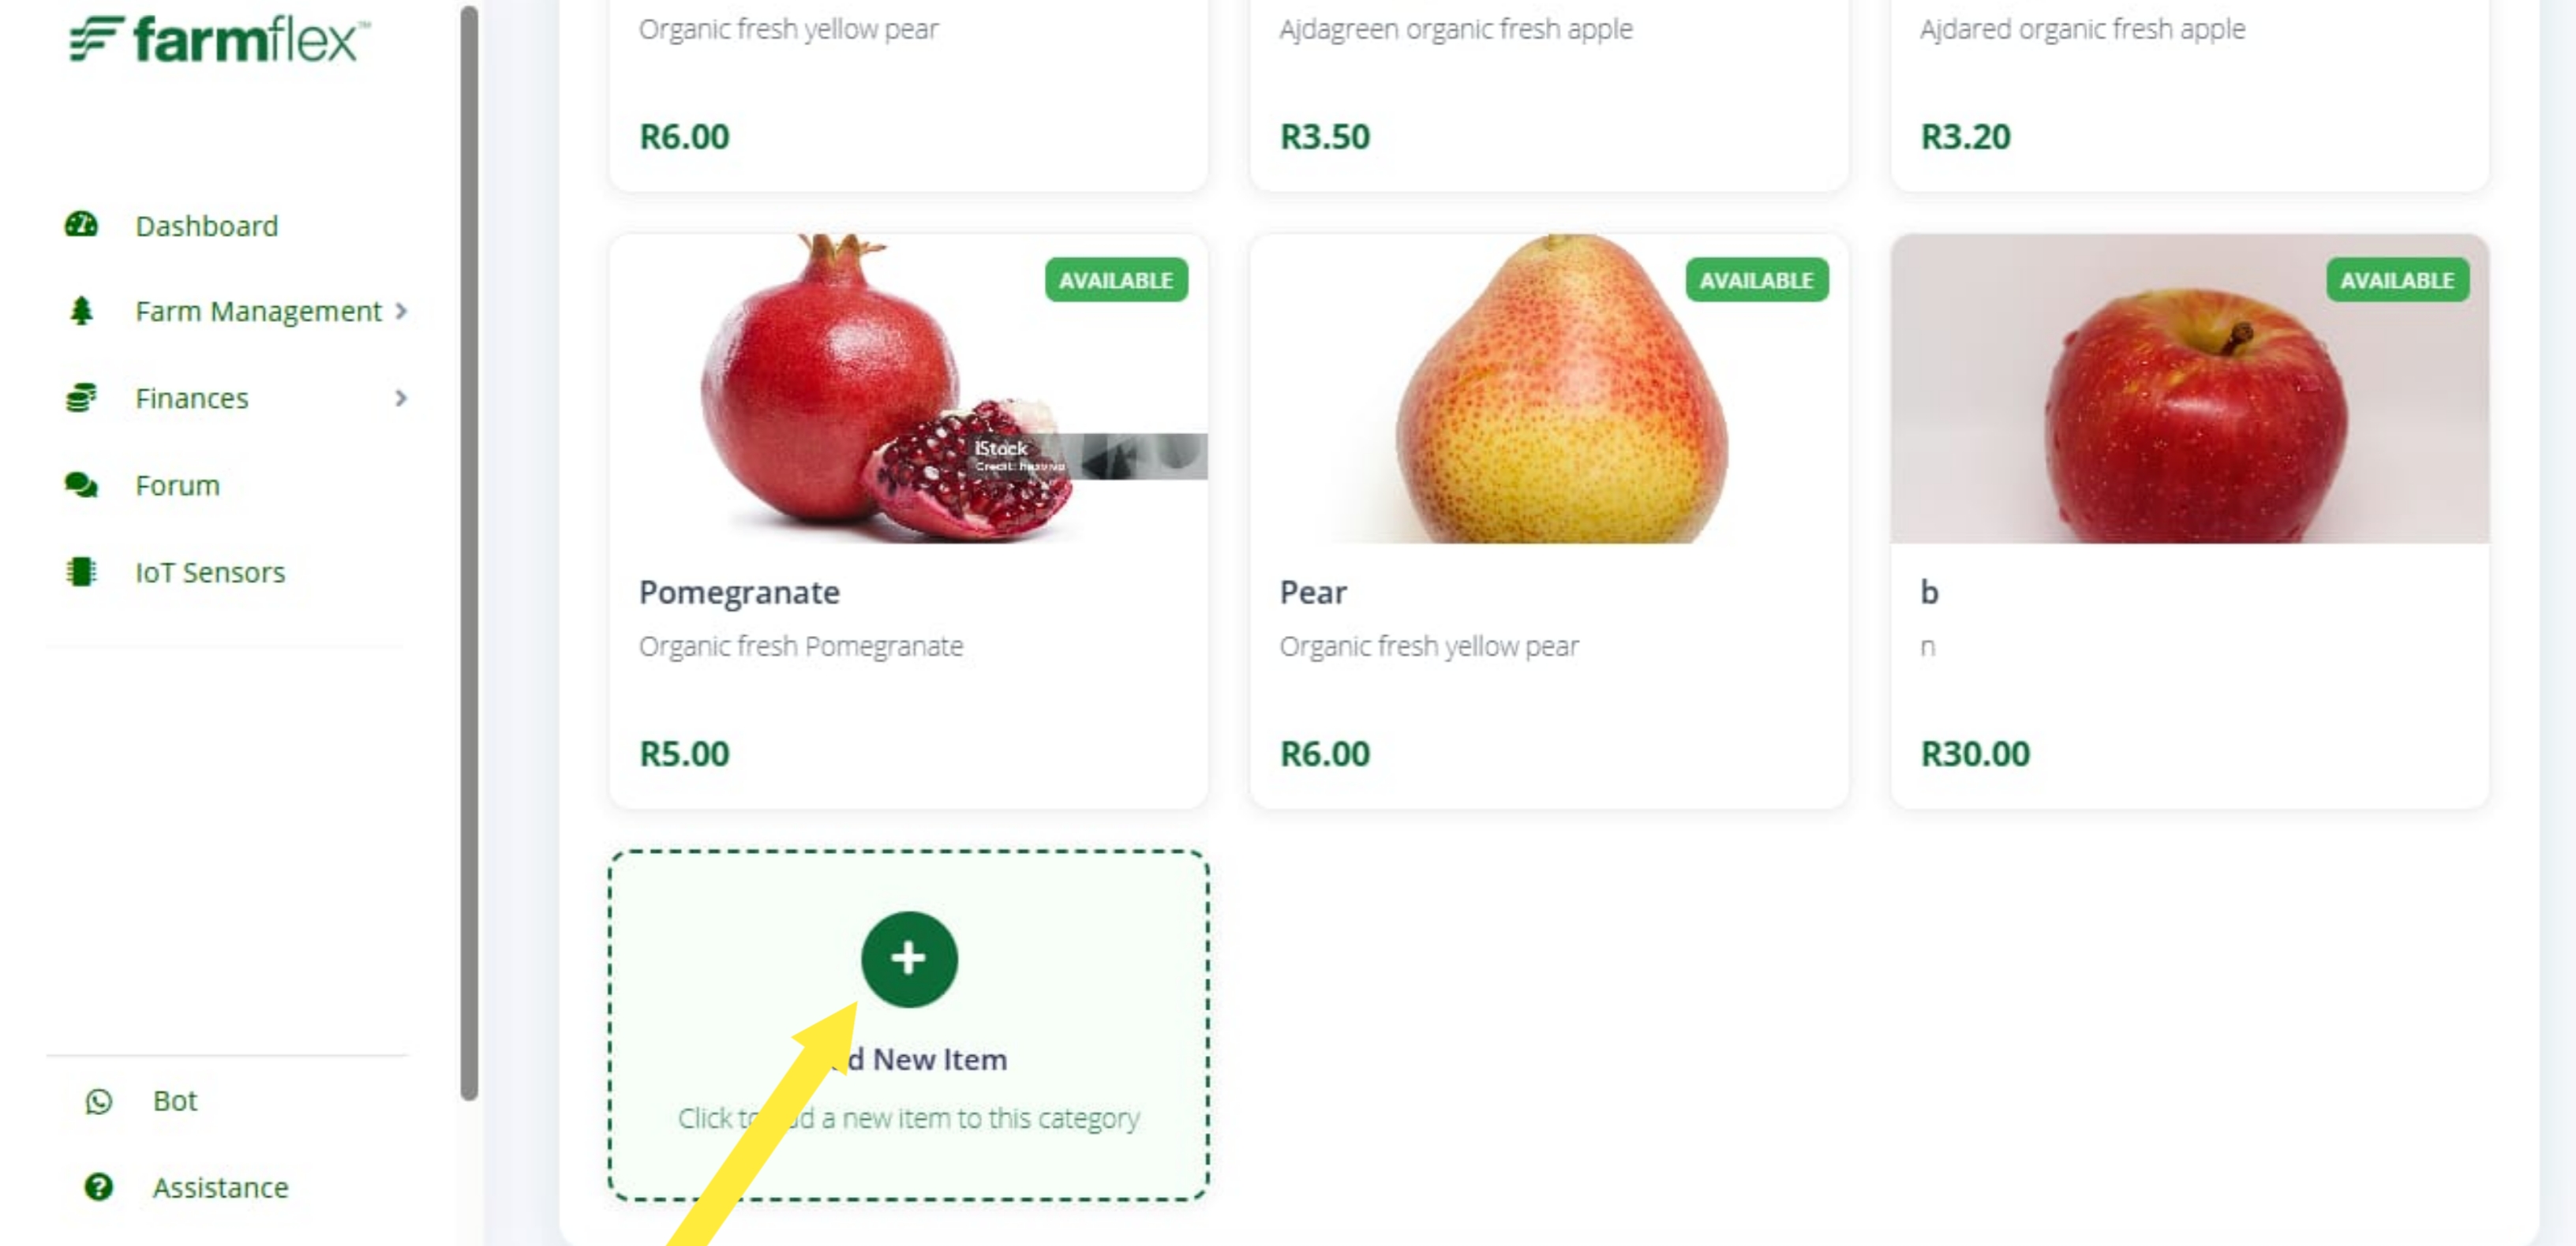
  • Look for "Add Item" button
  • Fill in the item details form
Add Item Button
5
Step 5

Item Details

Enter basic item information including name, price, and description.
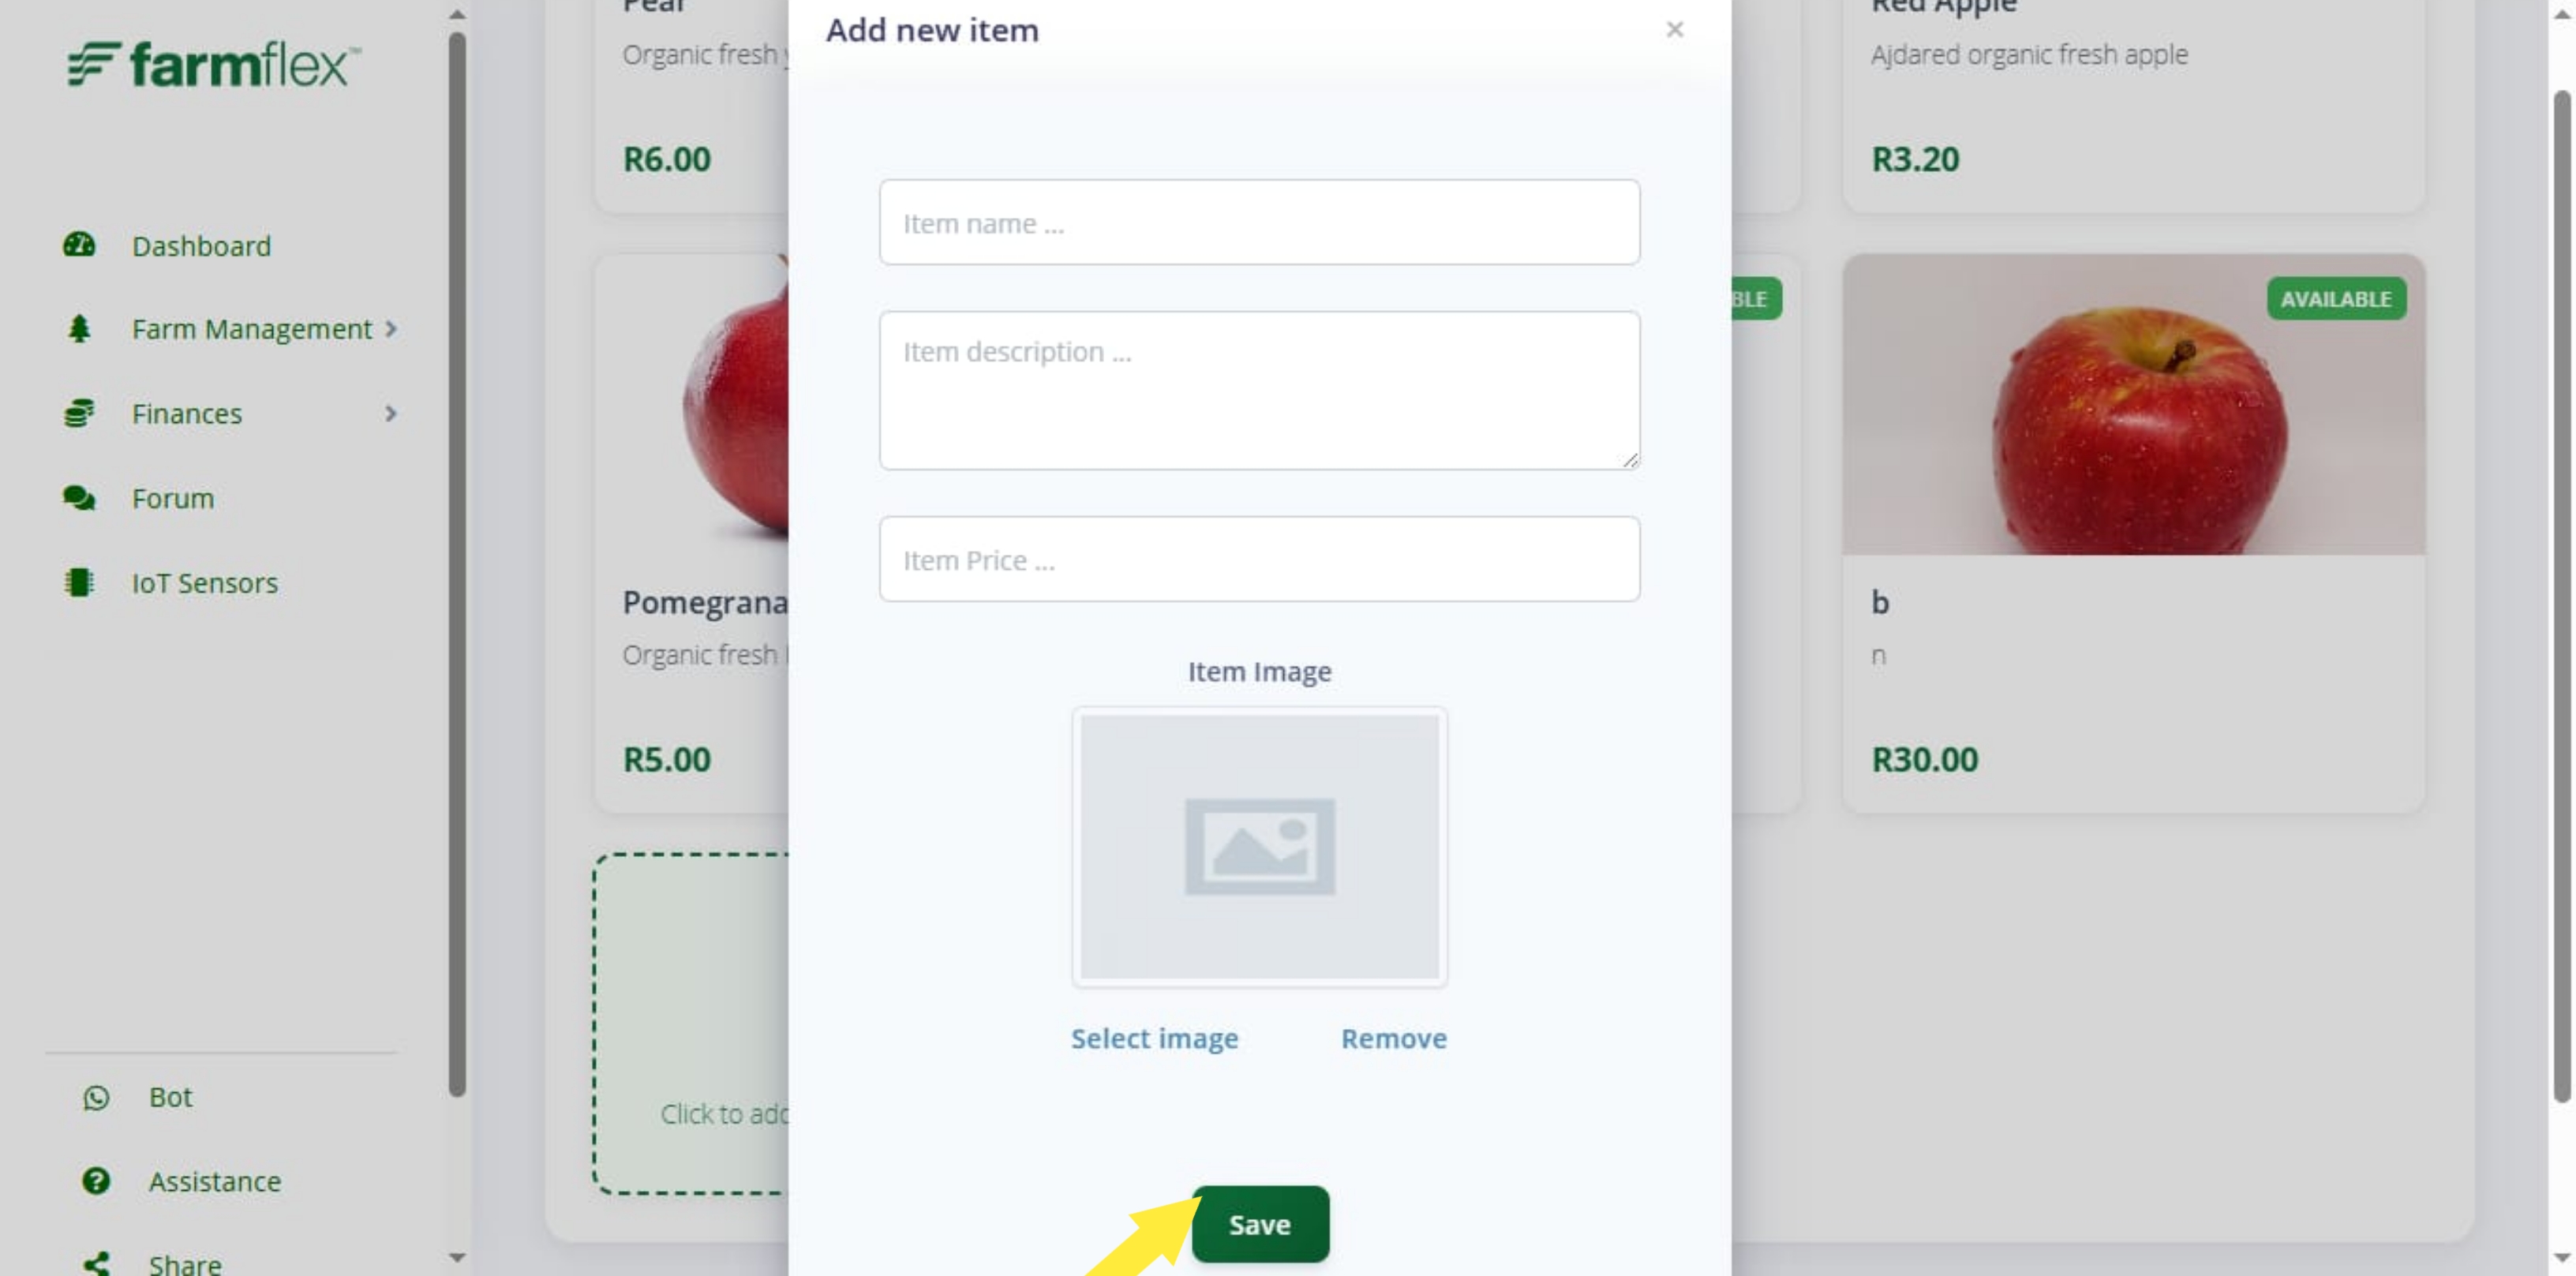
  • Item name
  • Price
  • Discounted price (optional)
  • Description
  • Upload item image
  • Click "Save" to create the item
Item Form
6
Step 6

Items Placed for Sale

Your items are now visible in the menu and ready for customers to order.
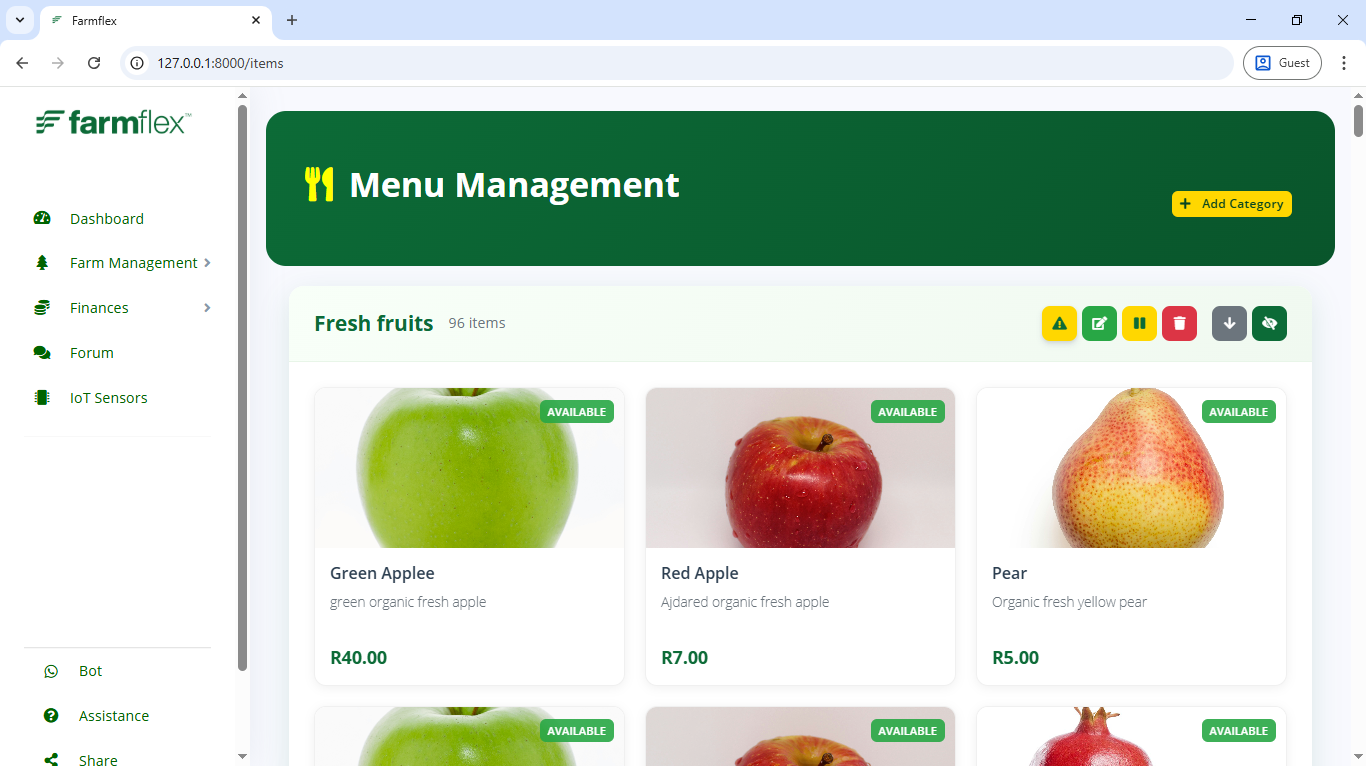
  • View all items in their categories
  • Edit items anytime
  • Remove items that are no longer available
  • Toggle availability
View Store Menu
Items for Sale
7
Step 7

Customer Store View

Customers can now browse and order your items from the store page.
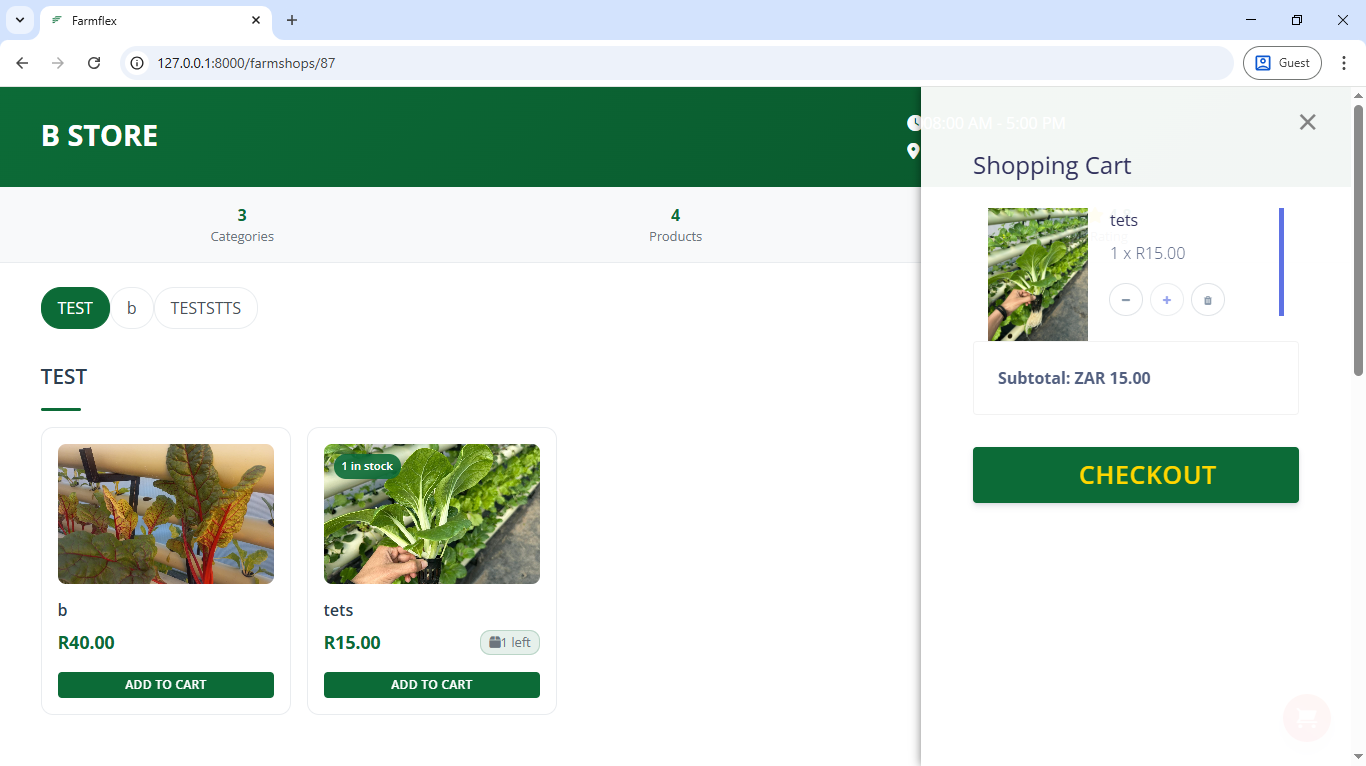
  • Items appear in categories
  • Search and filter by category
  • Add items to cart
  • Complete checkout
View Customer Store
Customer Store View

AI Assistance Guide

Get smart recommendations for your farming needs using our AI assistant.

Floating Help Button

Click the green button at bottom right for assistance

Crop Recommendations

Get AI suggestions based on your location and season

Weather Insights

AI analyzes weather patterns for optimal planting

Yield Predictions

Forecast harvest yields with AI accuracy

Analytics Guide

Understand your farm data with powerful analytics and reports.

Farm Status

Visual breakdown of active vs completed farms

Timeline Charts

Track farm creation over time

Export Reports

Download data in CSV or Excel format

Real-time Insights

Monitor metrics as they update

View Dashboard
1
Step 1

Access Task Management

From the sidebar, click on "Farm Management" dropdown to access Work/Tasks.
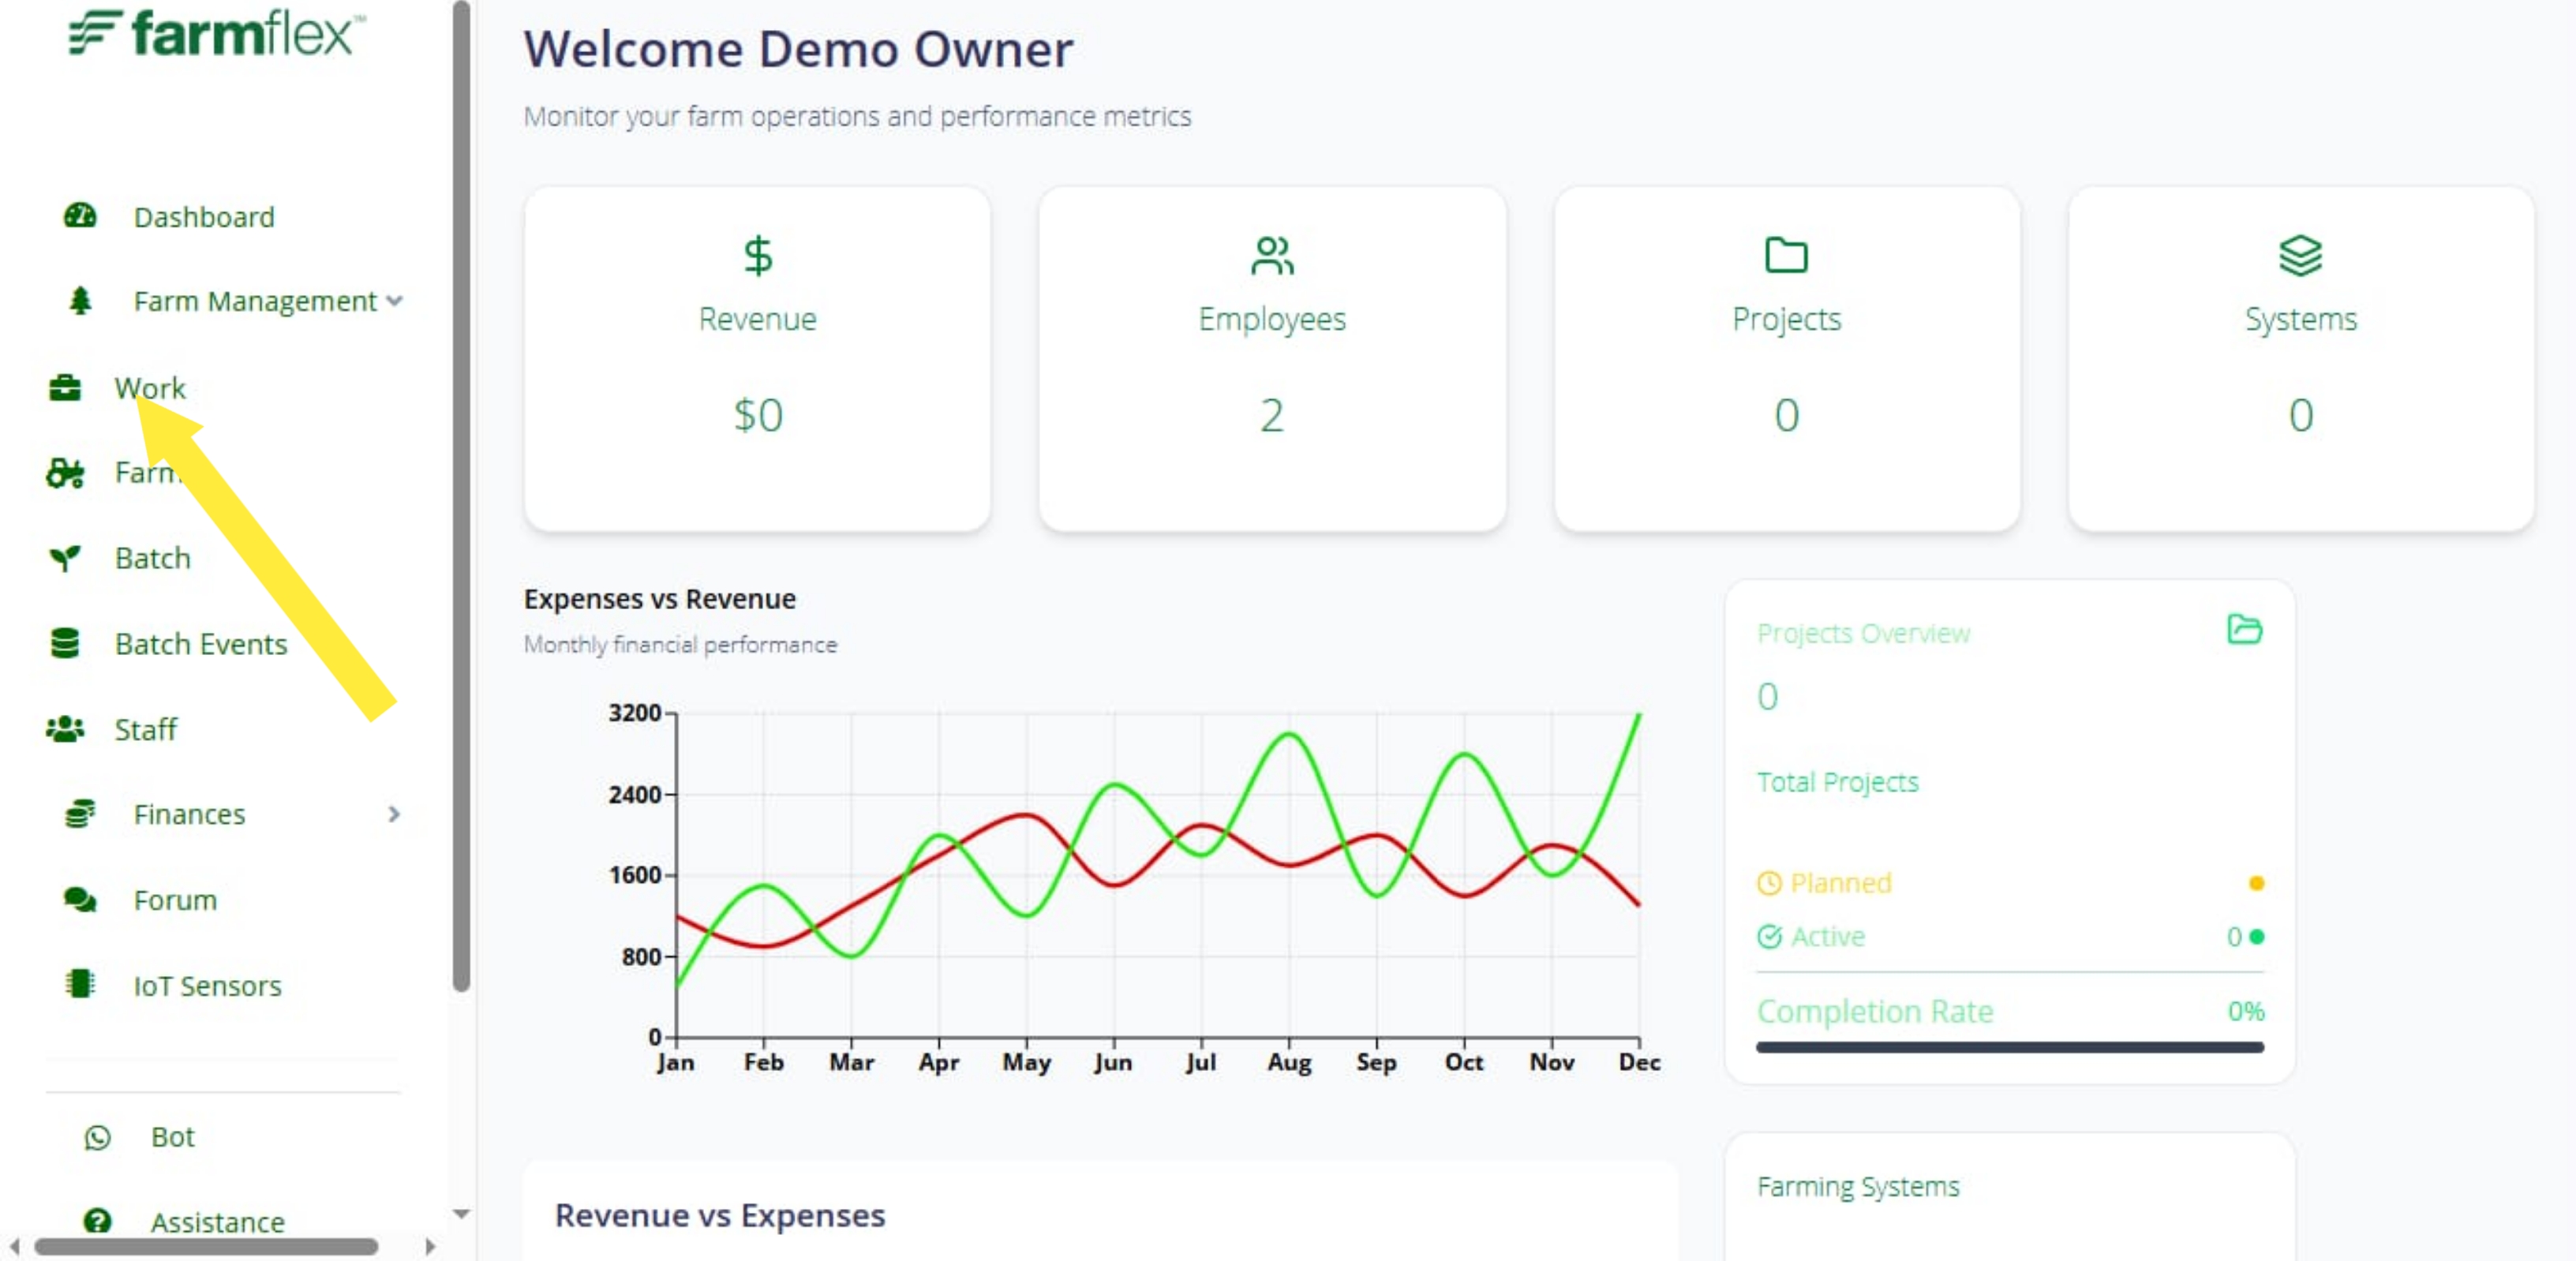
  • Expand the Farm Management dropdown menu
  • Click on "Work" option
  • You'll be taken to the tasks management dashboard
Go to Tasks
Farm Management Work
2
Step 2

Tasks Dashboard Overview

View all your tasks, filters, and quick actions from the tasks dashboard.

  • View task statistics
  • Filter by status, priority, or assigned staff
  • Search for specific tasks
  • Click "Create Task" to add a new task
Tasks Dashboard
3
Step 3

Click Create Task

Click the "Create Task" button to start creating a new farming task.
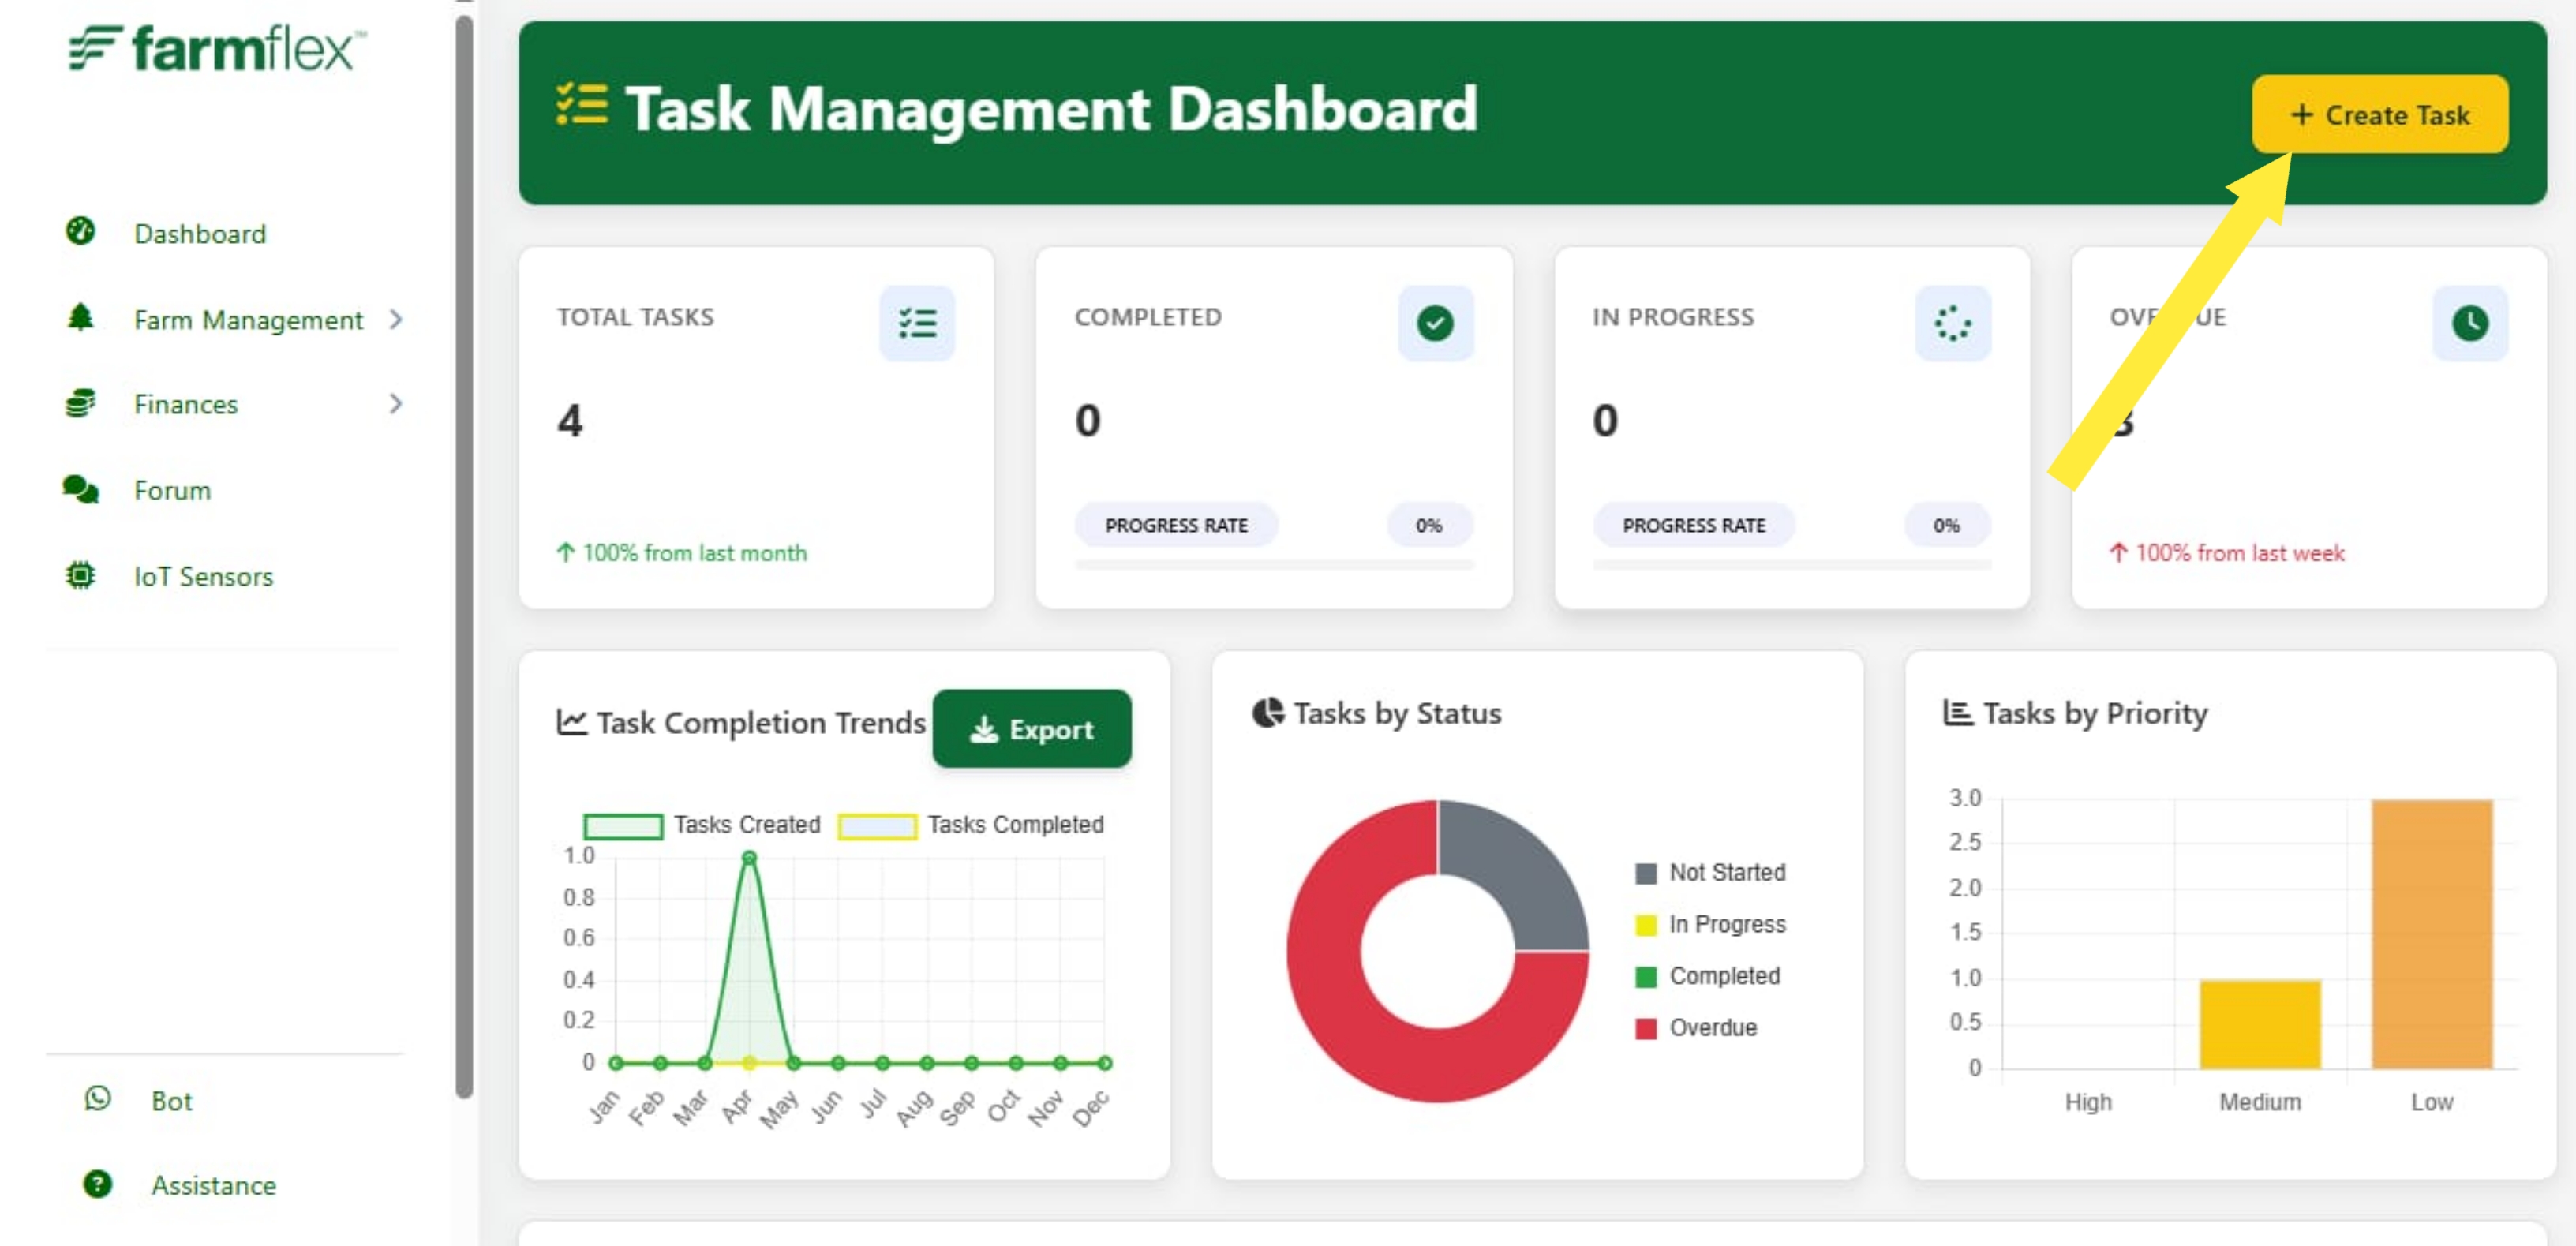
  • Locate the "Create Task" button
  • A form will appear to enter task details
Create Task Button
4
Step 4

Task Details

Enter task information including name, description, priority, and assignment.
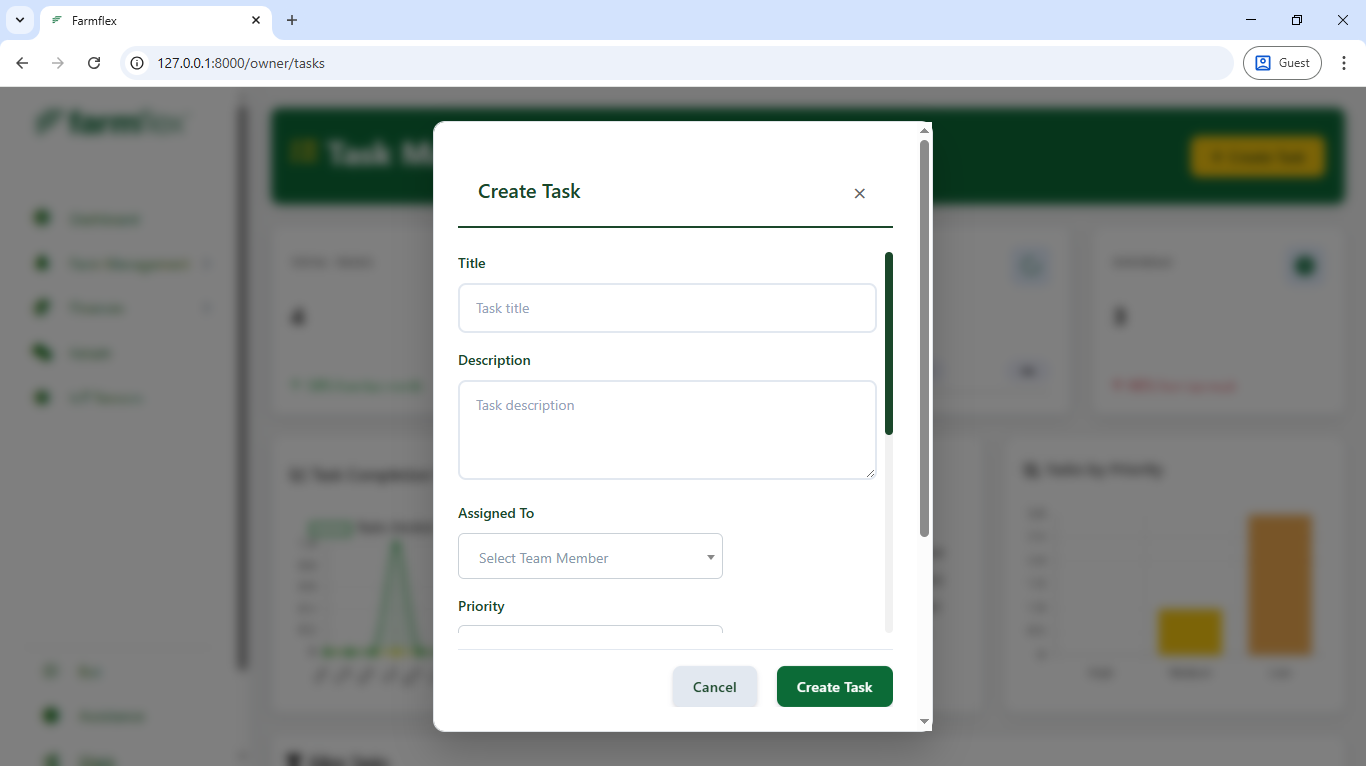
  • Task name
  • Task description
  • Priority: Low, Medium, or High
  • Status: Not Started, In Progress, Completed
  • Assign to: Select staff member
  • Due Date
  • Select Farm
  • Select Field (optional)
  • Click "Save Task" to create the task
Task Form
5
Step 5

Task Saved

Your task is now created and appears in the tasks list.
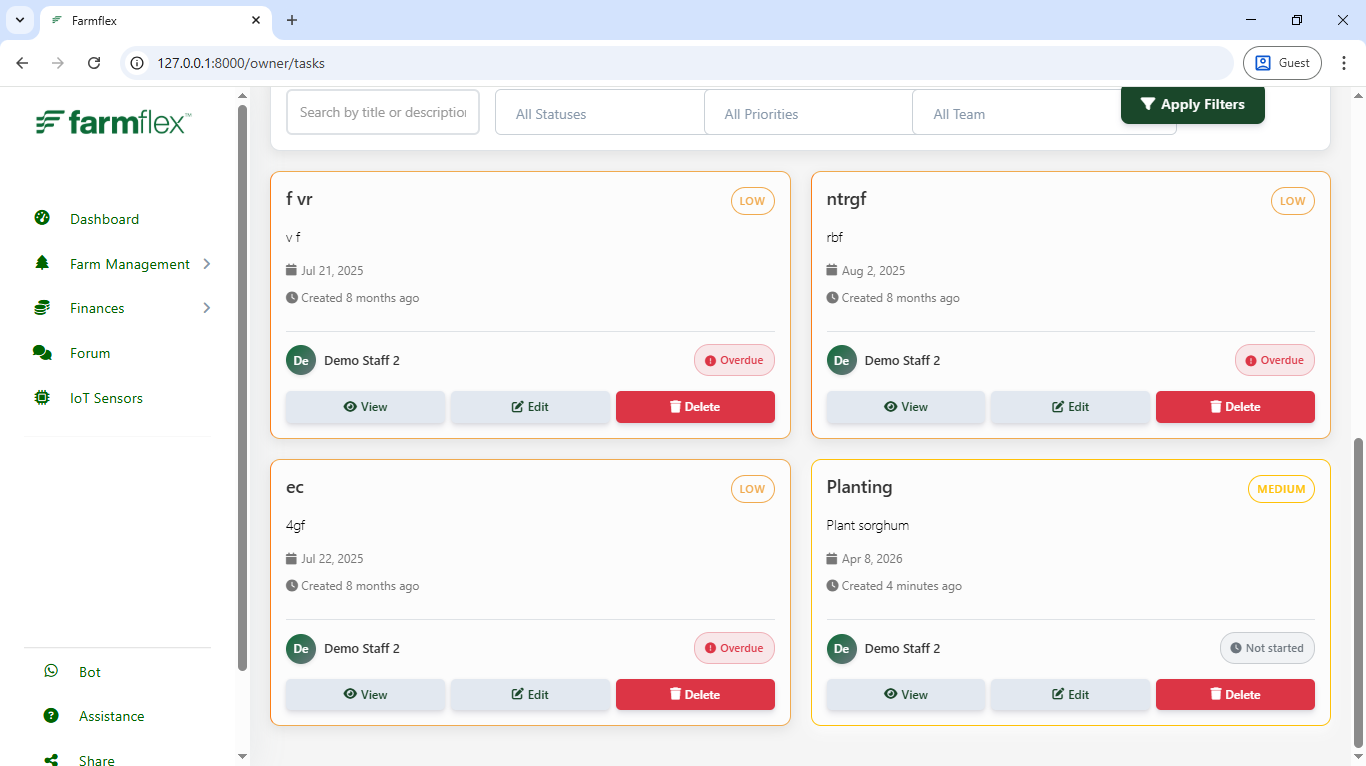
  • View task in the dashboard
  • Staff receives notification
  • Track task progress
  • Click "View Report" on any task
Task Saved

You're All Set!

You've completed the Farmflex onboarding journey. Start managing your farms today!